Friday, December 23, 2011

A Savory Holiday Breakfast Bake


My friend Cathleen asked me about a savory breakfast bake, so I thought I'd share one of my favorites from a few months ago, with a more savory twist.

A Deliciously Easy Savory Breakfast Bake

Ingredients:
  • (1/2) loaf of French bread (leftover Italian bread would be fine too)
  • (1 1/2) cups of shredded Cheddar cheese
  • (1/2) cup shredded Gruyere cheese
  • (1/4) cup shredded Parmesan cheese
  • (6-12) eggs (depending on your number of guests, I usually do 2 to 3 eggs per person, depending on what type's of eaters you're baking this for)
  • (1)tsp thyme leaves, chopped rosemary and thyme (the world won't end if you use a bit more than this.)
  • (6-12 Tablespoons) milk (about 1Tb of milk per egg. It's not an exact science; you really don't need to bust out the measuring spoons, just guestimate and I can assure you, the bake will turn out great.
  • Sausage (I prefer Whole Foods Sage Pork Sausage that you get at the meat counter.)
  • Salt and pepper to taste.
Directions:

  • Preheat oven to 350-degrees.
  • Spray the inside of a 13x9 cake pan with cooking spray.
  • Heat a medium skillet on the stovetop at medium heat with a small glug of olive oil.
  • If using uncased sausage (I prefer it to sausage in a casing), pull your sausage apart into chunks and add to the hot pan.
  • Cook about 1-2 minutes per side, just so that each side is nicely browned. Keep in mind that it will continue to cook in the bake, so don't overcook it.
  • When done, place in the cake pan. (I used a 13x9 pan.)
  • Slice your bread.
  • Place the sliced bread in your cake pan.
  • Whisk your eggs, milk, herbs, salt, and pepper in a bowl until well beaten.
  • Pour the mixture into the pan over the bread. Make sure it's spread throughout the pan.
  • Place in the hot oven for 15 minutes, or until the bake looks golden and firm.
  • Sprinkle the cheese over the bake and cook for 5 more minutes. I prefer my bread and cheese a little gooey and crunchy, so I tend to leave it in a few minutes longer. If you don't like your bread or cheese that dark, take it out when it's just melted.
*You can prepare this to be cooked the following morning the night before. Just be sure to put it in a safe spot in your fridge, and to wrap it well with saran wrap, otherwise you'll have a mess (anyone who's seen the Family Stone knows just what I mean)! Just let it sit out for about 10-15 minutes to get closer to room temperature prior to baking.

Enjoy!!


Thursday, December 22, 2011

Gingerbread for Jessica...

Since my girlfriend Jessica asked for my gingerbread recipe after checking out my breakfast bake, I figured I'd share it with all of you!

I got the recipe from Better Homes and Gardens: New Cookbook.  It was one the first cookbooks that I ever bought, and this recipe is really great- so long as you don't overwork your dough.  I made the mistake of thinking I could make this and keep Laela from climbing the walls, tables, etc, and it just wasn't a good idea.  I wound up running around while letting the dough mix itself into a tizzy.  My advice?  Make this recipe, it's super easy- so long as you're not super distracted.  (FYI, it came out perfect when I tried it again during Laela's naptime!)

Gingerbread

You'll need:
  • 1 1/2 cups all-purpose flour
  • 3/4 tsp ground cinnamon
  • 3/4 tsp ground ginger
  • 1/2 tsp baking powder
  • 1/2 tsp baking soda
  • 1/2 cup shortening
  • 1/4 cup packed brown sugar
  • 1 egg
  • 1/2 cup mild flavored molasses
Instructions:
  • Grease a 9x1 1/2 inch round cake pan; set aside.  In a bowl stir together flour, cinnamon, ginger, baking powder, and baking soda; set aside.
  • In a large mixing bowl, beat shortening with an electric mixer on medium speed for 30 seconds.  Add brown sugar, beat until fluffy.  Add egg and molasses, beat 1 minute.  Alternately add flour mixture and 1/2 cup water to shortening mixture, beating on low speed after each addition until combined.  Pour batter into prepeared pan.
  • Bake in a 350-degree oven for 35 to 40 minute or until a wooden toothpick comes out clean.  Cool for 30 minutes in pan on wire rack.  Serve warm.
Enjoy!

A Very Merry Breakfast Bake


I don't know about you, but the smell of gingerbread cooking in our house is one of my favorite smells.  It reminds me of all things holiday and cozy.  Since I'd made some gingerbread the other day, I thought it'd be fun to try making a traditional breakfast bake using the gingerbread. 

The result was pretty amazing.  I think I'm going to have to make this the night before Christmas, and put it in to bake while we open presents!

Gingerbread Breakfast Bake
serves 4-6, or 3.5 very hungry people

You'll need:
  • 5 slices of gingerbread (You want them to be about 2 in thick.)
  • 1 tsp cinnamon
  • 2 eggs
  • 1/2 cup heavy cream
  • 1 cup milk (I used whole milk for this recipe)
  • 1 tsp pumpkin pie spice
  • 1 tsp vanilla
  • 1 tsp sugar
Instructions:
  • In a medium sized bowl, beat your eggs, cinnamon, heavy cream, milk, pumpkin pie spice, vanilla, and sugar together until well mixed.
  • Spray some Pam or non-stick baking spray into an 8x8 square cake pan (I used a glass pyrex pan).  If you choose to double the recipe, use a 9x11 cake pan.
  • Place the slices of gingerbread in the pan.
  • Pour the mixture over the gingerbread.
  • Let soak for at least 10 minutes.  I like to let this sit for longer, but no worries if you're in a rush.  You can also let is soak overnight and bake it in the morning.  Just let it sit out for ten minutes or so before you bake it (it's better for it to be closer to room temperature before baking.)
  • Preheat your oven to 350-degrees. 
  • Bake for about 30 minutes, or until the bake looks like a solid custard, and the bread is slightly golden on the sides of the pan.  (If it still feels soppy when you touch the top of it, it's not ready.  The inside should be a bit custardy, while the outside is lightly toasted.)
  • Shake a bit of powdered sugar on top.
  • Serve!

Wednesday, December 21, 2011

Mark Cuban on "How to Win at the Sport of Business: If I Can Do It, You Can Do It"

One of my readers, Jeff Rivera, Editor-in-Chief of The Gatekeepers Post, recently contacted me about posting an interview with Mark Cuban.  Mark Cuban is well known for being the owner of  the Dallas Mavericks.  He recently wrote an e-book called, How to Win at the Sport of Business: If I Can Do It, You Can Do It.  Mark is an inspiration to all hopeful entrepeneurs, and his book, as well as his blog offer up some really great advice on what it takes to be a successful, thriving business owner.

I know that this post is a bit out of type for me, but I keep hearing my friends, as well as my readers, talking about how badly they want to start their own business, but that they don't know where to start, or that they're too afraid of failure.  Hopefully, Jeff Rivera's interview with Mark Cuban will inspire you- and remind you that the American dream is achievable with a lot of hard work, a lot of personal sacrifice, and the right kind of business savvy.

Here is Jeff's interview with Mark:

One part in your book I loved and my heart sank at is when your fiance lost your $7500 ring. What's your advice for those moms out there who are distracted by a relationship? How do you balance a real life with your dreams?

I never was able to balance.  Each person has to make their own decisions.  But remember, your competitors aren’t sitting by idly waiting for you to have a nice dinner with your significant other.  They are trying to kick your ass. So choose wisely.

Mark, you mentioned that you were approached countless times to write a memoir but instead chose to ePublish.  Why?

The time obligations of a traditional release were more than I was willing to undertake. I couldn’t ask for advances and then not want to do a book tour. Plus, the editorial deadlines were much more forgiving. I made changes hours before the final release.

You have three kids. What life lessons do you give them so that they don't go through all the heartache that you've gone through?

That is a life-long process . My oldest daughter is just 8, so we are still dealing with the basics. But I try to do some things in my businesses that are great for my kids. For instance, we changed the programming on HDNet Movies so that every morning we run commercial-free, kid and family-friendly movies. I was mad that my kids always were so excited about commercials they saw in their favorite shows that I wanted to give them a commercial-free environment.

One of my favorite parts of your book, How to Win at the Sport of Business, that completely broke my heart was when your ex-secretary robbed your first company of over $83,000, leaving you only $2000 after a year of work. If there are moms out there that have lost everything, what advice do you have for them to pick themselves back up?

Keep working. Don’t feel sorry for yourself because it won’t do any good.

There are many young moms who are just beginning their lives and can relate to you when you said you were sharing a small apartment with 6 people and sleeping on the floor. How can someone keep their eye on the prize when they’re living on Ramen noodles?

Who cares how you are living today? I loved every minute of living in that dump. The low rent and utilities and eating Mac n’ Cheese all the time allowed me to afford the startup of my business. Instead of paying myself much, I could put it in to my business.  
Where can we get a copy of your eBook, How to Win at the Sport of Business?
 
Anywhere eBooks are sold: Amazon, BN.com, and sites that support independent bookstores too.

Jeff and Mark, thank you for taking the time to do this interview to inspire my readers!  This time of year tends to be a time of reassessment and reflection for many, and I hope that for at least some of you out there, Mark's story shows you that everyone goes through hard times.  It's up to you to choose the path you want out of your life, come up with a solid game plan, and go for it full throttle.

In the words of someone very wise..."Do or do not.  There is no try."


Sunday, December 18, 2011

Momspectations

It's wild how quickly days go when you have a toddler.  Between playdates, Little Gym, playing at the park/children's museum/zoo, running errands, keeping house, and cramming in as much family time as possible, I sometimes wake up the next day, wondering where the heck the time from the day before went.  I think people that don't have children, or haven't stayed home with them, can't fully understand how jam packed a stay-at-home mom's day can be.

Lately, I've been re-evaluating where I'm at with my life- what my expectations for myself are, what they were before I had Laela, and what I actually want, versus what other people have tried to tell me I should want or expect from myself.  I love being a mom.  I love staying home with Laela.  I love that I get to help her learn, watch her grow, and help her face each new challenge- whether it's learning to swim, or something that might seem so simple- like getting undressed and dressed on her own.  It cracks me up how adults forget that someone had to teach them to use a fork, peel a banana, read, and yes, go to the potty on the potty.  I've had to give myself a gentle reminder that people that criticize stay at home moms, or try to be negative or rude about the work they do, have never ever been a stay at home parent themselves. 

I treat being a mother as I would treat a job.  I make to do lists, I create objectives, I have expectations, a schedule, and yes, I have spreadsheets.  When my girlfriends have babies, I send them my crazy spreadsheets of what you need, what you don't need, what you might like but probably won't use much.  I have spreadsheets of Laela's books so that we don't buy doubles.  Christmas list?  Spreadsheet.  Moving?  Spreadsheet.  You get my drift.

The single most important part of being a parent to Laela is making sure that she has, as she calls them, "a happy day!"  That is a job.  It is rewarding, it is challenging, and sometimes I think I know too much about Elmo and Disney Princesses, but it's the best job in the world.

In a few years, when Laela is a "big girl" (a phrase that I've avoided like the plague!  I want her to stay my baby for a little while longer!!!), I"ll embark upon starting my own business, but for now, I'm going to enjoy these moments...and continue to make more spreadsheets- including the one with my expectations, hopes, and ideas for my bakery in a few years.

Tomorrow, I'll be sharing an interview with Mark Cuban- businessman, Daddy, and all around inspirational character.  He has some great insights on starting your own business.

Thursday, December 1, 2011

Thanksgiving Feast!

I thought it'd be fun to share some pictures of our Thanksgiving feast!

The star of the show, the Turkey:


Old Fashioned Macaroni and Cheese with Toasted Homemade Breadcrumbs:


Garlic Mashed Potatoes:


Green Bean Casserole:

Sweet Potato Casserole:


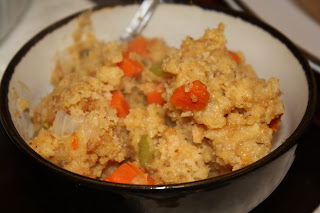
Dressing:


Rolls:


Roasted Veggies:

The turkey only took 2 1/2 hours, so I had everything cooked and prepped while the turkey cooked, and then baked and cooked the things that needed to bake off and get reheated while the turkey rested for about 15 minutes.

For Christmas, I'm thinking of making beef bourguinon, but I'm not entirely sure yet.  My brother will be staying with us, and Kyle has a few days off, so I thought it'd be nice to make something really special.

Wednesday, November 23, 2011

Thanksgiving Hors d' oeuvres Made Easy!

I can't believe it's already Thanksgiving.  I feel like Laela just got done galloping to each house in her pink pony costume for Halloween, and here I am, sitting in front of the computer, with an apartment that smells like turkey brine and pumpkin pies.  It's really beginning to seem as if the holidays are getting moved up each year.

I have to say, living in South Carolina, and preparing for the holidays is much, much different than back home in PA.  For one thing, it was 75 degrees today.  Seriously?  The idea of turkeys and Christmas trees doesn't feel entirely right without a solid crisp to the air.  Secondly, this is our first holiday without our families, so there's going to be considerably less food (although, if Kyle gets his way, not much less food.)

While it's really difficult to be away from our loved ones for the holidays, it has been nice to have some much-needed family time.  Kyle's had the week off, and it's been really nice leisurely doing things together, instead of having to cram a lot into a small amount of time.

Since Kyle works in the kind of job where you can't really eat heavy meals or have hearty snacks, he had some requests for this week.  I thought, instead of sharing Thanksgiving recipes like I did last year, I'd share some quick and easy favorites that most people seem to buy boxed or canned.  It is possible to make a deliciously simple hors d' oeuvre without going to the freezer section.  Try it!
Pigs in a Blanket

You'll need:
  • 1 package mini hotdogs, or cocktail wieners (I prefer the turkey- they're less fat and you really can't tell the difference.)
  • 1 sheet of puff pastry (you can also use pre-made croissant pastry if you don't have the puff pastry- the instructions are the same, except that the triangles are already cut for you.)
  • Cooking Spray
Instructions:
  • Preheat your oven to 400 degrees.
  • Most puff pastry is already sectioned into three strips.  Separate the three strips (or cut your pastry into three even strips.
  • Take each strip of pastry and cut into three even squares.
  • Cut each square into two triangles.
  • Once you have triangled your puff pastry, take one triangle and one mini hot dog at a time, and roll the pastry triangle over the hot dog, starting with the larger end of the triangle.
  • On a greased cookie sheet (just spray the sheet well with some cooking spray) place each pig in a blanket on the sheet, 2 inches apart on the cookie sheet.
  • Bake for 15- 20 minutes, or until golden brown.
  • Enjoy!!
*Sometimes, as a variation, I'll spread some mustard, brie, or place a small sprinkle of cheese inside the pastry before I roll it around the hot dog.  It makes for a really yummy treat!


Bacon and Cheese Stuffed Biscuits


You'll need:
  • 6 oz cheddar and/or colby jack cheese
  • 4 strips of cooked bacon, chopped
  • 3 cups all purpose flour
  • 4Tb baking powder
  • 1Tb sugar
  • 1tsp salt
  • 3/4 cup butter
  • 1 1/4 cups milk
Instructions:
  • In a large bowl, stir together the flour, baking powder, salt, sugar and cream of tartar.  Pour mixture into a food processor.
  • Add butter until the mixture resembles coarse crumbs.
  • Pour ingredients into a bowl.
  • Add milk all at once.
  • Stir just until moistened.
  • Turn dough out onto a lightly floured surface.
  • Knead dough by gently pressing and folding for four to six strokes, or just until dough holds together.
  • Don't over work your dough.  It doesn't have to look perfect.
  • Pat or lightly roll dough until 3/4 inch thick.
  • Cut the dough into 2 1/2 inch pieces (if using a knife or roll cutter, it helps to flour your implement)
  • Using your thumb, press a small indent into the center of the roll.
  • Place your cheese and crumbled bacon in the indented spot.
  • Gently fold the roll around the bacon and cheese.  (Use about a teaspoon of cheese and bacon- overstuffing the roll will cause it to bubble out cheese and burn on your pan.)
  • Place biscuits one inch apart on an ungreased baking sheet.
  • Bake at 450 degrees for 10-12 minutes or until golden.
  • Remove from baking sheet and serve immediately.
  • Enjoy!!
**These biscuits are also amazing without the cheese and bacon!!

I know that these are some pretty starchy appetizers, but trust me, they're awesome!  If you're looking for something a tad healthier, try my spinach dip recipe using low fat mayo and sour cream.  Laela and Kyle scarf it up!!

Have an amazing Thanksgiving!!  And remember, it's just one day.  If you have to choose between being Martha Stewart, and spending time with your family- choose your family.  Enjoy the day.

Wednesday, October 26, 2011

Chocolate Lover's Nutella and Chocolate Stuffed Croissants

My husband is a chocoholic.  Seriously.  I think if he had a choice between a steak and a chunk of milk chocolate, he'd go for the chocolate nine times out of ten.

I'm starting to think this chocoholic tendency may be genetic.  I've watched my husband polish off a pan of brownies covered in fudge icing in mere minutes!  My mother in law said she used to do the same thing!  You might say this is a learned behavior, but Kyle doesn't eat like that in front of Laela.  He waits until she's asleep (he says it's because he agrees with me not wanting her to eat junk, but I think it's just because he doesn't want to share!)

The only thing that I have always given in on with Laela are chocolate croissants.  It all started at Cake, my all time favorite brunch spot in Philly.  Kyle would order these huge breakfasts with eggs and bacon and potatoes, but he simply couldn't leave there without a chocolate filled croissant.

Once Laela got big enough for solids, and started stealing from our plates, she got wise to the chocolate croissant.  My Mom and Kyle used to give her little bites, with only a little chocolate, and eventually, she was snatching big hunks of chocolate filled croissant from everyone's plates!  Needless to say, if my child so much as smells chocolate, she'll hunt it down.  (Thankfully we don't have it in the house very often!  Otherwise I'd be worried we have a problem!!)

Since Laela asked for a treat for breakfast the other day (and come on, she spelled pumpkin with her leapster! so she deserved an awesome reward!!), I decided to surprise my very sleepy husband with his and Laela's favorite breakfast/dessert!!

Don't be afraid guys, this is one of the most simple, seemingly fancy breakfast treats you'll make in your entire life!

Chocolate Stuffed Croissants
makes 6 small croissants

You'll need:
  • 1 sheet puff pastry, defrosted
  • Nutella
  • 2oz dark chocolate
  • 1 egg
  • 1Tb cocoa powder (optional)
  • Flour (just enough to dust your rolling pin and counter)
Instructions:
  • Preheat your oven to 425 degrees.
  • Cut your puff pastry into three sections (it should already be indented into three sections, so this should be pretty easy to do- just break or cut along the indented lines on th pastry).
  • Dust your counter and rolling pin with flour.
  • Roll each strip of puff pastry until it's almost doubled in width.  You don't want it too thin.  If it seems thick to you, it's okay.
  • Cut each rolled section into 2 triangles.
  • Spread a teaspoon or so of Nutella into each triangle.  Try not to spread it to the edges.
  • Shave or cut some chocolate.  Sprinkle some on top of the Nutella.
  • Roll your pastry from the big end to the little end.  It should look like a tiny croissant (it will puff up in the oven.)  Don't worry about it looking perfect.  It'll taste delicious!
  • Spray a baking sheet with cooking spray.
  • Place all of the croissants on the baking sheet.
  • In a small bowl, beat your egg with a bit of water. (This is called an egg wash.  It makes pastries that yummy golden color.)
  • Using a pastry brush, or a clean paint brush, dip your brush into the egg wash and paint each croissant.  Make sure to paint the entire top of the croissant so that it gets a beautiful golden brown and delectably crispy when you bake it.
  • Bake for about 10-15 minutes, or until the croissants are golden brown and puffy.
  • For an added touch, sprinkle with a dusting of cocoa powder!
Enjoy!

Friday, October 21, 2011

Butternut Squash Soup

Over the last few months, I've dared to get dangerous in the food store.  I let Laela use one of those little kid carts in the produce section at Whole Foods.  She gets to fill it with whatever she wants, and then we go home and try to figure out what to do with it.

Last week, Laela grabbed a butternut squash, something, I'm almost embarrassed to admit, I've never made.  I think it's delicious, but I usually ate it out or at friend's houses.  I tried looking up a few recipes, but I seemed to be missing an ingredient, or three, so I decided to just wing it.  The result?  A soup so deliciously simple and flavor packed, that it almost defies reason.

Butternut Squash Soup
You'll need:
  • 1 medium butternut squash
  • 2 cups chicken broth (I used homemade that had been cooked with lemon, sage, garlic, and rosemary)
  • 1 clove garlic
  • 1 good shake of onion powder
  • Salt and pepper
  • 1Tb butter
  • An immersion or regular blender.  (If you don't have an immersion blender, and have $20 to spare, go out and get one.  It will really make your cooking life easier- and less messy!!)
Instructions:
  • Put a large saucepan on medium heat.  Add the chicken broth, garlic, butter, onion powder, salt and pepper to the pot.
  • Peel off all of the skin of the squash.  The skin is a little difficult to peel, and the squash is an awkward size, so I used a knife to peel and cut off the ends.  Just be sure not to cut too deeply, or you'll take away the "meat" of the squash.
  • Cut the squash into cubes.
  • Steam your squash cubes using either a steamer, or a pot with a steamer insert.
  • When the squash falls apart on your fork, it's ready to be added to the pot of hot broth.
  • Cook for 5-10 minutes. 
  • Blend together.  Taste to adjust seasoning. 
  • Serve and enjoy!!
Laela LOVED this soup.  We toasted some whole wheat baguettes and dipped them in our yummy soup.

*This will store in the fridge for a week, the freezer for 3-6 months.
*Roasted red peppers are a fantastic garnish for this!

I know that it might sound crazy to let my child loose in the produce department, but I really think it's teaching her to be curious and open to healthy foods.  I have a little girl who cheers "Banana!  Banana!" in the checkout line, and that's something I'll take any day of the week over those kids flipping out over wanting candy.  Give it a go.  Let your kid have a food-venture with you!  You never know what you will come up with!

Wednesday, October 12, 2011

Crock Pot Chicken

I've been craving some chicken with salsa, so I decided to "food-speriment"  I put two large, boneless, skinless chicken breasts in the crock pot on low, with some black beans(as much as you like), chunky tomato salsa (about a half a jar-4-5 oz or so), kidney beans (as much as you like), and a half cup of chicken broth.  I served it with some basmati rice with a bit of shredded cheese, and wala!  Dinner was ready!

Super delicious!  Try it!

**Optional:  You can "pull the the chicken" and put the chicken with salsa and beans in taco shells/tortillas.  It's also great served with tortilla chips.

Sunday, October 9, 2011

A Simple Brisket

I don't know about you, but pulled meats are one of my most favorite things ever- pulled pork, brisket that you don't even need to pull because it's been cooked low and slow, pulled chicken, there's something about that shredded goodness that just makes me happy.  I think the main reason I love it so much is because it is just so stinking easy.

In keeping with my crock pot recipes that I've promised, here's the easiest (and I do mean easiest) brisket recipe you will ever make.  Yes, I said ever, and I totally mean, wholeheartedly, that a blind man with one hand could make this dinner.

Crock Pot Brisket
You'll need:
  • 2 lb Brisket (Don't trim the fat, it keeps it super juicy.  Remove the fat with a slotted spoon when it's done cooking.)
  •  Beef Broth-3 cups, or just enough to cover the brisket (or water with beef boullion cubes, whatever you have on hand)
  • 2Tb garlic powder
  • 2Tb onion powder
  • 2Tb ground black pepper
  • 3Tb salt (I used sea salt, and added more to taste)
  • 1Tb ground coffee
  • 1Tb brown sugar
  • 1tsp paprika
  • 3 leaves of sage, finely chopped
Instructions:

Put all of the ingredients in the crock pot.   Set the crock pot to the lowest setting. Cook either overnight, or start it in the morning and enjoy for dinner that day! 

**This freezes really well.  Put in tupperware and pop it in the freezer.  It'll be good for about three months, depending on how cold your freezer is (if you have a deep freeze it can last longer!)

Monday, October 3, 2011

Pulled Pork

We learned pretty quickly that barbecue is a religion in South Carolina.  South Canrolina's barbecue is mustard based (and if it's done right it is crazy delicious!), so if you have the opportunity to try it, definitely give it a go!

My pulled pork recipe is delicious with any kind of barbecue sauce, so use whatever kind you like best! 

Fair warning, pulled pork enthusiasts that love their pork smoked and made with care, this is a lazy person's recipe.  So if you love pulled pork like we do (my little girl always exclaims "Num Num Mommy!", this recipe is for you!


Pulled Pork

You'll need:
  • 2-3 lb pork butt (I prefer bone in- it packs more flavor!)
  • 6-8 oz barbecue sauce (depending on how barbecue packed you'd like your pork to be)
  • 2 cups water
Instructions:

Set the crock pot to low heat.  Combine ingredients in the crock pot.  Cook for 8 hours (or however long your crock pot setting for low is set for- ours is set to a timer, and clicks off after 8 hours when we cook on low, 5 hours on medium, and 2 hours on high.) 

When the pork is done, use two forks to "pull" the pork. It should pull rather easily (use one fork to hold the pork in place, use another one to pull or shred the pork with your fork.)  You can take the pork out and do this on a cutting board if you like.  Personally, I like to do it in the crock pot so that I don't make more dirty dishes than necessary, and I like that it soaks up even more juice as you pull the pork!

Enjoy!!

**This is another super easy to freeze dinner.  As with the brisket, it should freeze in a conventional freezer for about 3 months. 

Monday, September 26, 2011

Crock Pot Turkey Meatballs

Ugh.  Our laptop exploded.  Therefore, until we get a new laptop, there will be no pictures on CaraCakes.

Anyway, I promised some seriously awesome recipes this week, so let's get to it.

Who doesn't love meatballs?  Okay, vegetarians.  Vegetarian friends, try this with veggie crumble or ground tofu.  And double your seasonings. 

Crock Pot Meatballs

You'll need:
  • 1lb ground turkey (I get the butcher to give me a mix of 85/95- otherwise it'll be too dry if you use all white turkey.)
  • 2 cups pasta sauce
  • 1/2 cup chicken/beef/veg stock
  • 2 bulbs garlic, crushed
  • 1 cup parmesan cheese
  • 1/2 cup romano
  • 1 cup breadcrumbs
  • 1 egg
  • Dash of salt and pepper
  • 1tsp onion powder
  • 1 tsp garlic powder
Instructions:
  • In a large bowl, combine your meat, egg, onion powder, garlic powder, salt and pepper, romano, parmesan, and breadcrumbs.  Squish all of the ingredients together with your hands.
  • Form the meat mixture into balls (try to make them the same size).  If it feels to dry, add a bit of water to make it easier to mold.
  • Turn the crock pot on low heat.
  • Pour the pasta sauce and broth into the crock pot.
  • Add the crushed garlic.  (you can add extra if you're a huge garlic lover.)
  • Add the meatballs.
  • This is a great meal to start in the morning, as it will be ready by dinner!
  • Serve with pasta, on a roll, or on their own!
*This is another easy to freeze dinner.  You can freeze them with or without sauce.
*Tip- If you like crispy meatballs (we really do!) bake them for about ten minutes on a greased baking sheet at 400-degrees before you put them in the crock pot.

Enjoy!!

Sunday, September 25, 2011

Crock Pot BBQ Chicken

I don't know about you, but I absolutely love fall.  Maybe it's because Kyle finally stops looking at me strangely for eating a lot of soup (he deems soup to be a seasonal food, while I can eat it all the time, any time), or maybe it's because the air gets a little more crisp, and the clothing tends to be just a little more comfy.

One of my favorite things about fall is the food.  Pumpkins, hearty meats, sweet potatoes, gravy, baked apples.  I could go on for longer than this post would allow!  But the best thing, the single best foodie thing for anyone that wants to come home to a delicious, flavorful, healthy meal at the end of a hard day, is almost always made with a crockpot.

Now I know that there are two types of people when it comes to the crock pot.  The one type is the kind that values and loves their crockpot almost as much as their dog.  A good one is hard to find and trust me, you don't want to get rid of it.  (I had my old crockpot for ten years, and still used it when it had a small crack in it until Kyle finally made me get a new one.  I still stand by the fact that it was the best crock pot ever and none have ever cooked so evenly since. *sigh*)

The other type of person thinks that cooking with a crockpot isn't really cooking.  I am dedicating my week to crock pot recipes.  And these aren't your grandma's recipes man  (unless she's a super awesome, savvy cook like my grandma.  If so, rock on with her recipes!)  I challenge you to try each of these recipes, and tell me if they don't knock your socks off.

Let's get crockin'

I'll start you off easy with some crock pot barbecue chicken.

Crock Pot BBQ Chicken

You'll need:
  • 6 oz BBQ sauce
  • 4 large chicken breasts or 8 boneless chicken thighs (you can do bone in- I just like to go for the quickest, easiest type to serve/eat/cook)
  • 1 cup water
Add all of the ingredients to the crock pot.  Cook on low.  I usually start this in the morning, and serve it for dinner.  It's one of those meals that tastes better with time, so if you want to make extra so you have leftovers, do it!

*This is a GREAT meal to freeze.  I bought individual serving containers and froze the chicken so that Kyle could bring them to work for lunch.

*You have the option to cook this on low and then serve it as is.  Personally, I enjoy my BBQ chicken better pulled.  When the chicken is done, just get two forks and gently pull at the bbq chicken.  It will be so tender, it should just fall apart on the fork.  Delicious!!

Friday, September 2, 2011

Fast Food My Way!

I have blood sugar issues.  I think it may be from years of working too many jobs at weird hours.  There have been times where I forgot to eat and didn't realize it until I was at a red light and was absolutely convinced that my car was going in reverse.  Yeah, my car was definitely not moving.  It was my blood sugar going into a code red.

When Kyle and I started dating, okay literally, the day we went on our first date, I gave him fair warning that I eat every three hours.  If I don't, there are different degrees of of my grumpiness.  Since then, he's actively tried to avoid the hungry, red eyed version of Cara that I become when I go too long without so much as a peanut.

I think the worst part is that my cravings are so acute that I won't just settle for whatever is being offered to me to eat, unless I'm on the verge of passing out.  Then, I'll happily scarf down your stale bag of smoked almonds that you found in the bottom of your gym bag.  Yum.  Sweaty tasting salty almonds.  Delish.

So why is this chic informing us of her blood sugar issues, you might ask?  Well, I encountered them big-time the day while I was stocking up on "supplies" to get us through the weekend.

Colleen, who has not known me a super long time (I think we're going on a month or so now?), gave me the look at the grocery store that indicated that I was slurring and not making any sense.  I said "what?" to which she replied, maybe we should get you a candy bar?

I grumpily trudged through the rest of our shopping, got us home safely, and started searching the pantry for something to eat.  We were about to order food when I went from amber (about to lose my mind with hunger) to straight up code red.

I decided that the delivery man would take too damn long, so I whipped up mussels cooked in my super easy pasta sauce with a cup of white wine, a tablespoon or two of butter, and a clove of garlic, finely sliced.

Hungry?  Want fast food?  Doesn't get much faster than this baby.

Super Speedy Mussels for the Ridiculously Hungry:

You'll need:
  • 1 lb mussels
  • 1 garlic clove
  • Pasta sauce
  • 2 Tb butter
  • Pasta
  • 1 cup white wine (any that's on hand will do)
Instructions:
  • Put a pot of water, well salted, to boil.
  • Add pasta.
  • Cook to a little less than done.
  • Cover the bottom of a large pan with water.  Bring to a boil.
  • Add mussels to the pan.
  • Lower your heat to medium heat.
  • Add the garlic and white wine to the pan.
  • Put on the lid.
  • Check in 1-2 minutes.
  • The mussels should open after less than five minutes.
  • When the mussels are all open (if there are a few that don't open, just toss them), take the mussels out of the pan. 
  • Set aside.
  • Use all of the liquids used to cook the mussels to cook and add the butter and pasta sauce.
  • Stir all of the ingredients together.
  • Allow the sauce to reduce (get thicker) for a few minutes while stirring.
  • Add the pasta and mussels to the pan.  Let the pasta soak up all of that delicious sauce.
Enjoy!

This took less than ten minutes.  Seriously.  Think about how long a delivery guy takes to get to your house, or how long it would take you to run out and get something that would make you feel like you'd been hit by a truck.

Let's redefine fast food.  Eat well.  Feel well.  Try it!

Monday, August 29, 2011

Simply Superb Shrimp Scampi


Sometimes I find really amazing recipes at the strangest of places.  The other day, my friend Colleen and I went food shopping at Whole Foods (yes, she was brave and went shopping with Laela and I), and wound up talking to the samples woman.  She made shrimp scampi- which I generally can't stand, and made it light and lemony- not heavy, buttery and cloying like I often find shrimp scampi to be.  It was so good, I bought a pound of shrimp and all of the ingredients that she recommended.  We had it for dinner that night, and, in the words of Laela: "MMMMMM!  Yummy!  Delicious Mama!!"  Make this.  It's super simple and absolutely fantastic.


Shrimp Scampi
serves 4-6

You'll need:
  • 1 lb peeled and deveined shrimp (I used frozen peeled and deveined shrimp, they only take a minute or two extra to cook.)
  • Juice and zest of 2 lemons (preferably Meyer lemons)
  • 6 cloves garlic
  • 1/2 stick butter
  • 1/2 bag baby red and green chard, cleaned and rinsed (you can add more if you like.)
  • 1/2 cup white wine
  • Pinch cayenne pepper (I added a little more than a pinch because we like a little kick.)
  • Salt to taste
  • Chopped Italian parsley
Instructions:
  • Finely chop the garlic.
  • Melt the butter over medium low heat.  Saute the garlic gently until very fragrant.
  • Add the wine and lemon juice and raise the heat to medium high.
  • Reduce the wine mixture by half, and add a pinch of cayenne pepper.
  • Add the baby chard and cook briefly.
  • Add the shrimp and cook just until done, 3-4 minutes. (They'll turn from clear to pinkish-white)
  • Add the chopped parsley and lemon zest.
  • You can serve this as is, or add cooked pasta to the mix so that it can seep up all of the delicious sauce.
Enjoy!!

Saturday, August 27, 2011

Run Down Mama

There are a lot of different types of people in this world.  There are the types that can pour themselves into their jobs, ignoring the world, and their life around them for days, weeks, sometimes months at a time.  There are people that spread themselves too thin, trying to be there for every event, every person, just so that they feel like they're enough.  I find both of these types of people to be interesting, because I grew up around people like this.  Loving, dedicated, but extraordinarily different people.

I've come to realize as I've evolved not just as a mom, but as a person, I've become a bit of a challenge to describe.  Kyle laughs because in the same breath that he's calling me particular (like the house has to be "just so"), Laela will cover herself in finger paints and I'll just laugh as I dunk her in a bubble bath to let her finger paint herself and the tub.

That weird balance that I like to think I usually achieve is probably my most flattering attribute.  My worst is that I think that I can do everything.  I think I can cram in being the best mommy ever who teachers her daughter wonderful, fun, enriching things for the majority of her day (by the way, she can totally count to 10 now!).  I can cook all three meals and two snacks a day from scratch.  I can stay up until the crack of dawn when my husband gets home from second shift and hear about his day.  And retain the information.  I do all of the housework, maintain our social calendar, you name it, I do it.  My list of things that I get done in a day occasionally leaves my head spinning as my head hits the pillow. 

Being a mother is challenging in any circumstance.  But when you're sick, it bites the big one.  When you're sick and your husband has to leave for another double shift, and your baby is sick too, it can be overwhelming.

Thankfully, I have a guy who will get me sick packages before he leaves.  The kind of husband and Daddy that bundles up his girls in blankets, hands over the remote, and has ginger ale and crackers within reach of the couch.

The tough thing about being ill when your little one is ill is that you have to stay on.  You have to stay aware.  And you have to be supermommy to take care of them.

So what did I do?  I netflixed Sesame Street and we watched the Big Bird movie.  Then we snuggled in and watched a Sesame Street 20th Birthday documentary that was awesome.  After that we passed out.  I'm not a big tv person, especially for little ones, but when we're sick, that's the easiest way to chill out.  Laela and I say we're "laying like vegetables".

When we woke up, I made some tea.  Laela toddled into the kitchen, reached for a potato, and said "Mash please.  Thanks Mama."  So I boiled some water, added some salt, and threw in a rinsed potato.  I let it boil until it was for tender, added a dash of salt and pepper with olive oil, mashed it with a fork, and Laela ate it right up.  I suppose we all have our sick foods, and my little girl is a salty potato lover.

The point is that at some point, our bodies tell us when it's time to slow down.  I'm off to get some rest.

Hope that everyone is having a safe and natural-disaster free weekend.

Tuesday, August 23, 2011

Fajitas!!

We are big time Mexican food lovers in our house, so when I got the email from the Food Revolution to try this recipe, I went for it.  I paired it with some golden Spanish rice.

This took about ten minutes to make, and froze/reheated really well.  Give it a go!

Fajitas

Ingredients for the fajitas:
  • 1 red bell pepper
  • 1 medium red onion
  • 8 ounces skinless, boneless chicken breast fillets
  • 1 teaspoon smoked paprika
  • A small pinch of ground cumin
  • 2 limes
  • 1 tablespoon olive oil
  • 1/16 teaspoon sea salt
  • freshly ground black pepper to taste
  • 2 x 8-inch flour tortillas
  • ½ cup plain yogurt
  • 2 ounces Cheddar cheese

For the salsa:
  • ½–1 fresh red chile, to your taste
  • 15 ripe grape or cherry tomatoes
  • about ½ cup a small bunch of fresh cilantro
  • 1/16 teaspoon sea salt
  • freshly ground black pepper, to taste
  • 1 lime
For the guacamole:
  • a small handful of cherry tomatoes- about ¼ cup
  • ½-1 fresh red chile
  • a few sprigs of fresh cilantro
  • ½ ripe avocado
  • 1 lime
Jamie's Tips:
•This is a great meal to prepare ahead, like a stir-fry – the trick is to prepare all your ingredients before you start cooking because once you start things go pretty fast!
•Make sure your grill pan is nice and hot before you start cooking so that the chicken starts sizzling and grilling as soon as it hits the pan.

•The trick to sizzling hot, golden brown chicken and veggies is to not overcrowd the pan. If you’re making this for 4, just double the ingredients but cook them in two pans or in batches.

•You can make the guacamole a little bit ahead of time – to keep it nice and fresh, press a piece of plastic wrap right onto the surface of the guacamole – this will keep it from turning brown.

Method:

•Put your grill pan on a high heat. Halve and seed your bell pepper and cut it into thin strips. Peel, halve, and finely slice your onion. Slice your chicken lengthways into long strips roughly the same size as your bell pepper strips.
•Put the bell peppers, onion, and chicken into a bowl with the paprika and cumin. Squeeze over the juice of half a lime, drizzle over a lug of olive oil, season with the salt and pepper and mix well. Put to one side to marinate for 5 minutes or so while you make your salsa.

•Finely chop your chile. Roughly chop your tomatoes and the cilantro, stalks and all.

•Put the chile and tomatoes into a second bowl with the salt and pepper and the juice of 1 lime. Then stir in your chopped cilantro.

•Use a pair of tongs to put all the pieces of bell pepper, onion, and chicken into your preheated pan to cook for 6 to 8 minutes, until the chicken is golden and cooked through. As the pan will be really hot, keep turning the pieces of chicken and vegetables over so they don’t burn – you just want them to lightly chargrill to give you a lovely flavor. Give the pan a little love and attention and you'll be laughing.

•To make the guacamole squeeze a handful of cherry tomatoes on to a board. Finely chop up the flesh with ½ -1 red chile and a handful of cilantro leaves, including the top part of the stalks.

•Halve the avocado, leaving the side with the pit for another use. Then squeeze the one side of the avocado over a board so the flesh comes out of the skin. Discard the skin. Squeeze over the juice of 1 lime and chop everything together until fine. Taste and adjust the flavors if needed.

•Warm your tortillas up in a microwave or a warm dry frying pan. Divide your warmed tortillas between your serving plates.

•At the table, carefully help yourselves to the chicken and vegetables straight from the hot grill pan. Just be sure to put it down on top of something that won’t burn, like a chopping board.

•Halve your remaining lime and squeeze the juices over the sizzling pan. Serve with bowls of plain yogurt and guacamole alongside your Cheddar, a grater, and your lovely fresh salsa.


Spanish Rice:
This is one of my favorite dishes.  Follow the instructions on the box/bag.  Add 2 packets of Goya Sazon seasoning, 2 cloves of crushed garlic, a small pinch of paprika, and salt and pepper to taste.  You can add kidney beans, black beans and/or olives if you'd like.  I chose not to this time because I felt that a nice simple rice was the perfect addition to the fajitas!

I hope you enjoy this as much as we did!


Monday, August 15, 2011

Roast This!


One of my absolute favorite foods is roasted chicken.  This time last year, I wrote a post called Perfect Roast Chicken.  Today's recipe is very similar.  The only difference is that I took the extra time to make a brine to marinate the chicken.  This packs the chicken with even more flavor, and keeps the chicken extra moist (especially when you're cooking it with the idea that it will be reheated).

Briny Roasted Chicken

For the Brine:
  • 1/4 cup kosher salt
  • 4 cups water
  • 1Tb cloves
  • 1Tb cracked pepper
  • 3 garlic cloves
  • 1/2 tsp paprika
  • 1 tsp onion powder
For the Chicken:
  • 1 approx. 3 1/2 lb roasting chicken
  • 1 lemon
  • 2 carrots
  • 2 celery stalks
  • 1 large onion
  • 1 small bunch of rosemary, thyme, and/or sage
  • 1 bulb garlic
  • Olive Oil
  • Salt and pepper
Instructions:

To make the brine:
  • In a large soup pot, combine the water and all of the ingredients.
  • Bring to a boil.
  • Simmer for ten minutes.
  • Take off the heat.
  • When room tempurature, place the chicken in the brine.  You can brine it for 20 minutes to 1 hour.

To prep your chicken:
  • Preheat your oven to 475 degrees.
  • There's no need to peel the vegetables- just give them a wash and roughly chop them.
  • Break the garlic bulb into cloves, leaving them unpeeled.
  • Pile all the vegetables and garlic into the middle of the large roasting pan and drizzle with olive oil. (The chicken roasts on top of the vegetables.)
  • Take the chicken out of the brine.
  • Dab it dry with a paper towel.
  • Drizzle the chicken with olive oil and season well with salt and pepper, rubbing it all over the bird.
  • Carefully prick the lemon all over, using th tip of a sharp knife (if you have a microwave, you could pop the lemon in there for 40 seconds at this point as this will really bring out the flavor).
  • Put the lemon inside the chicken's cavity, with the bunch of herbs.
To cook your chicken:
  • Place the chicken on top of the vegetables in the roasting pan and put it into the preheated oven.
  • Turn the heat down immediately to 400 degrees fahrenheit and cook the chicken for 1 hour and 20 minutes.
  • Baste the chicken halfway through cooking and if the vegetables look dry, add a splash of water to the pan to stop them from burning. (Be careful, this may cause the pan to steam up at your face if you're too close to it.)
  • When cooked, take the pan out of the oven and transfer the chicken to a board to rest for 15 minutes or so.
To carve your chicken:
  • Remove any string from the chicken and take off the wings.
  • Cut through the joint and pull the leg off.
  • Repeat on the other side, then cut each leg between the thigh and the drumstick so you end up with four portions of dark meat.
  • Place these on a serving platter.
  • You should now have a clear space to carve the rest of your chicken.
  • Angle the knife along the breastbone and carve one side off, then the other.
  • When you get down to the fussy bits, just use your fingers to pull all the meat off, and turn the chicken over to get all the tasty, juicy bits from underneat. You should be left with a stripped carcass, and a platter full of lovely meat and roasted veggies.

I know that this seems like a labor intensive recipe, but the truth is that the brining really is worth it.  We ate this chicken for four days, and ate it in a different way each time.

The first evening, I made the chicken with the potatoes and carrots.  The second evening, I mixed it with the lentils, chunky tomatoes and beans that I'd had ready in the freezer.  The third day, I made it for lunch.  I shredded some chicken, cut up some tomatoes, and shredded some lettuce and put it in a wrap with some swiss cheese.  On the fourth day, I had it with leftover mashed potatoes from the bangers and mash I'd made for breakfast.

The chicken never got dry, tasted great cold or hot, and froze easily.  Try it!

Friday, August 12, 2011

Bangers and Mash!


I absolutely love a really good dish of bangers and mash.  Usually, I'll have it for dinner, but when I found myself without eggs, I had to think of what would hold Kyle over until dinnertime.  This is a pretty heavy meal, so when you make this, be ready to eat!

Bangers and Mash
You'll need:
  • (3) Small Yukon Gold potatoes
  • (2) Bangers (I got them from the meat counter at Whole Foods)
  • 1 tsp butter
  • 1 cup beef stock
  • 1 tsp corn starch
  • Salt and pepper
  • Rosemary and thyme (about 1 sprig each)
  • 1/2 tsp garlic powder
  • 1/2 tsp onion powder
Instructions:

Mashed Potatoes:
  • Boil water in a medium saucepan.
  • Dice potatoes. 
  • Once water is boiling, add the potatoes.  Boil until fork tender.
  • When the potatoes are fork tender, add the butter.  Salt and pepper to taste.
  • Mash the potatoes (using a blender, mixer, or immersion blender.)
Bangers:
  • Set your skillet to medium heat.
  • Cook on each side for about four minutes per side.  (You want each side a nice, golden brown.)
  • When fully cooked, set aside. 
  • Save all drippings.
Gravy:
  • Using the skillet that you used for the sausage, raise the heat to medium-high heat.  Pour in the beef stock.
  • Chop and add the herbs.
  • Add the garlic and onion powder.
  • Add salt and pepper to taste.
  • Mix cornstarch and water (about a tsp.) in a cup, and whisk into the boiling herb broth.
  • Turn off the heat.
  • Whisk until the proper consistency. (If it gets too thick, add a bit of water to thin it out a bit.)
To Serve:
  • Scoop one serving of potatoes onto each plate.
  • Slice the sausage and place on top of each plate of potatoes.
  • Add gravy.
  • Serve!


This was also really delicious when I reheated my other half of it for lunch with some corn.  Yum!

Monday, I'll be sharing another deliciously easy way to make roasted chicken- and what to do with some of the leftovers!  Have a great weekend!

Thursday, August 11, 2011

Flatbread Pizza!


Over the last two and a half weeks, we've done a lot.  I've signed up for two mommy groups (something I was always too nervous to do in Philadelphia), made some new friends in the area, and have discovered some really great places to eat.

The only thing that I haven't been able to find is really great pizza.  For some reason, the pizza here tastes really bland.  The dough doesn't have that amazing texture that pizzza had back home.  The pepperoni and sauce are missing that really kickin' spice that you can find in PA.  Here, people eat pizza from chains.  At home, we ate pizza from the Italian neighborhood we lived in.

Last Sunday, we went to a Greenville Drive game with a mommy group that I joined.  The game was really fun and the moms' seemed really nice!  After the game, Kyle and Laela were cheering "pizza! pizza! pizza!", so we ran to the store, picked up some ingredients, and I came up with this totally tasty flatbread pizza.


This pizza is practically effortless!

Flatbread Pizza with Tomatoes, Basil, Ricotta Cheese, Pepperoni and Mozzarella
You'll need:
  • 1 tomato
  • 6 basil leaves
  • Pasta sauce (as much or as little as you'd like)
  • Fresh mozzarella (I used mini balls, about 5 will do.)
  • 1 piece flatbread
  • Olive Oil
  • Ricotta cheese (about 4 tsp, depending on how cheesy you want it.)
  • Pepperoni (optional)
Instructions:
  • Heat your oven to 400 degrees.
  • Brush your flatbread on both sides with olive oil.
  • Toast the flatbread for ten minutes in the oven.
  • Take the flatbread out of the oven.
  • Using a cookie scoop or a spoon, scoop about four tsp of ricotta cheese onto the flatbread.
  • Spread some sauce over the ricotta.
  • Slice the tomato into thin slices.  Add the slices to the pizza.
  • Add the basil.
  • Add the pepperoni slices.
  • Slice your mozzarella balls into halves.
  • Place them on the pizza.
Bake for 10-15 minutes.  Serve!!

*Since Kyle does not like tomatoes on their own, I  made him the same thing without the tomato slices.

Tuesday, August 9, 2011

Meatloaf Burgers, Lentils, and Chunky Tomatoes and Bean Pasta Sauce

Life is a bit difficult right now. I've had to completely adjust our program in so many ways that I feel as if my head is spinning. Kyle is working double shifts to get acclimated to his new role. Laela is fine while we're out, but is very, very clingy when we're home. She cries every night for her Daddy. She hugs her dinosaur book and says "Daddy dinosaurs!!"


As for me, I'm just trying to keep things together. Kyle has always traveled a lot, but we always made up for it with lots of phone time, writing letters, and making sure to spend a lot of time together when he gets home. We've always tried to cram every moment of family time that we can, much in the same way that you want to sop up the gravy of a really good roast. You want to savor it, and make it last as long as possible.

Because we need this time, I've had to strive for a balance with things that I'd never really had to worry about before. I'm trying to make new friends for Laela and I, but I also have to make sure to keep the two hours a morning that Kyle's available this week, and possibly next week, free. I wasn't prepared for Laela to beg for Dada to get out of bed, but then for her to ignore him. I wasn't prepared for the tears when he left this morning. It's a lot.

Sad toddler aside- which is generally only at bedtime and morning time when Kyle leaves, things are going okay. I was really nervous about having to switch from dinner being the main sit down family meal.  Now it's all about breakfast/brunch before Kyle goes to work.

I've also had to readjust our meals in that I have to make dinner for the next day the night before. So all of the meals that I'm making from now on, with the exception of most breakfasts, are easy to freeze, and taste just as good microwaved. Just because Kyle's not eating dinner with Laela and I anymore, doesn't mean he shouldn't have a tasty, healthy, energizing meal. My focus right now is making sure that we all stay healthy.

Over the next few weeks, I will be sharing recipes that are easy to freeze, and will taste great reheated.
Here is a recipe for three things that can be frozen and reheated, and will please everyone in your house.


Meatball burgers
You'll need:
  • 1 lb ground chuck (I prefer grass fed when possible)
  • 1 egg
  • 1 cup breadcrumbs
  • 2 diced sprigs parsley (stems too)
  • Salt and Pepper
  • Good squirt of ketchup
  • 1/2 tsp onion powder
  • 1/2 tsp garlic powder
  • olive oil
Instructions:
  • Mix all of the ingredients together in a bowl.  If your mixture feels too wet, add a bit more breadcrumbs.
  • Form patties out of the mixture.
  • Heat a skillet to medium heat.  If you are using grass-fed beef, keep an eye on your skillet.  If it gets too hot, it will cook faster than regular beef. 
  • Drizzle some olive oil in the pan. 
  • Cook each burger for 3-6 minutes per side, depending on how well done you like them.  If you plan to freeze them, it doesn't hurt to cook them a little under what you normally prefer so that when you reheat them, they don't dry out.
  • To keep them from drying out when reheating, drizzle some water or broth on the burger when you reheat it.


Lentils
You'll need:
  • 1/2lb lentils
  • 1 chopped carrot
  • 1 chopped celery
  • 1/2 chopped onion
  • 2 chopped garlic cloves
  • Water
  • 1 bay leaf
  • Salt and Pepper
  • Olive oil
Instructions:
  • Heat a large sauce pan to medium heat.
  • Drizzle a bit of olive oil in the pan.
  • Add the garlic, carrot, onion  and celery.
  • Cook for five minutes.
  • Add the lentils, bay leaf, and pasta sauce.
  • Cover the lentils with about a 1/2 inch of water.
  • Bring to a boil.
  • Lower to medium low heat.
  • Cook for about 20 minutes.
  • Add salt and pepper as needed.
Chunky Tomato and Beans Pasta Sauce
You'll need:
  • 1 cup pasta sauce (I use homemade, but you can use jarred if you want.)
  • (1) 8oz can of diced tomatoes
  • (3) cloves garlic, chopped
  • (1) 8oz can cannellini beans
  • (1) oz can red kidney beans
  • Salt and Pepper
Instructions:
  • Heat a large saucepan to medium-low heat.
  • Mix all of the ingredients in the pan.
  • Cook for ten minutes.
This is one of those meals that each compontent is delicious alone, but is also great mixed together.  Yesterday, I defrosted some of the lentils and pasta sauce and cooked it with some whole grain pasta.

Put down the premade frozen meals, and give some of the meals I make over the next few weeks, and give them a try.  I promise, you won't be disappointed!

Monday, August 8, 2011

Tomorrow!

While I really dislike putting off posting recipes, I feel like continuing to post them without photos is a bit boring.  I need tech support (Kyle), to get me all of the right cords to upload my photos!

Tomorrow evening I will share a delicious beans and pasta sauce, as well as a tasty lentils recipe that all three of us loved!