Showing posts with label caracakes. Show all posts

Saturday, February 15, 2014

Happy Valentine's Day!

Photo: Valentine's Day mini cupcakes for my daughter's Valentine's Day party at school. <3
Yesterday was Valentine's Day, and I'm finding myself feeling a touch of nostalgia...

My earliest memories of Valentine's Day are of my Dad.  My hero. My first favorite guy.  I remember, year after year, him showing up with a yellow rose, or some yellow roses, just for me, and I loved it.


One particular year, right as I was towing that line of when a little girl is becoming a young lady, I was having, well, let's just call a spade a spade- one of the first of (sadly) many angsty moments in my life.  For you adults out there, you KNOW what I mean.  And for those of you that are in the thick of it, you're probably too busy having deep conversations about how you aren't angsty...or maybe you're the most angsty?  Who knows anymore?


That said, I was heartbroken, maybe not for the first time, but probably the fourth or fifth time (yikes again..we have girls, so not looking forward to that!), and my sweet Daddy came in with flowers just for me.  It made my day.  I don't think he really ever knew how much that small gesture meant to me, but at that moment, when I felt awful about everything and everyone for reasons that I simply can't remember, but felt were VERY important at that time in my life.  It meant the world to me.


Maybe this sounds silly to you, but everyday, I wake up, and I think about the things that I can do to make my girls happy.  What will they remember? What can I do to make holidays and moments special and memorable for them?


Laela is at that magical age where things are sparkly and fabulous.  Where creativity and time mean everything.  So when my sweet girl told me that she wanted "teeny tiny cupcakes in a beautiful heart with candies allllll around them" for her school Valentine's Day party, I had to oblige.  I know that these moments count so much, even though to us grownups they can seem pretty inconsequential.  It's pretty amazing though when you see the look on a child's face when you created something magical just for them.


Wednesday, May 29, 2013

Last Minute Cupcakes with Melty Chocolate

I don't know about your little ones, but when my daughter comes home from school, she is famished!  Living in Italy, we often stop by the local bread shop, pick up a few mini pizzas with sausage, and she is one happy little lady.  But then there are days where all my little pinkalicious princess wants is a cupcake.

The other day, Laela came home from a long day of learning and playing, begging for something that sweet that she could help create.  In a moment, I was bamboozled into making quickie cupcakes that I found in the Nigella Express cookbook.  They are ridiculously easy, and when topped with some chocolate (that you can easily melt over low heat on the stove, or in the microwave for a few seconds), you feel like you're throwing the most fancy of tea parties.


For the cupcakes you'll need:


  • 1/2 stick plus 1Tb soft butter
  • 1/2 cup plus 1 tsp sugar
  • 2 eggs
  • 3/4 cup flour
  • 1tsp baking powder
  • 1/2 tsp baking soda
  • 1 tsp pure vanilla extract (or if you live in Italy and only have powdered vanilla, use about a quarter packet of the vanilla powder.  No more, or it will be a vanilla BOMB.)
  • 1 TB milk
Instructions:

  • Preheat the oven to 400-degrees farenheit
  • Line muffin pan with paper liners/grease muffin pan with butter (I just stick a hunk of butter into a paper towel and spread it around each muffin section evenly).
  • Cream the butter and sugar either in a bowl by hand or with an electric mixer (it should look creamy and well blended, kind of like icing).
  • Add the eggs, one at a time with a little of the flour, mixing as you go.
  • Fold in the remaining flour, baking soda, baking powder, vanilla, and milk.
  • Spoon the batter into paper liners/greased muffin pan, dividing equally.
  • Put in the oven for 15-20 minutes or until cooked and golden on top. (you can test with a fork or toothpick.  If it comes out clean, they're done.)
  • Let cool on a clean counter or wire rack.
For the topping:

Nigella recommends using whipped cream:

-Whip 1 cup heavy cream, once fluffy, put a dollop on top of the cupcakes. 

My daughter and husband are chocolate lovers, so I simply melt a half a bar of chocolate (4 or 5oz- doesn't matter if it's light/dark/milk/white) in a small pot on low heat.  I dip each cupcake in the pot, turning a circular motion as I lift from the pot to remove any excess chocolate. Continue with each cupcake.  If you have the willpower, allow the chocolate on the cupcake to cool before serving. (This seldom happens in my house.)

Enjoy!

(note the melted cioccolato allll over my little girl's happy face!)

(**This recipe is from Nigella Express, page 187 by Nigella Lawson)


Monday, May 27, 2013

Quickie Expat Meatloaf and Biscuits

 
  I don't know about you, but I'm a big fan of having kids in the kitchen.  Sure, it creates a bigger mess, and maybe slows things down a bit, but cooking as a family is something that my husband and I make a serious effort to do.  I really believe that it builds confidence while teaching kids about what's in their food (which usually gets them to eat things they might not normally be inclined to try).
 
That said, there are moments when getting a kid to eat a vegetable is like pulling teeth from a snow leopard.  When veggie strikes come up, and this expat mama is craving some "American" style food like meatloaf, it makes it pretty darn easy to sneak in some vegetables. 
 
Now we have visited meatloaf before...there's "sneaky meatloaf" and also a couple of different ways to eat meatloaf when you have leftovers...but this recipe was made on the fly on a day when I had one egg in the house, some spinach, a couple of heels of bread, and some leftover pasta sauce.  I pureed the spinach in with the sauce, toasted and blitzed the bread in the blender, and mashed it all together with the egg in a large bowl.  After that, I baked it for about 40 minutes in a 350-degree oven, and voila, dinner!  The best part?  Kyle and Laela made Laela's favorite biscuits, and voila, we had ourselves a tastylicious American style dinner that took so little effort, Laela and her Daddy wound up playing "biscuit dough" for a half hour.  Fun times.
 
For this easy peasy meatloaf, you'll need:
  • 1lb ground beef/meatloaf mix
  • 2 heels of bread (toasted and then crumbled in food processor/blender)
  • About 1 cup of pasta sauce
  • 1 cup spinach (pureed)
  • 1 egg
  • salt and pepper to taste

 
Wednesday I'll be sharing a super easy cupcake recipe that Laela and I like to make when we're craving cupcakes, and don't feel like making a ton of effort!

Tuesday, April 16, 2013

United.

I had a moment today.  I was sitting at the kitchen table with my beautiful, too smart for her own good, little girl this morning, eating strawberries and toast for breakfast.  I clicked on cnn.com to do a quick check of the news (something I've found myself doing infinitely more since my family and I moved to Firenze 6 months ago), and I saw that one of the victims of the Boston tragedy was an 8 year old boy.  I couldn't help the tears from escaping as I thought of that poor child's family, of the numerous families that are crushed by these events, of the millions of Americans worldwide that are being shocked to the core at yet one more horrific even in which innocent people are harmed.

My sweet daughter asked me why I was crying.  I'll be honest, I don't make it a practice of being upset in front of my child.  I try to make things sunshine and roses as much as possible.  But when she asked me this, I didn't pause.  I said "some people did a very bad thing and they hurt a lot of people."  Do you know what my 3 year old's reply was?  "They shouldn't have done that Mommy.  No one should hurt anyone."  From the mouths of babes.

I studied Political Science in college.  I have a best friend who is a high ranking military man.  I like to think that I have a decent grasp on war, terrorism, and the effects that it has on society. What never occurred to me was how it would feel for people within my home country to attack one another, or for our country to be attacked from within.

I'm of the 9-11 generation.  I went to college in a big city where our bridges were cut off, our subways shut down for our own safety.  We huddled in our homes and cried together for our fellow countrymen.  Wars were fought.  No one won.

We can't get back the people that we lost.  Not the children that were needlessly murdered earlier in the year, not those lost during the marathon, and during the countless other "events" that have happened over the last few months.  Maybe because I am not currently living in my home country I should feel less upset.  Perhaps my world should feel a bit less rocked- but it's not.  I'm an American.  I love my country, my home.  I don't have one state that I feel tied to.  I feel tied to many.

We are moving home in a few months, and there is a part of me, as a mother, as a wife with husband that travels all over the world regularly, that feels like I should be afraid, but all I can think of is this: we shall overcome.  We're Americans dammit.  And one of the quintessential things that Americans do, come hell or high water, is we band the hell together and fight.  We fight for our independence, we fight for the right to run marathons, send our innocent children to school, to go to work without harm, but most of all, at the end of the day- we fight for each other.  United we stand.  So don't let the evil take over.  Send your kids to school, run your marathons, practice your politics and religions how you choose, because that's your right!  The day that we all stop living in the world, and start cowering afraid is the day that "they" win. 

If we can learn anything from the Italians, it's to keep on keepin' on.  Italians don't quit on themselves.  They don't quit on their country.  They've been bombed, sieged, overtaken, broken down, you name it, it's happened to these poor people.  But they cherish their culture, and they keep moving forward.  Isn't that all any of us can do?  Move forward, stay brave, and be strong?

Yes, I know I'm just a young woman who blogs about food and her family, but writing about my family and what we're having for dinner tonight just didn't feel right to me today.

Monday, April 8, 2013

Pregnancy and Bolognese

I have been a terrible, rotten blogger lately.  The truth is, that for 15 of the last 16 weeks, I've had no desire for food.  Every time I've tried to eat it, my body rejects it.  I've been taken down with a case of pregalimia.  Brutal.

If you haven't heard of pregalimia, then you have either a. never known a pregnant person with "all the time sickness" (morning sickness is seriously the most annoying phrase EVER.  It has nothing to do with the morning.  It has to do with things being smelly, the very cute little alien that has taken over your body and turned you into a vomatious demon, and a very disturbing relationship with your head in the toilet- or the sink- or the trash can...), or a. you are one of those people that have only seen the bright side of pregnancy (i.e. your wife/significant other/friend never got sick, or she kicked it old school, and hid from you until she woke up and saw the sunlight with a rumble in her stomach that said: FEED ME NOW!)

Now that I've hit week 16, I finally have a (mostly)steady, ravenous desire for food.  This is one of those lovely times when living in Italy is first world problems.  What?  You're pregnant!  'No cured meats little lady, but here ya go, have some bolognese!'  It's wonderful.  Good grief.  Writing this blog is making me hungry. (Yay!)

Speaking of bolognese, or ragu, as it is known to some, this is one of the recipes that I have come to love since moving to Firenze.  A good girlfriend gave me the recipe, and it's one of the few things that I've ever made that if it was in our house everyday, my husband wouldn't be able to resist it.  Ever.


You'll need:
  • 2 tbsp olive oil (I prefer extra virgin)
  • 6 rashers of streaky 'pancetta' bacon, chopped
  • 2 large onions, chopped
  • 3 garlic cloves, crushed
  • 2 carrots, chopped
  • Stick of celery, chopped 
  • 1kg/2¼lb lean minced beef (I usually use what is sold as "ragu meat" in Firenze.  Pork is just as tasty as meat if you prefer it.)
  • 2 large glasses of red wine (I prefer Chianti)
  • 2x400g cans chopped tomatoes (or 1 jar of passata- a type of tomato puree for those that don't like a chunky sauce)
  • 2 fresh or dried bay leaves
  • salt and freshly ground black pepper
  • 800g-1kg/1¾-2¼lb dried tagliatelle or a good artigianale pasta that will hold up to the ragu.
  • freshly grated parmesan cheese (optional for serving)
Instructions:

1. Heat the oil in a large, heavy-based saucepan and fry the bacon until golden over a medium heat.

2.  Add the onions, garlic, carrots, and celery, cook until softened, and the onions are clear.

3.  Increase the heat and add the minced beef. Fry it until it has browned. Make sure to "chop" at it with your spatula so that the meat gets nice and small (and the veggies too as they break down and cook).

4.  Pour in the wine and boil until it has reduced in volume by about a third. Reduce the temperature.  Stir in the tomatoes and bay leaves.

5. Cover with a lid and simmer over a gentle heat for 1-1½ hours until it's rich and thickened, stirring occasionally.

6.  Add salt and pepper to taste.

7.  Serve over tagliatelle, or stir in with a hearty pasta that sticks to the ribs on a cold day!

8.  Top with freshly grated parmesan cheese.

This is also one of those delicious sauces that tastes better with each passing day, so don't be afraid to make it ahead of time and use it later.  (Although, once you taste it, I guarantee that it won't last long!  I've caught Kyle eating it by the spoonful!)

Monday, February 4, 2013

Chicken Pot Pie 2

 
Okay, I admit it, we've visited Chicken Pot Pie before.  And yes, that recipe is still one of my favorites.  However, this is the perfect recipe for when you are just too busy to make pie crust, and you want to throw something hearty and healthy together quickly.
 
I apologize for not having a picture of the entire product, but Laela was yanking on my pant leg telling me that she was "STARVING", so chicken pot pie with a hunk cut out is what you get.
 
Easy Chicken Pot Pie (mostly from scratch!)
 
You'll need:
  • 1 sheet of puff pastry
  • 2 chicken breasts (can be leftover from roasted chicken- that's what I used)
  • 2 carrots, chopped
  • 1/2 onion, chopped
  • 2 potatoes, chopped
  • 1 celery stick, chopped
  • 1/2 cup frozen peas
  • 1Tb butter
  • 1Tb flour
  • 1 cup chicken broth/stock
  • 1 sprig rosemary
  • 1 sprig thyme
  • Salt and pepper
Instructions:
  • Preheat your oven to 425-degrees Fahrenheit.
  • Heat a large skillet to medium heat.  Add a few glugs of olive oil.
  • Place the onion, carrots, celery, and potatoes in the pan to cook for about ten minutes.  Stir occasionally.
  • While the vegetables are cooking, heat a medium saucepan to medium-high heat.
  • Add the butter and flour.  Whisk until they are well combined.  Do not allow it to brown. 
  • Pour the chicken stock/broth into the pan with the butter/flour mixture.  Whisk until it thickens to an almost gravy consistency.
  • Mix in the rosemary (I cut my rosemary with scissors to make it nice and easily diced) and thyme leaves.  Add salt and pepper to taste.
  • If using raw chicken, cut it into cubes.  Put it in the pastry dish.
  • Add the cooked vegetables, frozen peas, and the chicken stock/broth mixture to the pastry pan.  Gently stir the ingredients together.  They'll meld together well while they bake, so don't go overboard trying to mix everything together.
  • Gently unroll the puff pastry over the pastry dish (I usually use a pie pan, but you can use anything you like- corning ware is great for this).  Gently pinch the sides so that they adhere to the dish.  If you have any leftover dough, hand it over to your little one to make fun shapes, and then top the pastry with the shapes.
  • If you want to it to have a rich golden texture, use a pastry brush to paint the pastry with an egg wash (1 egg that's been beaten with 3 tablespoons of water).
  • Bake for 30 minutes.
  • Enjoy!

Wednesday, January 23, 2013

Fancy Pork Tenderloin Made Easy

 
Do you ever have those moments when you're reading "Real Simple", or your walking through a gourmet shoppe, and you look at the food, and you're like, "*sigh*, wouldn't it be great to have the time to make that?" (Please tell me that I'm not alone in my foodsanity.)
 
If so, this is the fancy dinner for you.  It takes five-minutes of prep, 40-60 minutes in the oven, and then it's time for dinner!
 
Cara's Fancy Pork Tenderloin
 
 
You'll need:
  • 1-2 lbs of pork tenderloin
  • 1 foot of butcher's twine
  • 4-5 slices of bacon/pancetta
  • 2 sprigs of rosemary
  • Salt and pepper
 
Instructions:
  • Preheat your oven to 425-degrees farenheit.
  • Sprinkle salt and pepper all over the pork tenderloin.
  • Wrap the bacon/pancetta slices around, or over the top of the tenderloin.
  • Place the rosemary on top of the bacon/pancetta wrapped tenderloin.
  • Hold the rosemary/pancetta-bacon in place with one hand.  Wrap the tenderloin in twine so that the bacon-pancetta/rosemary stays in place.
  • Fill a baking pan with 1inch of water.
  • Place in the oven in a medium rack (it will dry out on the top rack).
  • Lower the heat to 375-degrees farenheit.
  • Cook for 40-60 minutes depending on weight.
  • **If you feel that your bacon/pancetta hasn't gotten crispy enough for your liking, heat a skillet to medium-high heat.  Place the tenderloin on the skillet, bacon/pancetta side down, and allow it to crisp up for 2 minutes.
  • Feel free to add some mixed veggies (potatoes, sweet potatoes, carrots, onions) to the bottom of the pan to cook with the tenderloin.  Yum!
  •  
Enjoy!

Monday, January 21, 2013

An Expat Onion Dip Craving...

Since we've moved to Italy, I've had these moments that I've begun to call my "Homer Simpson" moments.  Usually they involve a craving for extra crispy bacon.  Bacon!

Okay.  I'm back.  Whew.  You don't know how much you love certain things until it's either completely impossible, or ridiculously difficult to get them.  Tacos?  I figured that out.  Pho?  Strangely, found the ingredients at a local outdoor market.  But my go-to foods when my husband is traveling and I'm single parenting for a week?  Ugh.  Florence doesn't have them. 

Kyle was away last week, and all this mama wanted was some onion dip.  You might be thinking, onion dip?  Who craves onion dip?  ME.  I want it with carrots, peppers, chips, whatever.  Just hand it over.

But here's the problem, Italians don't do pre-packaged food, or food mixes- unless it's pasta.  Is this good for you?  Yes.  Do I live 99.9% of my life this way?  Yes.  But man, sometimes I just want onion dip. And not that crapgasm in a tin that you can buy for 4 euro.  Ew.  No thanks.  I'd rather be grumpy.

Or figure out my own damn onion dip.

So I did.  I looked up a few recipes online, and realized that no sir, I don't have sour cream.  What I do have is a big bag of onions, some worcerstire sauce, a tub of 0% greek yogurt, some garlic, and some hope.  While you might be thinking, "silly American girl, you can't make onion dip in Italy", I'm telling you that you are so wrong my friend.  So wrong.  And I'll furthermore tell you that my shameful addiction to onion soup mix packets, feverishly swirled together with sour cream and barely refrigerated before I devoured it while we lived in the States is o-v-e-r.

This dip is so good, that even when I got sick I was still finding a reason to house it.  Then I made the mistake of telling Kyle that I figured out how to make onion dip, and I had to make more!  Which only made me eat more!  Ah!  And I'm not one of those people that gorges on things.  Ah well, I guess we all have our kryptonite.

So here's the skinny on how to make some amazing, delicious, and internationally ingredient friendly onion dip.


Cara's Onion Dip

You'll need:
  • 3 small yellow onions, finely diced
  • 2 garlic cloves, diced
  • 1 cup 0% Greek yogurt
  • 1/4 cup, 1Tb mayonaisse
  • Garlic powder (3-4 stiff shakes)
  • 2tsp worcestire
  • Salt and Pepper (to taste)
  • Olive oil
Instructions:
  • Heat a medium-large skillet to medium-heat.  Add a good glug of olive oil to the skillet.
  • Add the onions to the skillet.  Sprinkle a bit of salt. 
  • Lower the heat to medium-low heat.  Allow to carmelize for 20-minutes.
  • *If the onions seem to be sticking to the pan, add water periodically to continue the caramelization, and to keep the onions from sticking.
  • In a medium sized bowl, combine the garlic powder, greek yogurt, worcestire, and mayonaisse.
  • Once the onions begin to caramelize, add the diced garlic.
  • After the onions and garlic are caramelized, allow them to cool (10-15 minutes).
  • Mix them in with the yogurt/mayo mixture.  Add salt and pepper to taste.
  • **This tastes best if you let it sit for a few hours, but it will also taste pretty great if you let it set for just a half hour/hour.
Enjoy!

P.S...Did I mention that this is virtually guilt free? ; )

Monday, January 7, 2013

Laela's Biscuits

My child makes the best biscuits ever.  Seriously.  One day, I had all the ingredients out (but not measured), and she just started scooping and "smooshing" the ingredients together.  Let me tell you, my little 3 year old is a superstar, because baby, her biscuits are delicious.

And yes, she wears a Sleeping Beauty dress while she bakes.  Don't you?

Laela's Biscuits:

You'll need:
  • 2 cups flour
  • 1Tb baking powder
  • 1Tb sugar
  • About 1/3 cup butter
  • 1 cup milk
Instructions:
  • Smoosh together with your hands. 
  • Preheat the oven to 375 degrees Farenheit. 
  • Play.  Have fun.  Make goofy shapes. 
  • Bake for 10 minutes.
  • **Laela also stuffed some with proscuitto and cheese. (You make a pancake, fold the meat and cheese, and then wrap the dough around it.)  YUM.
Here's the snowman biscuit Laela made:
 
 
I cannot emphasize how excited and proud Laela is when she makes something all by herself.  The fact that she made this biscuit recipe up all on her own while we were cooking dinner one night, and that it came out delicious, was fantastic for her self-esteem.  I know it can be messy, and for some it can be difficult to allow anyone into the kitchen, but try it.  Invite your children into the kitchen and allow them to create.  They really might surprise you!

Friday, January 4, 2013

Lazy Le Mont Blanc

Happy New Year everyone!

I don't know about you, but this holiday season has been busy busy busy!  Holiday parties, school activities, and then some much needed family time has kept my family on the go for the last few weeks. 

This Saturday is La Befana, which is the evening before the day of the Epiphany.  In Italy, the night before the Epiphany,  La Befana comes.  The short version of this Italian tradition is this: Befana is an old woman that flies down the chimney and brings treats/small gifts to the good children, and coal to the naughty ones to celebrate the eve before the wise men brought the gifts to Jesus.  You might be thinking, "isn't that what Santa does?"  Italians will argue with you that there is a major difference. Trust me ... don't fight the Italians on this one.  Just accept that you get to leave the lady some cookies and wine and enjoy the extra goodies. 

When the Epiphany is over, my husband is going back to work, Laela back to school, and I will be starting Italian lessons (yay! finally!  I'm going native!)  What's ridiculous, is that I'm most looking forward to my Italian lessons so that I can take some of the cooking classes that I found that are taught by super cute Nonna's who speak Italianglish.  I want to really understand them so that I can share what I learn with you all...and so I can eat more lasagne...

Speaking of lasagne, I had the BEST lasagne the other day.  My buddy Sandro made lasagne that was so good, if I were dropped in a vat of it, I'd eat my way out.  Seriously.  When he forks over the recipe, trust me, I'll be making it for you all!

Until then, let me share this little nugget...

We went to dinner at a friends' house for Christmas.  I was feeling a bit lazy, but I had promised a posh dessert.  What did I make, might you ask?


The lazy person's Le Mont Blanc.

Lazy Le Mont Blanc

You'll need:
  • 4 oz good quality chocolate, finely chopped (I used dark chocolate, 50% cocoa- use whatever you have on hand, or what you prefer)
  • 2 cups heavy cream
  • 1 tsp vanilla
  • 10 medium sized meringue cookies (I made my own, feel free to use packaged.)
  • (1) 1lb jar of vanilla infused or plain chestnut puree/spread
Instructions:

*The Nigella Express book that I found this recipe in calls for semisweet chocolate and 2 meringue nests (approx. 3in diameter each, from a packet).  I felt that Nigella would understand my lack of desire to traipse out into the rain to switch up from my chocolate choice. 
           As for the meringue, I had just made budino di cioccolato.  Since I had the leftover egg whites, I whipped up an easy meringue.  First of all, heat your oven to 375 degrees farenheit.  In a metal bowl, I whipped 3 egg whites until they had light peaks.  Then I beat in 1tsp cream of tartar and 1/8 tsp salt.  Once stiff peaks were formed, I gently and gradually beat in 3/4 cup of sugar.  Once a stiff meringue (a whitish-silver, smooth textured mixture, that when you pull up on your beater, the mixture leaves a point- like a peak- is what you'll be looking for) is formed, you can be fancy and put the mixture into a piping bag and swirl them into circles, or you can use a spoon to plop them onto the baking sheet that has been sprayed with cooking spray.  Place the meringue cookies into the oven.  Turn the oven off.  Do not open it for two hours.  The longer you leave the cookies in the oven, the crunchier they'll be!  Easiest. Cookie. Recipe. Ever.  And people will think you're a rock star for being able to make a fantastic meringue.

Now, back to business...
  • Get out 6 pretty glasses, or one pretty serving bowl. 
  • Sprinkle the chocolate evenly among the 6 glasses, or evenly in the serving bowl.
  • Whip the cream and vanilla.  Once it has formed the consistency of whipped cream, crumble meringue (I saved 6 for topping the mont blanc, but you don't have to), and gently fold it into the whipped cream. 
    • **A note on folding.  You are not folding clothes, and it is not the same as folding dough.  If you mix it, the whipped cream will get watery.  You want to gently scrape the sides of the bowl, and gently, gently, swirl in the meringue.  This is not one of those things that you have to get perfect, or that you have to make sure everything is evenly distributed.  Put down the OCD for a minute, and just let it be.
  • Evenly distribute and spread the chestnut cream/puree in the glasses.
  • Top with cream and a meringue if you have extra, or are feeling fancy.
Enjoy!


Friday, December 14, 2012

Sugar Cookielicious!

 
It's cookie time!  Ky came home from work the other day seeming a bit "American treat" homesick, so I surprised him with some nummy yummy sugar cookies.  It also made my little girl who was pleading to make Santa some cookies pretty darn happy.  (Not sure how Santa's going to get any cookies since my little love and big love keep asking me to bake more of the dough that I froze for the big guy!)
 
Now I've got to give it to you straight, these cookies are AWESOME.  Full disclosure though, the recipe with the Crisco is just a bit better.  The cookies puff up nice and pretty with the Crisco, and if you're not a butter enthusiast, these are just a touch more buttery than they would be with Crisco.
 
This nice thing about these cookies, is that they make about 50 per batch (awesome, right?), and whenever I've been in a "baking pinch", these have saved me from having to devote hours that I don't have to making tons of cookies for that party/event/school lunch that my exhausted, semi-brain dead self may have forgotten about.  Whew.  Also, since I usually do these as 2 inch balls, if you shrink the balls down to 1 inch, you'll have twice as many cookies, and barely any extra work.
 
First, here is the recipe as I would make it in the States:
 
Sugar Cookies
 
You'll need:
  • 1/2 cup unsalted butter, softened
  • 1/2 cup shortening
  • 2 cups sugar
  • 1 teaspoon baking soda
  • 1 teaspoon cream of tartar
  • 1/8 teaspoon salt
  • 3 egg yolks
  • 1/2 teaspoon vanilla
  • 1 3/4 cups all-purpose flour
Instructions:
  • Preheat oven to 350-degrees Farenheit.
  • Whip the butter and shortening for 20 seconds.
  • Add the sugar and vanilla.  Whip until creamy.
  • Whip in the egg yolks.
  • Beat in the baking soda, cream of tartar, and salt.  Scraping the sides occasionally.
  • Gradually beat in the flour. 
  • When the dough is well mixed, shape it into 1 or 2 inch balls.
  • Place 2 inches apart on a cookie sheet, and pop them in the oven!
  • Bake for 6 minutes.
  • Allow to cool on cookie sheet for 2 minutes. 
  • Transfer to an air tight container.
  • Make sure your container is air tight so that your cookies stay chewy!
Enjoy!!


American Sugar Cookies Italian Style
 
You'll need
  • 250 grams butter, softened (I could only find salted)
  • 2 Cups Sugar
  • 1 teaspoon baking soda
  • 1 teaspoon cream of tartar
  • 3 egg yolks
  • 1/2 teaspoon vanilla
  • 1 1/2 cup all purpose flour
Instructions:
  • Preheat your oven to 125 degrees Celsius.  (I tried it at a higher temperature and it made the cookies spread too much).
  • If you're kickin' it old school like me and don't have a mixer in your beautiful new abode, here's what you do: 
  • Put your softened butter, sugar, vanilla, and eggs into a nice big bowl.  Wash your hands thoroughly.  Dry them thoroughly.  Dive those hands in and cream that sugar baby!  Squish until it's mixed!  You'll know it's ready when everything is feeling very thoroughly mixed.
  • Next, work the cream of tartar and baking soda into the creamed sugar.
  • Add the flour, and work that in until it's a nice, sticky-smooth dough.
  • Create 1-2 inch balls.
  • Place the dough balls 2 inches apart on the cookie sheet.
  • Bake for 5-7 minutes.
  • Allow to cool for 2 minutes on the cookie sheet.
  • Place the cookies in an air tight container.
Enjoy!!


Laela wouldn't share!
 

Wednesday, November 21, 2012

Thanksgiving in Italy


Thanksgiving is in a few days, and here I am, kitchenless, living in a hotel in a foreign country.  I have to say, I've gone back and forth about how we'll celebrate.  Should we go to an Italian restaurant claiming to make classic "American Thanksgiving fare"?  Should I take a cooking class that one of the local cooking schools is hosting to learn a way to "fuse" the Italian idea of Thanksgiving with American Thanksgiving?

Maybe this is me having a moment where I don't want to change my culture.  Thanksgiving is not an Italian holiday.  It's American.  I'm American.  So me, with my crazy American, individualist, marching to the beat of my own drummer mindset, will be celebrating Thanksgiving late this year- when I can cook it, and celebrate it, in a way that makes me and my family feel at home.  Until then, I'll just continue to enjoy Italian culture and their culinary expertise.

The truth is, I'm a thankful person.  I was raised by a small village of people (particulary my parents) who taught me that thankfulness and family are not something you celebrate on single days.  You should celebrate them and appreciate them often. 

I'll never forget our first Thanksgiving with Laela.  I was so exhausted (she was barely three months old), that there was no way this milk machine was going to throw a dinner together.  My parents, my husband, and our baby daughter got ourselves together for a simple Thanksgiving dinner that Abner's (the best bbq you could get in the Northeast until they so sadly closed) gloriously threw together for us.  It was a great Thanksgiving- in my Daddy's words: "We should be spending time together...not hiding in the kitchen."

That's what Thanksgiving is.  It's about your family.  It doesn't matter if you're risking your lives frying a turkey, baking pies, having pizza, or gorging on pizza.  It matters if you're being together.  So this year, be present.  Put down the damn phones.  Turn off the computers.  Spend time together.  I'm not giving advice on how to get everything out of the oven in time, or how to get it all hot simultaneously.  I'm telling you to genuinely be thankful for the gifts you have been given.

Monday, November 19, 2012

Quickie Pepper Soup


Every now and then, I want to make a serving or two of soup without any hassle.  I don't feel like making a big batch and having to store it, or sometimes, I find myself with random leftovers, and see if I can whip up something quick and healthy for lunch, or dinner if I find myself in a subsidized single parenting situation.

Right before we moved, Kyle was away on a business trip.  I found myself in the odd situation of not having anything in the fridge (since we were cleaning the fridge out before our big move abroad).  I foraged through the fridge and came across some chopped peppers from a salad I'd had a day or two before and a frozen cup of pasta sauce, as well as a frozen cup of chicken broth in the freezer. It's amazing what you can come up with when you only have a few paltry leftovers in the fridge and you're sick to death of take-out!

This pepper soup is awesome and literally takes five minutes. 

Quickie Pepper Soup

You'll need:
  • 1/2 cup pasta sauce
  • 1/2 cup broth (chicken, veggie or beef will do)
  • 1/2 red pepper (or a whole one, whatever you have in your fridge!- you can mix other flavored peppers in as well if you want)
  • Salt and Pepper to taste
Instructions:
  • Heat a medium saucepan to medium-high heat.  Drizzle a bit of olive oil (no more than 1tsp) into the pan.
  • Roughly chop the pepper.  Toss it in the pan.
  • Cook for 1 minute.
  • Pour in the broth and pasta sauce.
  • Heat the pan to high.  Bring the pan to a boil.
  • Lower the heat to medium-high heat.
  • Cook for 3 minutes. 
  • Blend with a immersion blender or a blender until liquid.
  • Serve!
**Since I was the only one eating this, I added a bit of hot sauce and sriracha!  Make it however spicy or mild you like!

Friday, November 16, 2012

Caprese Salad

 
I love caprese salad.  It's one of my oddball comfort foods.  It reminds me of when I was younger, and would try to wow my grandparents with my cooking ability (little did I know how little I didn't know!)  I remember serving it up with some homemade Italian bread, with the caprese salad placed neatly in a bowl and my family devouring it.  It's one of the first things I ever made where I had hope that I could really be good at this cooking thing, so it'll always be a bit special to me, regardless of the fact that it's incredibly easy to make.  I think it goes to show that sometimes the best things in life are the simplest.  

Since we've been living in a hotel for the last few weeks, I've had to find different ways to make healthy, fresh food.  I don't want to live on take-out or go out to dinner all the time.  I have a preschooler.  She needs her sleep, and we all need some time to relax! 

Caprese Salad is literally the most simple, yet fancy seeming dish that you can make.  And all it takes is a tomato, a ball of fresh mozzarella, a few basil leaves, 2 tablespoons of some balsamic vinegar and 2-3 tablespoons of extra virgin olive oil, with a dash of salt and pepper.  It doesn't matter if you cube, slice, or chop your cheese and tomatoes.  It will be perfectly delicious regardless of how you present it.  Does it get more simply, or more lovely than that? 

Wednesday, November 14, 2012

A Cookie Cutter Kind of Day

 
I have this silly obsession with old school cookie cutters.  You know the ones, the really sharp metal ones that everyone's Grandma used to use? Those sharp as nails cookie cutters are much better than those rinky dink plastic ones, so when you find them, and you like the shape, pick them up! They can make super cute "rainy day" sandwiches, such as these lovely little butterflies!
 
 
Laela told me that it was a "gloomy doomy day" because it's dark, cold, and rainy, so I busted out one of the old school cookie cutters I brought with me from the US.  (Yes, my favorite cookie cutters were a priority for me.  I've been here two weeks an they've already been useful!  Hah!)
 
We made "sandwich treats", which are sandwiches filled with peanut butter and honey.  Other times we'll use pumpkin butter with a sprinkle of "fancy cinnamon" (Laela's very into Fancy Nancy, can you tell?) or peanut butter with Nutella.  It depends on what kind of day we're having.
 
These are very easy to make.  Make the sandwich of your choosing.  Place the cookie cutter over the sandwich.  When you are inside the crust, push down, and you'll have a lovely shaped sandwich!


Tip:  Did you know you can clean metal cookie cutters to a pearly shine with some Dawn and vinegar?  The solution is just 1 drop of Dawn added to 1/2 cup water mixed with a 1/2 cup distilled white vinegar. It also saves scorched pans. No joke.  To save a scorched pan, soak the pan in the solution for a few hours.  Then, hit it with a tad more Dawn and a scrubbie, and you should be good to go!

Monday, November 12, 2012

My Last Meal in America

Holy exhaustion Batman.  You don't know tired until you move to a foreign country.  A little over two weeks ago, my family and I moved to Florence, Italy for my husband's job.  Thankfully, my husband and I visited over the summer, so I was reasonably prepared for what we would need, and what things we should bring from the States (thankfully I remembered taco seasonings and Old Bay!)

I think people really don't realize that Italians eat pasta every single day.  It's nothing like pasta in the States, it's lighter, more flavorful, and in all ways just better, so trust me, I plan on taking plenty of cooking classes to share my experiences and recipes!  I want to learn not only authentic Italian cooking (which varies by region), but other European cuisines as well.  Italian food is amazing.  Everything is always fresh and homemade.  In Italy, if something isn't homemade, they'll tell you. 

And trust me, Italian food is kind of like dating.  You can weed out the phony "tourist trap" food versus the amazing Italian food very very quickly.  (For example, if you see a huge mound of gelato, slowly back away.  You are being bamboozled.  Go to a small gelateria where there aren't any/many tourists and allow yourself to be completely blown away.)

The thing is, as much as I love Italian food, I had a hankering for a cheeseburger the other day, and me, yes, Little Miss "I only eat healthy food" dragged my husband to Hard Rock Cafe for a huge bbq burger.  I have to say, it was awesome- until I was in a food coma and literally couldn't move for ten minutes. 

After my honkin' "American cheeseburger", I got to thinking...in the whirlwind of packing up and moving to Italy, what was my last homemade American meal?

Shrimp and Grits!!

 
How befitting, I moved to the South a Philly girl, and left the US with grits in my belly.

Here's the easiest recipe for grits you'll ever find.  This is not quite as amazing as my best friend Alexis' shrimp and grits recipe, but she's promised to share that with you all another time.  This recipe is simple and no holds barred delicious.  Give it a go!


Cara's Shrimp and Grits
serves 4

You'll need:

For the Shrimp:
  • (1) 1lb bag of shrimp, peeled and deveined
  • 1/2 Green Bell Pepper
  • 1/2 Yellow Pepper
  • 1/2 Red Bell Pepper
  • 1/2 cup butter
  • 1 Cup corn (I used frozen sweet corn, but you can use fresh if you want)
  • 3 Tb Old Bay (You can add more if you like.  I tend to go heavy on the Old Bay)
  • **1lb Andouille Sausage, sliced (I didn't have any on hand, but you should definitely try it with the sausage!
Heat a medium sized skillet to medium heat.  Chop, slice the peppers (or if you want, just buy a bag of frozen chopped/sliced peppers) and toss them in the preheated pan with 1/2 the butter, sliced andouille and Old Bay.  Cook for 3 minutes, stirring occasionally.  Stir in the corn.  Cook for 1 minute.  Add the remaining butter and the shrimp.  Cook until the shrimp go from clear to white/pink and begin to curl (2-3 minutes).  Stir occasionally.  If it seems like the butter is reducing quickly, lower the heat a bit and add a bit more butter, a splash of fish or chicken stock, or a splash of white cooking wine  Don't overcook them!  Add more Old Bay to taste.

For the Grits:
  • 1 1/2 Cups water
  • 1 1/2 Cups milk

  1. In a small pot, bring water, milk, and salt to a boil.
  2. Slowly stir grits into boiling mixture.
  3. Stir continuously and thoroughly until grits are well mixed.
  4. Let the pot return to a boil, cover pot with a lid, lower the temperature, and cook for approximately 30 minutes stirring frequently.
  5. Add more water if necessary.
  6. Grits are done when they have the consistency of stiff cream of wheat.
  7. Stir in butter.
  8. Serve with additional butter on top. (Optional- I didn't do this since the grits were being topped with the shrimp, veggies and Old Bay butter sauce.)

Serve grits topped with shrimp and veggies!  Enjoy!

Thursday, October 18, 2012

Helping Our Children Chase and Achieve Their Dreams

"If we did all the things we are capable of doing, we would literally astonish ourselves"
                                                                                                     -Thomas Alva Edison

I couldn't sleep last night.  I woke up at 4am and watched my little girl sleep.  Then I wrote some blog posts for the coming weeks.  After cleaning my house, doing some packing, getting breakfast and lunches ready for the day, I decided to hunker down and read The Richest Kids In America: How They Earn It, How They Spend It, How You Can Too by Mark Victor Hansen. 

When I was in college, my creative writing teacher told me that I had too many interests, and way too many ideas.  She told me that I needed to start writing everything down- and she was right.  I still have that little glitter notebook, and I still jot my ideas down from time to time.  Some are great things that I'm working on today, and some are things that I hope to work towards.

As I sat down and read The Richest Kids in America, I found myself intrigued and encouraged by these driven, passionate, and creative kids who grabbed life by the horns and went for it.  They took risks that most people would be petrified to take.  But most of all, they had amazing parents that stood by them, up for them, and by them as they endeavored to do things that their peers clearly had not.  Instead of thinking up ideas, they took the plunge and followed through on them.

"Creating change is not something that you can do alone, and it is imperative to have a strong network of mentors, advisors, and peers."

I learned a lot from this book about how to encourage my daughter to have a successful, thriving life.  Sure, I knew that she should surround herself with positive influences, but sometimes parents have a hard time conveying that to their children.  This book is great back-up.  It encourages the reader to surround themself with positive people, media, books and information that will stimulate rather than stifle.

I really believe that most parents believe that their children should be challenged in some way.  This book takes it one step further and has work-sheets for the children (and adults!) to help use creativity to bring talents to the surface, passion to unleash potential, and to find a way to implement their ideas to a specific target market.  Many times, we are all herded into a group mentality, rather than an individual mentality, but these kids found ways to be individuals that influence and change the group by listening to their inner voice and by trusting their instincts.  You never know what hobby or activity could bring about a new idea that is a profitable enterprise.

"I want you to be a visionary, but I also want you to create sustainable income that does not own you."

Mark Victor Hansen does a great job of conveying the stories of young entrepeneurs that vary in "backgrounds, interests, and personalities", thus proving, that it doesn't matter where you come from to be successful.  What does matter is how you spend your time.  My Mom used to say, "follow your rainbows, follow your dreams", and she was right.  It took time and research for me to learn how to package it and how it serves people.

We're parents.  Our #1 job is to raise our children to be good people that are self sufficient.  We won't be here forever.  That's just a fact of life.  So why not teach them independence, self sufficiency, trust in their instincts, how to hone in on their creativity, and that charity is incredibly important, from the time they are young?  You never know what they can accomplish unless you encourage them to try!

Tuesday, October 16, 2012

Meatloaf 4 Ways!


I have a confession...when my husband is on business trips, I eat way more popcorn than a normal person would ever consider consuming...and I tend to live on leftovers.

During Kyle's last business trip, I made Laela and I some delicious turkey meatloaf. You might be thinking, "meatloaf? How boring! How on Earth can anyone live on meatloaf for a week?!" Well, let me tell you this- meatloaf is awesome. You can eat it cold on a sandwich (some people like it with mayo, others with ketchup, or some top it with tons of lettuce, tomato, onion, cheese and/or pesto). You can eat it hot and steaming with mashed potatoes, veggies, and brown gravy. You can chop it up, mix in some bbq sauce in a medium hot pan until it's well heated, put it on a bun and yum! You've got a tasty sandwich!

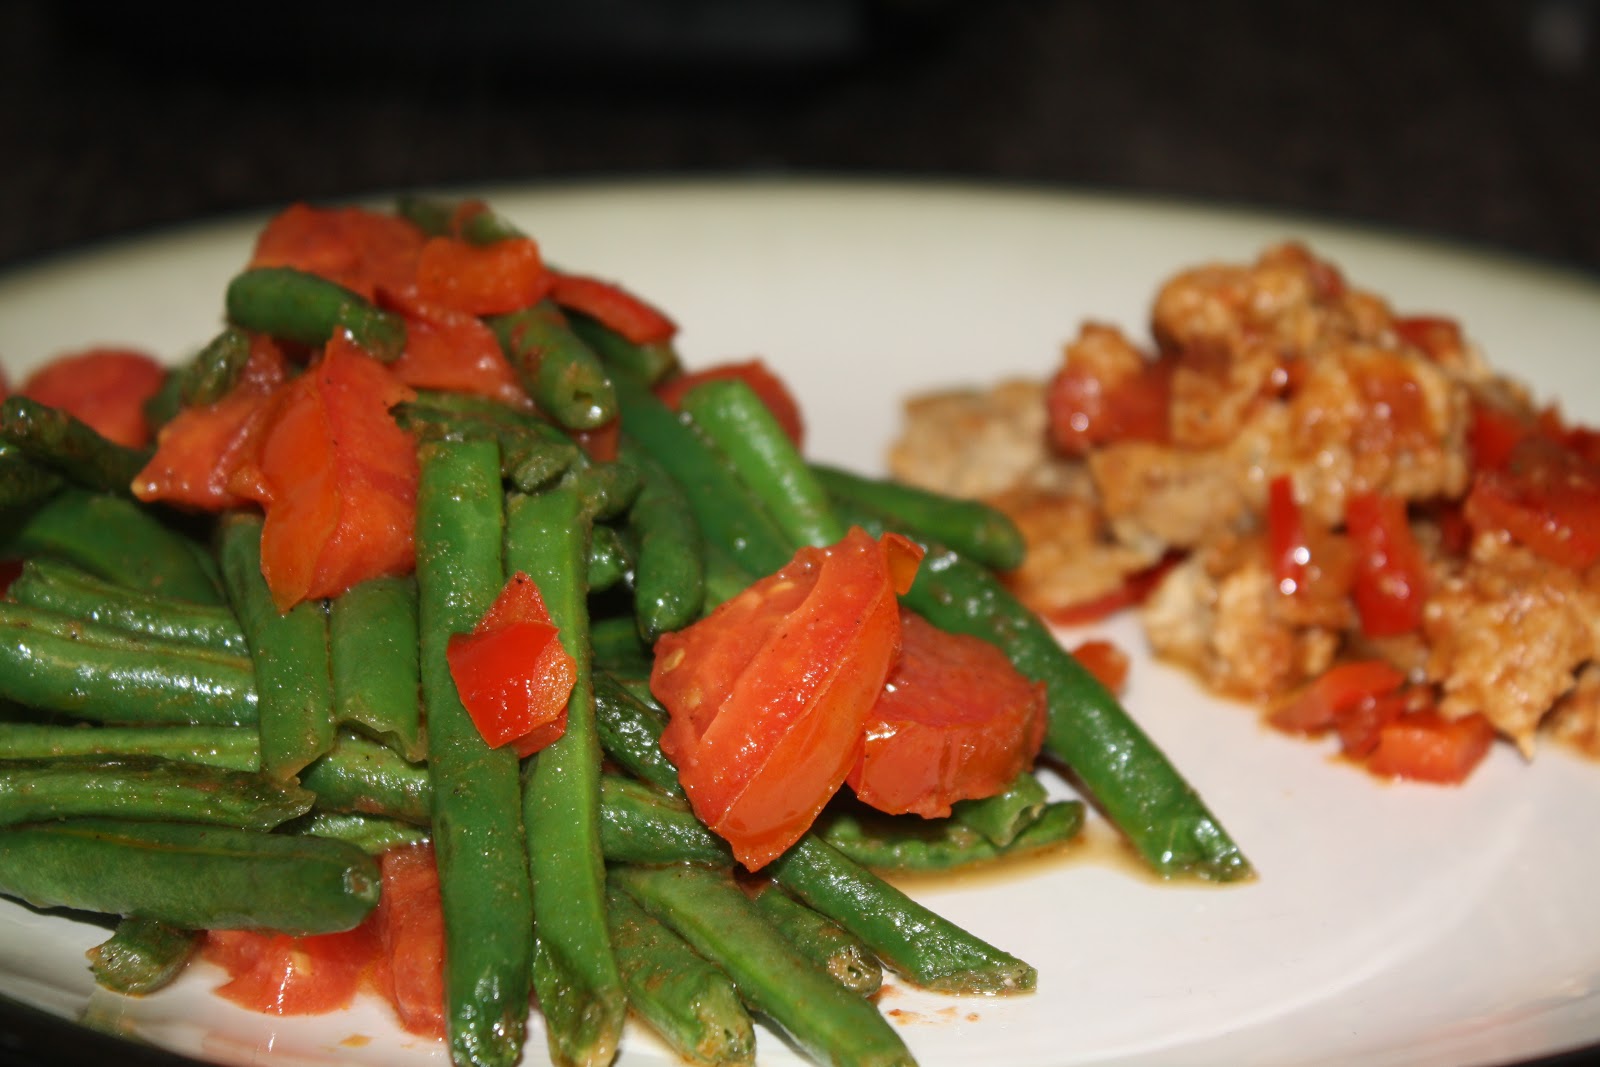
My latest discovery for leftover meatloaf may very well be my favorite. I cooked some hericots verts (french green beans) in a medium-hot pan with 2 cloves of finely sliced garlic, 1/2 a roughly chopped tomato, about a tablespoon of olive oil, and some salt and pepper. Once the beans were good and crispy, the tomatoes were oozing flavor, and the garlic was clear and aromatic, I transferred the green beans to a plate.  In the same pan (without turning off the heat) I drizzled a small bit of olive oil (about a 1/2 tsp), chopped the meatloaf to bits (2 servings), threw in 3 chopped up basil leaves, 1/4 cup of chicken broth, and added the other half of the roughly chopped tomato to the mix. I cooked it on medium heat for about 2 minutes, then let it reduce for about 30 seconds on high heat, stirring to make sure nothing stuck to the pan. Man oh man, was it ridiculously delicious. It was like a gourmet meal for the lazy...or the very tired mama.

This meal is proof that no matter how tired you are, you don't have to grab the phone and order that take-out that's just going to make you feel awful.  Sure, it's fine for once in a while, but if you have a life like most people, you're busy, and it's easy to get in a take-out rut.  Do yourself a favor, Drop the phone, and try cooking. This dinner took less than ten minutes to throw together.  The meatloaf itself is only 5 minutes or less of prep.  Plus, the more often you try new techniques and recipes, the more quickly you will be able to get things done in the kitchen.  Be a fearless home cook!

For a really great meatloaf recipe, click here. Just replace the 1lb beef for 1lb ground turkey (I prefer 1/2 dark and 1/2 white for meatloaf).

Once you've tackled that meatloaf, give this one a go! There are more ingredients/steps involved, but it's really delicious! (and it's great for sneaking some vegetables into your anti-vegetable family members!)

Tuesday, October 2, 2012

Fall Crock Pot Brisket


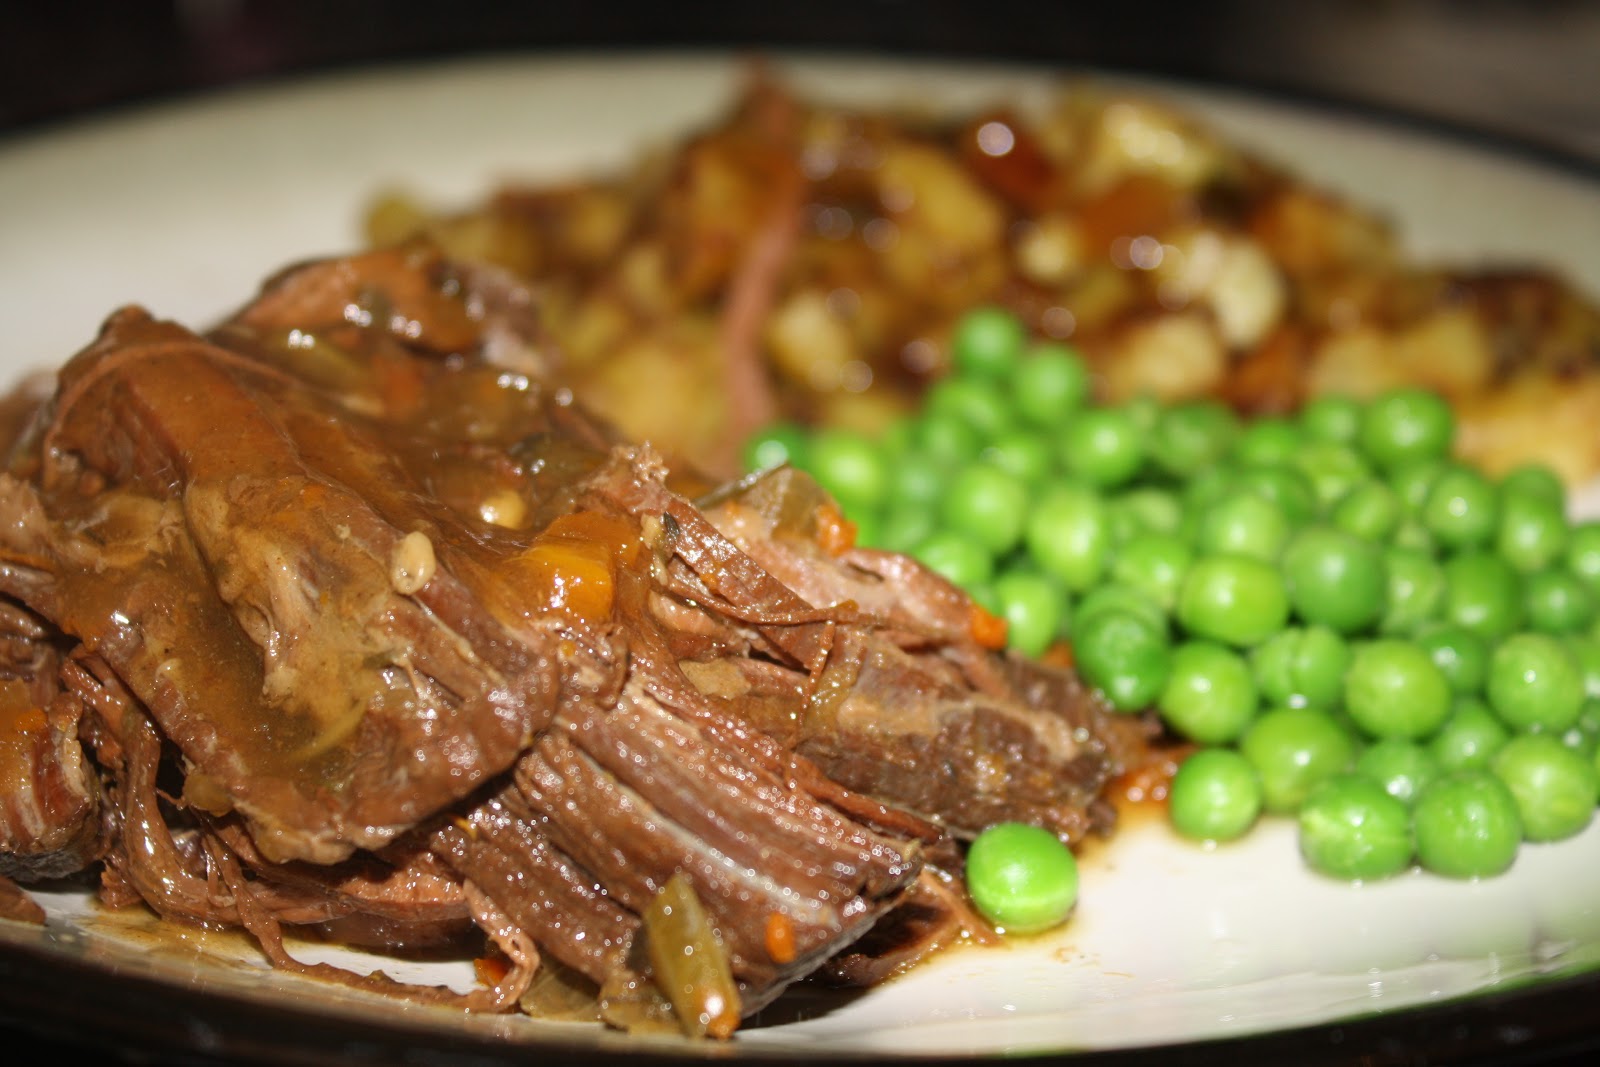
Brisket is hands down one of my favorite foods.  There's something so homey about a well made brisket.  Maybe it's because it reminds me of cooler weather and happy holidays with our friends Ellyn and Leon and their family.  Isn't that what comfort food is all about- food that warms us, satiates us, and reminds us of happy times with people that we love?
 
 
This is not a difficult meal to make.  In fact, it's kind of perfect in it's simplicity since you just toss all the ingredients in the crock pot, and leave it alone until the brisket is falling apart and your house is filled with the savory, hearty flavors of carrots, onions, herbs, and beef at its finest.  Laela had a great time helping "shake shake shake" the spices in, as well as tossing in the veggies.
 
Fall Crock Pot Brisket
 
Ingredients:
  • 2 lb Brisket
  • 1 Medium onion, diced
  • 3 Large carrots, chopped
  • 2 stalks celery, chopped
  • 1 Stalk thyme (leaves only)
  • 1 Stalk rosemary, chopped (leaves only)
  • 4 Leaves of sage, chopped
  • Salt and Pepper
  • 2 Cups beef broth
  • 2 Tb Worcestershire sauce
  • 2 tsp Balsamic vinegar
  • 4 garlic cloves, finely chopped
  • 3 Potatoes, chopped or cubed (optional)
  • 1 Tb Corn starch
Instructions:
 
For the Brisket:
  • Place the brisket, onion, garlic, worcestershire, balsamic vinegar, carrots, celery, thyme, rosemary, sage, potatoes, and broth in the crock pot.
  • Cook on the lowest setting (but not on warm) for 6-10 hours, or until the brisket is falling apart when you place a fork in it (brisket will "string" and "pull" apart.)
  • Serve as is, or with gravy.
For the gravy:
  • Take 1 cup of the drippings/broth from the crock pot and place it in a medium saucepan on medium-high heat.
  • In small ramekin or cup, whisk together 1 tsp corn starch and 2 tsp water.
  • Whisk in the corn starch mixture with the broth/drippings.
  • Taste for seasoning.  Add salt and pepper as necessary.
  • For a gravy with more herb flavoring, whisk in a few chopped leaves of rosemary, thyme, and sage.
  • Whisk until thickened.
  • Serve!
 

Monday, October 1, 2012

Pizza Party!


I'm a little burnt out.  We're moving in a few weeks and even though most of the work is done, it's just draining.  What do we do when things are stressful?  We find ourselves some fun!
 
Laela's best friend, Bailey came over for a sleepover a few days ago.  We made all kinds of goodies- cookies, pancakes, and most importantly, PIZZA!  That morning, I had discovered something called "Fleischmann's® Pizza Crust Yeast" that claimed to make pizza crust in 15-minutes instead of having to wait for the dough to rise like with normal pizza crust.
 
The package didn't lie!  I made one batch of pizza dough with the girls, and we had 4 mini pizzas assembled and ready to be eaten in less than a half hour.  We had a lot of fun creating our own pizzas! 
 
The best part was that girls really enjoyed making their own dinner.  Laela and Bailey were so proud of their pizzas!  If you're the type to get nervous having tiny cooks in the kitchen, this is a really great way to have them learn about cooking without stressing you out- just put all of the toppings into bowls, help them mold their pizzas, and let them put on the toppings!               
 
30 Minutes or Less Pizza 
 
Ingredients:

For the Crust:
1-3/4 to 2-1/4 cups all-purpose flour
1 envelope Fleischmann's® Pizza Crust Yeast
1-1/2 teaspoons sugar
3/4 teaspoon salt
2/3 cup very warm water (120 to 130°F)                      
3 tablespoons oil
1Tb Italian seasonings or freshly chopped basil

Toppings:                       
Pasta sauce
Other toppings as desired
Shredded mozzarella cheese


Instructions:
  • Preheat oven to 425°F.
  • Combine 1 cup flour, herbs, undissolved yeast, sugar and salt in a large bowl. Add very warm water and oil; mix until well blended, about 1 minute. Gradually add enough remaining flour to make a soft dough. Dough should form a ball and will be slightly sticky (kind of like if paste and play dough had a baby). Knead ("fold, push, and turn" the dough, and repeat) on a floured surface, adding additional flour if necessary, until smooth and elastic, for about 4 minutes.  If the dough becomes too sticky, just add more flour and work it into the dough.
  • If making 4 pizzas as we did, break the dough into 4 even sections.  Gently pat dough with floured hands to create a circle.  If you like thin crust, you can roll it a little less than 1/4 inch thick.  Don't go much thinner though, or it won't hold your toppings well.
  • Grease the baking sheet/pizza pan/pizza stone.  I just sprayed our pizza stone with cooking spray.  *I highly suggest investing in a pizza stone.  They'll only run you about $15, and your pizza will taste a lot better.  It gives the pizza a really great crunch to the crust, whereas a baking sheet or pizza pan don't.
  • If you like, spread some sauce on the crust. Top with desired toppings and sprinkle with cheese.
  • Bake on lowest oven rack for 10 to 15 minutes, until cheese is bubbly and crust is browned.  If making thick crust pizza, add about 5 minutes to the bake time.
  • Enjoy!