Showing posts with label carrots. Show all posts

Monday, April 8, 2013

Pregnancy and Bolognese

I have been a terrible, rotten blogger lately.  The truth is, that for 15 of the last 16 weeks, I've had no desire for food.  Every time I've tried to eat it, my body rejects it.  I've been taken down with a case of pregalimia.  Brutal.

If you haven't heard of pregalimia, then you have either a. never known a pregnant person with "all the time sickness" (morning sickness is seriously the most annoying phrase EVER.  It has nothing to do with the morning.  It has to do with things being smelly, the very cute little alien that has taken over your body and turned you into a vomatious demon, and a very disturbing relationship with your head in the toilet- or the sink- or the trash can...), or a. you are one of those people that have only seen the bright side of pregnancy (i.e. your wife/significant other/friend never got sick, or she kicked it old school, and hid from you until she woke up and saw the sunlight with a rumble in her stomach that said: FEED ME NOW!)

Now that I've hit week 16, I finally have a (mostly)steady, ravenous desire for food.  This is one of those lovely times when living in Italy is first world problems.  What?  You're pregnant!  'No cured meats little lady, but here ya go, have some bolognese!'  It's wonderful.  Good grief.  Writing this blog is making me hungry. (Yay!)

Speaking of bolognese, or ragu, as it is known to some, this is one of the recipes that I have come to love since moving to Firenze.  A good girlfriend gave me the recipe, and it's one of the few things that I've ever made that if it was in our house everyday, my husband wouldn't be able to resist it.  Ever.


You'll need:
  • 2 tbsp olive oil (I prefer extra virgin)
  • 6 rashers of streaky 'pancetta' bacon, chopped
  • 2 large onions, chopped
  • 3 garlic cloves, crushed
  • 2 carrots, chopped
  • Stick of celery, chopped 
  • 1kg/2¼lb lean minced beef (I usually use what is sold as "ragu meat" in Firenze.  Pork is just as tasty as meat if you prefer it.)
  • 2 large glasses of red wine (I prefer Chianti)
  • 2x400g cans chopped tomatoes (or 1 jar of passata- a type of tomato puree for those that don't like a chunky sauce)
  • 2 fresh or dried bay leaves
  • salt and freshly ground black pepper
  • 800g-1kg/1¾-2¼lb dried tagliatelle or a good artigianale pasta that will hold up to the ragu.
  • freshly grated parmesan cheese (optional for serving)
Instructions:

1. Heat the oil in a large, heavy-based saucepan and fry the bacon until golden over a medium heat.

2.  Add the onions, garlic, carrots, and celery, cook until softened, and the onions are clear.

3.  Increase the heat and add the minced beef. Fry it until it has browned. Make sure to "chop" at it with your spatula so that the meat gets nice and small (and the veggies too as they break down and cook).

4.  Pour in the wine and boil until it has reduced in volume by about a third. Reduce the temperature.  Stir in the tomatoes and bay leaves.

5. Cover with a lid and simmer over a gentle heat for 1-1½ hours until it's rich and thickened, stirring occasionally.

6.  Add salt and pepper to taste.

7.  Serve over tagliatelle, or stir in with a hearty pasta that sticks to the ribs on a cold day!

8.  Top with freshly grated parmesan cheese.

This is also one of those delicious sauces that tastes better with each passing day, so don't be afraid to make it ahead of time and use it later.  (Although, once you taste it, I guarantee that it won't last long!  I've caught Kyle eating it by the spoonful!)

Monday, February 4, 2013

Chicken Pot Pie 2

 
Okay, I admit it, we've visited Chicken Pot Pie before.  And yes, that recipe is still one of my favorites.  However, this is the perfect recipe for when you are just too busy to make pie crust, and you want to throw something hearty and healthy together quickly.
 
I apologize for not having a picture of the entire product, but Laela was yanking on my pant leg telling me that she was "STARVING", so chicken pot pie with a hunk cut out is what you get.
 
Easy Chicken Pot Pie (mostly from scratch!)
 
You'll need:
  • 1 sheet of puff pastry
  • 2 chicken breasts (can be leftover from roasted chicken- that's what I used)
  • 2 carrots, chopped
  • 1/2 onion, chopped
  • 2 potatoes, chopped
  • 1 celery stick, chopped
  • 1/2 cup frozen peas
  • 1Tb butter
  • 1Tb flour
  • 1 cup chicken broth/stock
  • 1 sprig rosemary
  • 1 sprig thyme
  • Salt and pepper
Instructions:
  • Preheat your oven to 425-degrees Fahrenheit.
  • Heat a large skillet to medium heat.  Add a few glugs of olive oil.
  • Place the onion, carrots, celery, and potatoes in the pan to cook for about ten minutes.  Stir occasionally.
  • While the vegetables are cooking, heat a medium saucepan to medium-high heat.
  • Add the butter and flour.  Whisk until they are well combined.  Do not allow it to brown. 
  • Pour the chicken stock/broth into the pan with the butter/flour mixture.  Whisk until it thickens to an almost gravy consistency.
  • Mix in the rosemary (I cut my rosemary with scissors to make it nice and easily diced) and thyme leaves.  Add salt and pepper to taste.
  • If using raw chicken, cut it into cubes.  Put it in the pastry dish.
  • Add the cooked vegetables, frozen peas, and the chicken stock/broth mixture to the pastry pan.  Gently stir the ingredients together.  They'll meld together well while they bake, so don't go overboard trying to mix everything together.
  • Gently unroll the puff pastry over the pastry dish (I usually use a pie pan, but you can use anything you like- corning ware is great for this).  Gently pinch the sides so that they adhere to the dish.  If you have any leftover dough, hand it over to your little one to make fun shapes, and then top the pastry with the shapes.
  • If you want to it to have a rich golden texture, use a pastry brush to paint the pastry with an egg wash (1 egg that's been beaten with 3 tablespoons of water).
  • Bake for 30 minutes.
  • Enjoy!

Tuesday, October 2, 2012

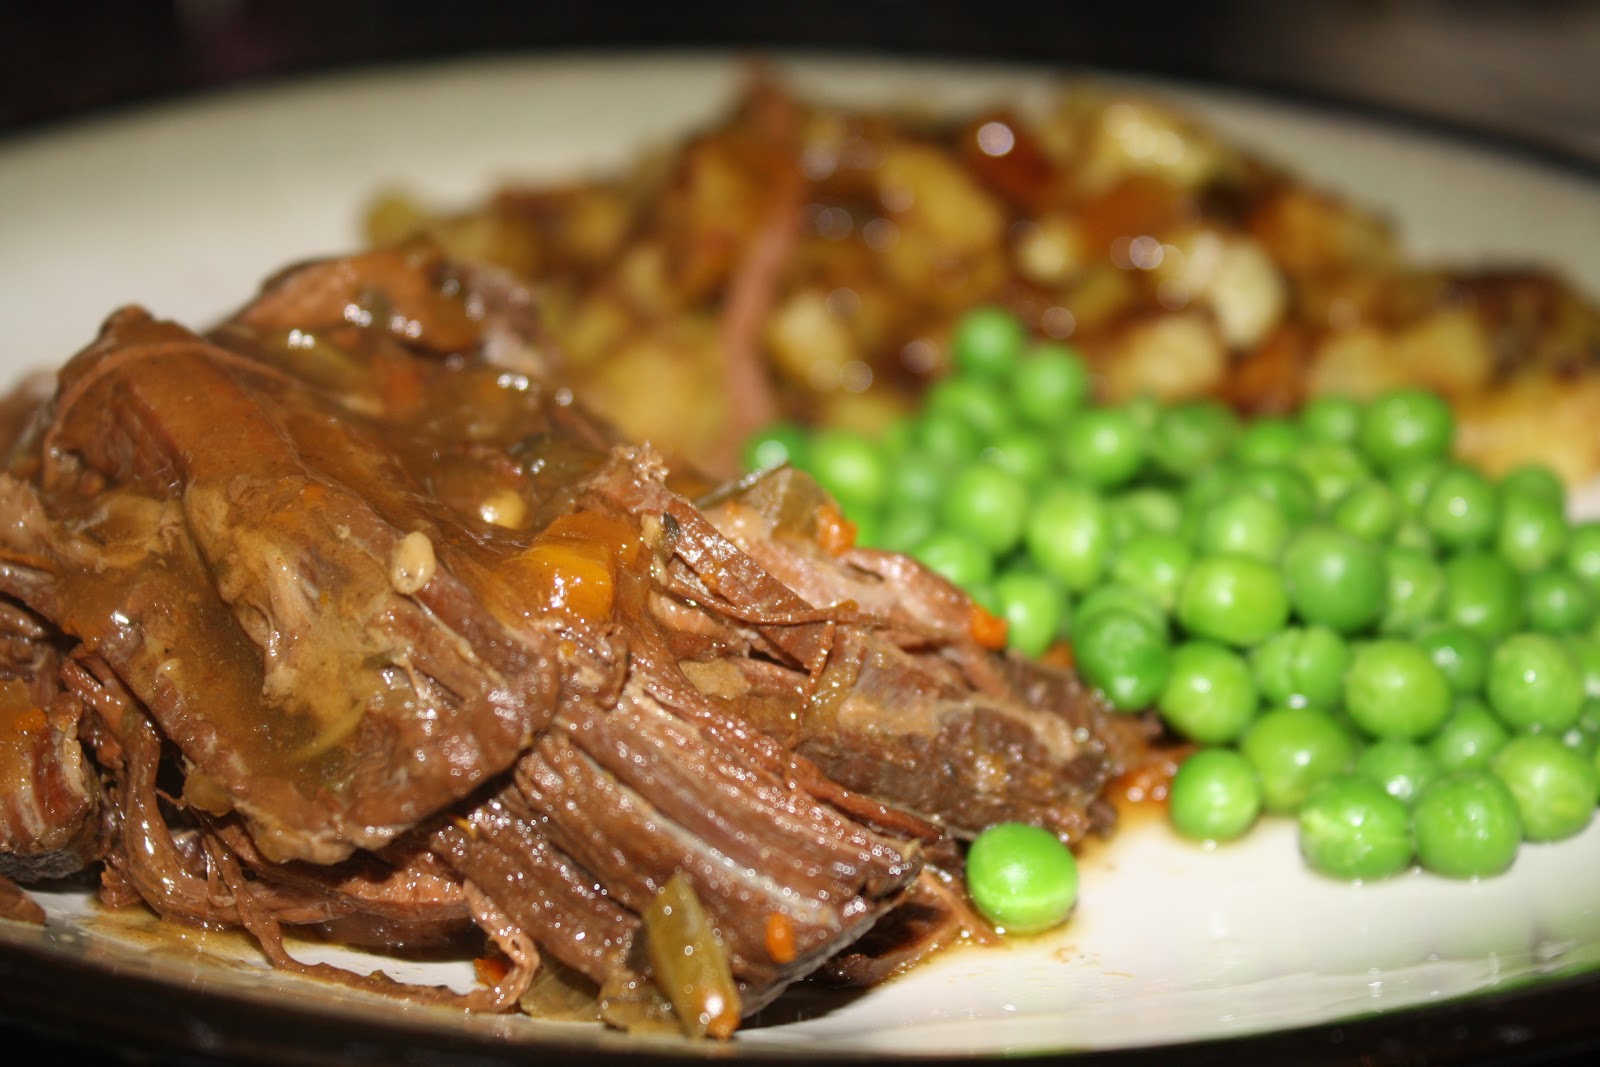
Fall Crock Pot Brisket


Brisket is hands down one of my favorite foods.  There's something so homey about a well made brisket.  Maybe it's because it reminds me of cooler weather and happy holidays with our friends Ellyn and Leon and their family.  Isn't that what comfort food is all about- food that warms us, satiates us, and reminds us of happy times with people that we love?
 
 
This is not a difficult meal to make.  In fact, it's kind of perfect in it's simplicity since you just toss all the ingredients in the crock pot, and leave it alone until the brisket is falling apart and your house is filled with the savory, hearty flavors of carrots, onions, herbs, and beef at its finest.  Laela had a great time helping "shake shake shake" the spices in, as well as tossing in the veggies.
 
Fall Crock Pot Brisket
 
Ingredients:
  • 2 lb Brisket
  • 1 Medium onion, diced
  • 3 Large carrots, chopped
  • 2 stalks celery, chopped
  • 1 Stalk thyme (leaves only)
  • 1 Stalk rosemary, chopped (leaves only)
  • 4 Leaves of sage, chopped
  • Salt and Pepper
  • 2 Cups beef broth
  • 2 Tb Worcestershire sauce
  • 2 tsp Balsamic vinegar
  • 4 garlic cloves, finely chopped
  • 3 Potatoes, chopped or cubed (optional)
  • 1 Tb Corn starch
Instructions:
 
For the Brisket:
  • Place the brisket, onion, garlic, worcestershire, balsamic vinegar, carrots, celery, thyme, rosemary, sage, potatoes, and broth in the crock pot.
  • Cook on the lowest setting (but not on warm) for 6-10 hours, or until the brisket is falling apart when you place a fork in it (brisket will "string" and "pull" apart.)
  • Serve as is, or with gravy.
For the gravy:
  • Take 1 cup of the drippings/broth from the crock pot and place it in a medium saucepan on medium-high heat.
  • In small ramekin or cup, whisk together 1 tsp corn starch and 2 tsp water.
  • Whisk in the corn starch mixture with the broth/drippings.
  • Taste for seasoning.  Add salt and pepper as necessary.
  • For a gravy with more herb flavoring, whisk in a few chopped leaves of rosemary, thyme, and sage.
  • Whisk until thickened.
  • Serve!
 

Monday, August 15, 2011

Roast This!


One of my absolute favorite foods is roasted chicken.  This time last year, I wrote a post called Perfect Roast Chicken.  Today's recipe is very similar.  The only difference is that I took the extra time to make a brine to marinate the chicken.  This packs the chicken with even more flavor, and keeps the chicken extra moist (especially when you're cooking it with the idea that it will be reheated).

Briny Roasted Chicken

For the Brine:
  • 1/4 cup kosher salt
  • 4 cups water
  • 1Tb cloves
  • 1Tb cracked pepper
  • 3 garlic cloves
  • 1/2 tsp paprika
  • 1 tsp onion powder
For the Chicken:
  • 1 approx. 3 1/2 lb roasting chicken
  • 1 lemon
  • 2 carrots
  • 2 celery stalks
  • 1 large onion
  • 1 small bunch of rosemary, thyme, and/or sage
  • 1 bulb garlic
  • Olive Oil
  • Salt and pepper
Instructions:

To make the brine:
  • In a large soup pot, combine the water and all of the ingredients.
  • Bring to a boil.
  • Simmer for ten minutes.
  • Take off the heat.
  • When room tempurature, place the chicken in the brine.  You can brine it for 20 minutes to 1 hour.

To prep your chicken:
  • Preheat your oven to 475 degrees.
  • There's no need to peel the vegetables- just give them a wash and roughly chop them.
  • Break the garlic bulb into cloves, leaving them unpeeled.
  • Pile all the vegetables and garlic into the middle of the large roasting pan and drizzle with olive oil. (The chicken roasts on top of the vegetables.)
  • Take the chicken out of the brine.
  • Dab it dry with a paper towel.
  • Drizzle the chicken with olive oil and season well with salt and pepper, rubbing it all over the bird.
  • Carefully prick the lemon all over, using th tip of a sharp knife (if you have a microwave, you could pop the lemon in there for 40 seconds at this point as this will really bring out the flavor).
  • Put the lemon inside the chicken's cavity, with the bunch of herbs.
To cook your chicken:
  • Place the chicken on top of the vegetables in the roasting pan and put it into the preheated oven.
  • Turn the heat down immediately to 400 degrees fahrenheit and cook the chicken for 1 hour and 20 minutes.
  • Baste the chicken halfway through cooking and if the vegetables look dry, add a splash of water to the pan to stop them from burning. (Be careful, this may cause the pan to steam up at your face if you're too close to it.)
  • When cooked, take the pan out of the oven and transfer the chicken to a board to rest for 15 minutes or so.
To carve your chicken:
  • Remove any string from the chicken and take off the wings.
  • Cut through the joint and pull the leg off.
  • Repeat on the other side, then cut each leg between the thigh and the drumstick so you end up with four portions of dark meat.
  • Place these on a serving platter.
  • You should now have a clear space to carve the rest of your chicken.
  • Angle the knife along the breastbone and carve one side off, then the other.
  • When you get down to the fussy bits, just use your fingers to pull all the meat off, and turn the chicken over to get all the tasty, juicy bits from underneat. You should be left with a stripped carcass, and a platter full of lovely meat and roasted veggies.

I know that this seems like a labor intensive recipe, but the truth is that the brining really is worth it.  We ate this chicken for four days, and ate it in a different way each time.

The first evening, I made the chicken with the potatoes and carrots.  The second evening, I mixed it with the lentils, chunky tomatoes and beans that I'd had ready in the freezer.  The third day, I made it for lunch.  I shredded some chicken, cut up some tomatoes, and shredded some lettuce and put it in a wrap with some swiss cheese.  On the fourth day, I had it with leftover mashed potatoes from the bangers and mash I'd made for breakfast.

The chicken never got dry, tasted great cold or hot, and froze easily.  Try it!

Tuesday, August 9, 2011

Meatloaf Burgers, Lentils, and Chunky Tomatoes and Bean Pasta Sauce

Life is a bit difficult right now. I've had to completely adjust our program in so many ways that I feel as if my head is spinning. Kyle is working double shifts to get acclimated to his new role. Laela is fine while we're out, but is very, very clingy when we're home. She cries every night for her Daddy. She hugs her dinosaur book and says "Daddy dinosaurs!!"


As for me, I'm just trying to keep things together. Kyle has always traveled a lot, but we always made up for it with lots of phone time, writing letters, and making sure to spend a lot of time together when he gets home. We've always tried to cram every moment of family time that we can, much in the same way that you want to sop up the gravy of a really good roast. You want to savor it, and make it last as long as possible.

Because we need this time, I've had to strive for a balance with things that I'd never really had to worry about before. I'm trying to make new friends for Laela and I, but I also have to make sure to keep the two hours a morning that Kyle's available this week, and possibly next week, free. I wasn't prepared for Laela to beg for Dada to get out of bed, but then for her to ignore him. I wasn't prepared for the tears when he left this morning. It's a lot.

Sad toddler aside- which is generally only at bedtime and morning time when Kyle leaves, things are going okay. I was really nervous about having to switch from dinner being the main sit down family meal.  Now it's all about breakfast/brunch before Kyle goes to work.

I've also had to readjust our meals in that I have to make dinner for the next day the night before. So all of the meals that I'm making from now on, with the exception of most breakfasts, are easy to freeze, and taste just as good microwaved. Just because Kyle's not eating dinner with Laela and I anymore, doesn't mean he shouldn't have a tasty, healthy, energizing meal. My focus right now is making sure that we all stay healthy.

Over the next few weeks, I will be sharing recipes that are easy to freeze, and will taste great reheated.
Here is a recipe for three things that can be frozen and reheated, and will please everyone in your house.


Meatball burgers
You'll need:
  • 1 lb ground chuck (I prefer grass fed when possible)
  • 1 egg
  • 1 cup breadcrumbs
  • 2 diced sprigs parsley (stems too)
  • Salt and Pepper
  • Good squirt of ketchup
  • 1/2 tsp onion powder
  • 1/2 tsp garlic powder
  • olive oil
Instructions:
  • Mix all of the ingredients together in a bowl.  If your mixture feels too wet, add a bit more breadcrumbs.
  • Form patties out of the mixture.
  • Heat a skillet to medium heat.  If you are using grass-fed beef, keep an eye on your skillet.  If it gets too hot, it will cook faster than regular beef. 
  • Drizzle some olive oil in the pan. 
  • Cook each burger for 3-6 minutes per side, depending on how well done you like them.  If you plan to freeze them, it doesn't hurt to cook them a little under what you normally prefer so that when you reheat them, they don't dry out.
  • To keep them from drying out when reheating, drizzle some water or broth on the burger when you reheat it.


Lentils
You'll need:
  • 1/2lb lentils
  • 1 chopped carrot
  • 1 chopped celery
  • 1/2 chopped onion
  • 2 chopped garlic cloves
  • Water
  • 1 bay leaf
  • Salt and Pepper
  • Olive oil
Instructions:
  • Heat a large sauce pan to medium heat.
  • Drizzle a bit of olive oil in the pan.
  • Add the garlic, carrot, onion  and celery.
  • Cook for five minutes.
  • Add the lentils, bay leaf, and pasta sauce.
  • Cover the lentils with about a 1/2 inch of water.
  • Bring to a boil.
  • Lower to medium low heat.
  • Cook for about 20 minutes.
  • Add salt and pepper as needed.
Chunky Tomato and Beans Pasta Sauce
You'll need:
  • 1 cup pasta sauce (I use homemade, but you can use jarred if you want.)
  • (1) 8oz can of diced tomatoes
  • (3) cloves garlic, chopped
  • (1) 8oz can cannellini beans
  • (1) oz can red kidney beans
  • Salt and Pepper
Instructions:
  • Heat a large saucepan to medium-low heat.
  • Mix all of the ingredients in the pan.
  • Cook for ten minutes.
This is one of those meals that each compontent is delicious alone, but is also great mixed together.  Yesterday, I defrosted some of the lentils and pasta sauce and cooked it with some whole grain pasta.

Put down the premade frozen meals, and give some of the meals I make over the next few weeks, and give them a try.  I promise, you won't be disappointed!

Tuesday, March 22, 2011

Beef and Ale Stew

Oh Spring, supposedly you're here, and when I look outside, it really looks like it!  Then I go outside.  And have to scurry in for my coat.  And scarf.  And normal shoes.  Ugh.  I was so looking forward to rocking some flipflops and being able to play outside for longer than 20 minutes! 

Alas, nature is not on my side.  The one benefit is that we can still rock out some stew!  (We live in one of those houses where certain foods are considered seasonal.  Kyle refuses to allow for hamburgers in Winter or lasagna and stew in Spring.  Personally, I could eat anything anytime, but I've got to respect his quirks.  And go out for hamburgers when I want one in Winter!)

We've visited a recipe similar to this before when I shared my beef beerguinon recipe, but this one has a lot less steps and takes some seriously minimal effort.  I used one of my favorite chefs, Jamie Oliver, for this one (thank you Food Revolution!), and added my own little twist.


Beef and Ale Stew
serves 4-6

Ingredients:
  • 2 stalks celery
  • 2 medium onions
  • 2 carrots
  • olive oil
  • 1 heaped tablespoon all-purpose flour
  • 1 x 14-ounce can of diced tomatoes (or if you don't like chunky tomatoes, tomato puree)
  • sea salt and freshly ground pepper
  • 2 cups brown ale, Guinness or stout (I used Terrapin Brown IPA)
  • 3 fresh or dried bay leaves
  • optional:  1 cup diced tomatoes, 2 cups peas, 4 medium potatoes- red or yukon gold.
Instructions:
  • If using the oven to cook your stew, preheat it to 350-degrees
  • Trim the ends off your celery and roughly chop the stalks
  • Peel and roughly chop the onions
  • Peel the carrots (I was lazy and didn't do this), slice lengthways, and roughly chop
  • Put a Dutch oven on a medium heat
  • Put all the vegetables and your bay leaves into the pan with 2 lugs of olive oil and fry for 10 minutes
  • Add your meat and flour
  • Pour in the booze and canned tomatoes/puree
  • Give it a good stir, then season with a teaspoon of sea salt (less if using table salt) and a few grinds of pepper
  • Bring to a boil, put the lid on, and either simmer slowly on your cooktop or cook in an oven for three hours.
  • Remove the lid for the final hour of simmering/cooking and add a splash of water if it looks a bit dry
  • When done, your meat should be tender and delicious
  • Remove bay leaves before serving and taste to see if it needs more salt and pepper.
Here's where I deviated from Jamie...

I cooked some quartered potatoes in olive oil, garlic and onion powder and stirred them in with the stew when there was an hour of cooking left.

Since Kyle hates chunky tomatoes, I put them at the bottom of Laela and my bowls so we'd have them, and just poured the stew on top.

I also added some peas to the bottom of Laela and my stew, because well, I always like something green, and I had a hankering for peas.


This meal is delicious, and it just gets better with each passing day!

Monday, March 7, 2011

Sneaky Meatloaf


I know we've visited meatloaf before.  I promise you though, this meatloaf is a little bit different.  I did the usual with the ground meatloaf mix (lamb, beef, and pork), egg, and breadcrumbs.  Here's where we get a little sneaky...I pureed a bunch of yummy steamed veggies- peas, broccoli, carrots, celery and onion.  I topped it with pasta sauce, and there you go!  A super simple, super healthy, and incredibly easy dinner!

You need:
  • 1 pound meatloaf mix
  • 2 celery stalks
  • 2 carrots
  • 1 medium onion
  • Italian seasoned breadcrumbs
  • 1 egg
  • Ketchup
  • Broccoli (I use about a cup)
  • Peas (I use a little less than a cup)
  • Pasta Sauce
  • Salt and Pepper
Directions:
  • Chop the celery, carrots and onions.  Sweat (cook until fork tender- you'll see moisture released as you do this) the celery, carrots and onions.  Steam the broccoli and peas. 
  • Puree all of the vegetables.
  • In a large bowl, add the vegetables, salt and pepper, egg, and a good squirt of ketchup.  Add enough breadcrumbs to bind it together so it's not slimy, but moist and firm.
  • Preheat your oven to 350-degrees.
  • Drizzle olive oil onto a baking sheet
  • Form your meatloaf/spice/breadcrumb mixture into two small logs.
  • Cook at 350-degrees for twenty minutes.  Top with pasta sauce (or if you don't like pasta sauce, my girlfriend Laraine swears by barbecue sauce- I've tried it and I've gotta say, it's a great change of pace, and is super yummy), and cook for 15-20 more minutes.
  • Wait about five minutes so that you don't lose its juiciness, and serve.

Enjoy!

Thursday, March 3, 2011

Pop in for Some Peppers Soup!


A while back, I had mentioned that I was going to start trying to work with what is already in my fridge, rather than run to the store every time I wanted to make dinner.  Part of the reason for this is to see what I can do at the end of the grocery week, and part of it is because I feel like sometimes trying new things with what's in the fridge can break me out of a food rut.

I've been in the mood for some hearty, soothing soups lately, so I decided to bust out some frozen mixed peppers that I had in the freezer and make a delicious pepper soup garnished with roasted potatoes.


Roasted Red, Green and Yellow Pepper Soup

Ingredients:
- Approx. 1 cup frozen mixed peppers (or one heaping handful)
- 2Tb Garlic (chopped)
- 1 small sweet onion, chopped.
- 3Tb butter
- 3Tb flour
- 2 cups chicken, vegetable, or beef stock (or 2 cups water with appropriate amount of boullion)
- 2 carrots, chopped.
- 2 celery stalks, chopped.
- 1 cup tomato sauce (you can use my super easy pasta sauce recipe if you want home made)
- Salt and Pepper to taste
- Dash of Nutmeg
- Dash of Cinnamon
- Olive Oil

Instructions:
  • In a medium saucepan, boil stock.
  • While the stock is boiling, put a large saucepan on high heat.  Whisk butter and flour until it forms a paste.
  • Whisk in the stock, the pasta sauce, and add 1Tb garlic, the salt and pepper, nutmeg, and cinnamon.
  • Lower the heat to medium heat.
  • Heat a large skillet to medium high heat.
  • Pour a few glugs of olive oil into the hot skillet.
  • For 5- 8 minutes, fry up the carrots and celery until fork tender.
  • When fully cooked, put the carrots and celery into the food processor or blender.  (KEEP THE SKILLET HOT!)
  • Add the peppers, onions, and garlic to the hot skillet. 
  • Once the peppers, onions and garlic start to smell really aromatic and great, and look like they're losing liquid (sweating), pour the mixture into a blender or food processor and puree with the carrots and celery.
  • Whisk the puree into the cooking soup. 
  • Lower the heat to medium low heat.
  • Cook for at least twenty minutes.  This is one of those recipes that will taste great straightaway, but will also taste amazing the longer it cooks, or the next day as leftovers.
For the Garnish:
Ingredients:
- 3 or 4 medium Yukon Gold potatoes
- 2 Sprigs Rosemary
- 2 Sprigs Thyme
- Salt and Pepper to taste
- Onion Powder
- Garlic Powder
- Olive Oil

Instructions:
  • Preheat your oven to 350- degrees.
  • Wash and chop your potatoes.
  • Put your potatoes in a 3 inch deep baking dish.
  • Add all of the seasonings, and a drizzle of oil.
  • Mix together with your hands or tongs.
  • Bake for 20 minutes
  • Top your soup with it and enjoy!

*This soup freezes well for 6 months in a regular freezer and 1 year for a deep freeze.  I put it in individual sized containers so that it defrosts quickly and is easy for Kyle to bring for lunch.

My family realy enjoyed this soup!  And to top it off, when Kyle and I talked about it, it cost less than $5 to make!  (and there was enough for him to bring to work for lunch and for me to feed the baby for 4 days!)  Maybe it's crazy to try to make everything in the fridge before I grocery shop next (besides for milk and eggs), but it is kind of fun to see that it is possible to make really good food with what we have, and to know that we're not wasting anything.  Isn't there enough waste in the world?  And enough people that don't have enough, that we should try to use what we've got before accumulating more?  Just a thought.

For the weekend, I'll be sharing a deliciously bad for you fried dinner that I made Kyle when he was a bit hungover.  Next stop...fried green beans and homemade chicken nuggets.

Monday, February 7, 2011

Lentil Soup with a Dash of Love

Whenever I hear someone mention lentil soup, I think of two things- the worst soup I've ever had, and the best soup I've ever had.  One of the first times I had it, I swear it was cooked in water with salt and pepper.  It had NO love in it whatsoever.  The first time I remember really remember LOVING it was this older Greek woman's soup that was garnished with red peppers and had a faint taste of red vinegar.  I've tried my damnedest to make her recipe, and I've just never been able to figure out what she did to make it so amazing.

This go around, I asked my good friend, Dawn, to give me some tips on how she makes her soup so yummy.  Her family makes "lucky lentil soup" that is made for the first day of the New Year, and if I'm guessing correctly, whomever receives the bay leaf is to have good luck that year.  (I grew up with that same tradition, except the bay leaves were in spaghetti sauce..but that's a post for another day.)

Anyway, Dawn recommended some pureed celery and carrots (Can you say yum?  And sneaking in veggies!  I'm in!)  She also recommended sun-dried tomatoes, which sounds super awesome, but I didn't have any on hand, so I just had to improvise with a fresh tomato.


Here's my twist on lentil soup..

Ingredients:
  • (1/2 lb) Dried lentils
  •  (3) Carrots
  • (1) Celery stalk
  • (1) Medium Tomato
  • (2) Boullion cubes (I used vegetable, but I'm sure chicken or beef would be good too)
  • (4) Cups water
  • (2) Tb Crushed garlic
  • (1) Tb Onion powder
  • (1) Bay leaf
  • Salt and Pepper to taste

Directions:
  • Measure four cups of water and pour it into a medium soup pot.
  • Chop the celery and carrots.  (I used the celery leaves as well.) 
  • Add the celery and carrots to the boiling water.
  • Boil for ten minutes.
  • While the veggies are boiling, slice up the tomato.
  • Sprinkle some olive oil in a medium-high skillet.  Salt and pepper both sides of the tomato and place each slice in the skillet.  Lower the heat to medium heat.  Cook for two or three minutes per side.
  • DO NOT DISCARD THE VEGETABLE WATER.
  • Use a slotted spoon to take out the vegetables.
  • Put the carrots, tomato and celery in a food processor or blender and puree.
  • Rinse the lentils.
  • Pour the rinsed lentils into the vegetable water.
  • Add the pureed vegetables.
  • Add the crushed garlic and onion powder (if you want to use fresh onions, just sautee them and puree them.  I used onion powder because I didn't have onions on hand.)
  • Add the boullion cubes.
  • Bring to a boil.  Once you have brought the soup to a boil, lower it to a simmer and place a lid on the pot.
  • Cook for 20 minutes.  (This is one of those dishes that tastes better the longer you cook it.  I let mine simmer on low heat after the twenty minutes were up for an extra hour, for a total time of 80 minutes.  The rule of thumb with sauces and soups (and food in general, really) is that if you put a little love in it, it'll taste like it.  So if you have the time, definitely take it.  If not, it'll still be a pretty darn delicious soup!
Oh, and as you can see from this picture, Laela really loved this soup!!


I know that it seems like there are a lot of steps in this dish, and it may not be the simplest recipe I've posted...but it really isn't too difficult, and it's definately worth the effort!

*This soup will freeze for 6 months in a normal home freezer, and 1 year in a deep freeze.

Wednesday, January 12, 2011

Quick and Easy Lemon Garlic Tilapia

I had a pretty rough night last night.  Laela was chanting for Daddy before bed, so it really didn't help that the snow plows woke her up three times and reminded her that, nope, Daddy still isn't home to come cuddle her when she's freaked out.  If you see Mr. Snow Plow, thank him for cleaning our roads, but ask him if it's necessary to be so loud?  I'm just sayin'.

Since I'm so zonked, I'm going to give you the easiest fish recipe you'll ever make in  your life.  Seriously.  I came up with this the other night when I realized that it was 6pm and I had nothing defrosted.  A quick stop at the fish market and I had dinner ready in ten minutes, prep and all!

You'll need:

1lb tilapia
1 lemon
4Tb olive oil
Salt and pepper
1 heaping tablespoon of garlic

Heat your pan to medium heat.  Drizzle your 4Tb of olive oil in the pan.  Add the garlic.  Slice one half a lemon into thin slices and place them in the pan.  Salt and pepper both sides of your fish.  Place your fish on top of the lemon slices.  Squeeze the other half of lemon, drizzling the juice all over the fish.  Cook about 4 minutes per side and you're done!

I made this with some yummy couscous (takes five minutes), peas (2 minutes), and steamed carrots (5 minutes).  The couscous and veggies all cooked while I waited for the tilapia.  It doesn't get much easier or faster than that!

Monday, November 22, 2010

Turkey Time is Coming!

I love Thanksgiving.  First of all, the food is always awesome (although I have to be honest, I always find myself wishing the Pilgrims and Indians had bonded over some steaks rather than turkeys), and I love having my family get together.  I'm super excited this year especially, since we're hosting Thanksgiving at our house!  Our menu consists of turkey, nicoise salad, cranberry sauce, sweet potato casserole, garlic mashed potatoes, roasted vegetables, green bean casserole, corn, peas, stuffing, honey glazed carrots, homemade corn bread, a hazelnut tart, and pumpkin pie.

I'm making the honey glazed carrots mainly because my Daddy doesn't like regular carrots.  He said something about liking sweet carrots, so hopefully he'll appreciate the effort!  Here is my honey glazed carrots recipe:

Ingredients:
  • Salt
  • 1 pound baby carrots
  • 2 tablespoons butter
  • 2 tablespoons honey
  • 1 tablespoon lemon juice
  • Freshly ground black pepper
  • 1/4 cup chopped flat-leaf parsley
Directions:
In a medium saucepan, bring water to a boil.  Add salt to the water.  Then add the carrots and cook until tender for 5 to 6 minutes.  Drain the carrots.  Toss the carrots back into the pan.  Add the butter, honey and lemon juice. Cook until a glaze coats the carrots (this should take about five minutes). Season with salt and pepper to taste and garnish with parsley.

Just as a side note, some easy ways to prepare for Thursday is to make things a few days ahead of time.  Today I made my onion dip, my pie crusts, and I organized all of my Thanksgiving ingredients and recipes.  I'm making my desserts on Tuesday, and almost all of my sides on Wednesday. Try to keep it simple so you don't make yourself crazy, and allow yourself to enjoy the day.

Wednesday, I'll share the pudding recipe I found in my Nigella Express cookbook.  My husband's exact words after his first bite were "Oh God."  After his second bite?  "This is NOT the Jello I grew up with!"
I'm planning on making this for my chocoholic mother-in-law when she comes in from the 'Burgh on Wednesday.

Monday, October 25, 2010

A Simple, Healthy Fall Meal

When I think fall, I think chicken pot pies, roasts with potatoes, roast beef sandwiches double dipped, and lots and lots of soup.  I think I made it pretty clear in my last post that I've about had it with chicken soup, and when I started to come down with the diptheria that the rest of my house had, this herb infused, braised chicken with quinoa spirals and veggies was right up my alley.


The picture was kind of an afterthought because I was starving, so please forgive the shanty quality.


For the quinoa, I purchased some Ancient Harvest Quinoa Spirals.  I cooked the quinoa pasta according to the package.

Here's what you'll need for the chicken and veggies (this served 4 adults and 1 toddler):

(2) Large boneless chicken breasts
(1) Quart of organic chicken stock (or a quart of homemade)
Seasonal veggies (I used two Yukon Gold potatoes, 1 zucchini, 3 large carrots, and 2 stalks of celery)
(2) Sprigs Rosemary
(1) Small bunch of Thyme
(2) Sprigs of Sage (or about 8 large leaves)
(1) Tb chopped Garlic
Salt and pepper to taste

  • Heat your cast iron skillet to medium high and pour in the chicken broth, garlic and herbs.  Cut each chicken breast into thirds, and put them in the skillet with the lid on.  (This will "steam" the chicken and really bring out the flavor)
  • Bring the heat down to medium and let the chicken cook for five minutes without the vegetables.
  • Chop the vegetables (the smaller you cut them, the quicker they cook) and add them to the chicken/stock mixture.
  • Put the lid back on the pan and let it cook for another five minutes.  Bring the heat down to medium-low heat.  Stir the chicken and veggies around to make sure all the flavors are mixing in well.  Taste the broth.  If it doesn't seem flavorful enough to you, add some chicken boullion.
  • If you're not ready to eat quite yet, you can leave the chicken and veggies on low for up to an hour.  They'll get packed with flavor and really be delicious.  Just make sure that the broth doesn't reduce too much, because you want that sauce for your pasta. 
  • When you're ready to chow down, mix your pasta with your chicken, veggies and broth.  Just fair warning, if you've never had quinoa before, it's super filling (because it's filled with oodles of protein!), so maybe pace yourself slow so you don't stuff yourself like a turkey!
This week is one of my family and friends favorite spoooktacular holidays, so check in with me later in the week for some yummy spooky treats, and some sweet treats for my parents wedding anniversary!

Wednesday, August 11, 2010

Perfect Roast Chicken


This chicken smelled so good, I ripped off some of the crispy, piping hot skin before I got a chance to take a picture of it!  The stabbed lemon and herbs stuffed into the cavity of the chicken sounds so simple and plain, but let me tell you, this will be one of the best bites of chicken you will EVER have.  Follow the recipe to the letter and you'll have a dangerously delicious and healthy meal that your family will love (or that you can live on for a week!).

It's a Jamie Oliver recipe from his Food Revolution cookbook, so be sure to try it!

Perfect Roast Chicken
Serves 4-6

1 x approximately 3 1/2-pound chicken, preferably free range, organic, or higher welfare
2 medium onions
2 stalks celery
1 bulb of garlic
olive oil
sea salt and freshly ground black pepper
1 lemon
a small bunch of fresh thyme, rosemary, bay or sage, or a mixture (I used a mixture and it was fantastic)

To prepare your chicken
Take your chicken out of the refrigerator 30 minutes before it goes into the oven. 
Preheat your oven to 475 degrees.
There's no need to peel the vegetables- just give them a wash and roughly chop them.
Break the garlic bulb into cloves, leaving them unpeeled.
Pile all the vegetables and garlic into the middle of the large roasting pan and drizzle with olive oil. (The chicken roasts on top of the vegetables.)
Drizzle the chicken with olive oil and season well with salt and pepper, rubbing it all over the bird.
Carefully prick the lemon all over, using th tip of a sharp knife (if you have a microwave, you could pop the lemon in there for 40 seconds at this point as this will really bring out the flavor).
Put the lemon inside the chicken's cavity, with the bunch of herbs.

To cook your chicken
Place the chicken on top of the vegetables in the roasting pan and put it into the preheated oven.
Turn the heat down immediately to 400 degrees fahrenheit and cook the chicken for 1 hour and 20 minutes. 
Baste the chicken halfway through cooking and if the vegetables look dry, add a splash of water to the pan to stop them from burning.  (Be careful, this may cause the pan to steam up at your face if you're too close to it.)
When cooked, take the pan out of the oven and transfer the chicken to a board to rest for 15 minutes or so.

To carve your chicken
Remove any string from the chicken and take off the wings.
Cut through the joint and pull the leg off.
Repeat on the other side, then cut each leg between the thigh and the drumstick so you end up with four portions of dark meat.
Place these on a serving platter.
You should now have a clear space to carve the rest of your chicken.
Angle the knife along the breastbone and carve one side off, then the other.
When you get down to teh fussy bits, just use your fingers to pull all the meat off, and turn the chicken over to get all the tasty, juicy bits from underneat.  You should be left with a stripped carcass, and a platter full of lovely meat and roasted veggies.

note:  Jamie Oliver has a recipe for gravy and bread sauce for this, but I made the chicken without gravy since it was so moist and delicious.  Plus Kyle, Laela and Darin were hungry, so I had to get to serving dinner!


Monday, June 7, 2010

One Sick Mama, and Some Easy Veggie Soup

Sorry for not posting last week. I got wailed with strep, or something like it (we're still waiting on my test results), and it pretty much put me out of commission until today, and I have to say, I'm still not feeling myself.
One of the many things that no one will tell you about being a Mom is that you really can't afford to get sick.  You might be thinking, "Well duh, you're Mom, everyone needs you."  What you don't realize until you're a Mom that you could be dying, and you'd still have to do the dishes, or clean up the overflowing diaper pail, or make sure the baby ate all her breakfast/lunch/dinner/snack.  You don't realize that no matter how fabulous your husband is, or helpful your parents are, that you are Mommy, and no matter how much codeine cough syrup the doctor may provide, you will wake up when your baby is crying at 2 AM for you.

I don't know about other Moms, but I'm a crazy person when it comes to my kid.  I nannied for 9 years.  I had my share of sleepless nights because of a kid with the flu, or a baby with croup.  I had my 4 AM morning wakeups because of a belly ache or a bad dream.  I also had my share of nights where I slept through babies crying and little ones complaining, because I knew then, as I know now, that the children will survive crying for a while until they pass out and go back to bed. 

The thing that's different about being a Mom rather than a Nanny is how difficult it is for me to give up my control and just let things be.  It's why crying it out wasn't really and option for me for a long time because it literally made me cry too.  When we finally did it, she really didn't do it for too long, and I truly believe that because I wasn't anxious over it, Laela had an easier time.

This past week was as awakening as it was challenging.  Kyle was extremely helpful with the baby.  The poor guy had to work from home all week while taking care of the baby.  I think in a way it was good because it was the first time he really got to see all that I do, and that it's not all playtime and reading books.  It wasn't easy to not be the one to snuggle the baby back to sleep, or give her the giggles, but it was really sweet to watch Laela and her Daddy bond in a new way.

The moral of the story?  Let your husband, partner, or friend help you out when you're sick.  We are Mommy, we are Superwoman, but even Superwoman needs to accept some soup and some help now and then.

Of course...I've got to end this post with my most favorite, and of course ridiculously easy vegetable soup recipe ever..

Easy Vegetable Soup
1 bag soup mix veggies
4 peeled and chopped carrots
3 large chopped potatoes
1 quart veggie or chicken stock
1 jar of spaghetti sauce (I make my own, but it you want to use premade, that's ok)
1 minced clove garlic
1 cup water
salt and pepper to taste

Toss everything in a big soup or spaghetti pot.  Bring to a boil.  Cook on medium low for 20 minutes.  Serve immediately, refrigerate for one week, or freeze for 3-6 months.  I personally don't like how the potatoes and carrots taste frozen, so when I freeze it I leave them out and add them when I defrost it.