Showing posts with label caraacakes. Show all posts
Wednesday, November 21, 2012
Thanksgiving in Italy
Thanksgiving is in a few days, and here I am, kitchenless, living in a hotel in a foreign country. I have to say, I've gone back and forth about how we'll celebrate. Should we go to an Italian restaurant claiming to make classic "American Thanksgiving fare"? Should I take a cooking class that one of the local cooking schools is hosting to learn a way to "fuse" the Italian idea of Thanksgiving with American Thanksgiving?
Maybe this is me having a moment where I don't want to change my culture. Thanksgiving is not an Italian holiday. It's American. I'm American. So me, with my crazy American, individualist, marching to the beat of my own drummer mindset, will be celebrating Thanksgiving late this year- when I can cook it, and celebrate it, in a way that makes me and my family feel at home. Until then, I'll just continue to enjoy Italian culture and their culinary expertise.
The truth is, I'm a thankful person. I was raised by a small village of people (particulary my parents) who taught me that thankfulness and family are not something you celebrate on single days. You should celebrate them and appreciate them often.
I'll never forget our first Thanksgiving with Laela. I was so exhausted (she was barely three months old), that there was no way this milk machine was going to throw a dinner together. My parents, my husband, and our baby daughter got ourselves together for a simple Thanksgiving dinner that Abner's (the best bbq you could get in the Northeast until they so sadly closed) gloriously threw together for us. It was a great Thanksgiving- in my Daddy's words: "We should be spending time together...not hiding in the kitchen."
That's what Thanksgiving is. It's about your family. It doesn't matter if you're risking your lives frying a turkey, baking pies, having pizza, or gorging on pizza. It matters if you're being together. So this year, be present. Put down the damn phones. Turn off the computers. Spend time together. I'm not giving advice on how to get everything out of the oven in time, or how to get it all hot simultaneously. I'm telling you to genuinely be thankful for the gifts you have been given.
Monday, September 24, 2012
Mini Apple Crumble
I love apple crumble. I love how it makes the house smell, I love its warm, cinnamony goodness, and I love that it means that fall is here! Unfortunately, I'm the only one in my house that loves it, so I've had to learn to modify the recipe.
This is probably the hands-down easiest dessert that I've ever made. Give it a try! You know you're looking for an excuse to go apple picking, so here it is!
Mini Apple Crumble
Serves 2-3 people
You'll need:
- 2 apples (I prefer Granny Smith), peeled and choopped/cubed/sliced
- 3 Tb Cinnamon
- 1 Tb Brown Sugar
- 1 tsp sugar (optional)
- 1 Tb Butter
- 1/4 cup Quick oats
- Preheat your oven to 350-degrees.
- In a small (2-3 cup) ramekin or corningware bowl (oven safe!!), mix the apples, 2Tb cinnamon, and 1 tsp sugar (I don't use the sugar, but on the rare occasion that Laela wants cooked apples, she prefers it with sugar).
- In a small mixing bowl, mix the oats, butter, brown sugar, and 1 Tb cinnamon into a crumble mixture.
- Sprinkle the crumble over the apples.
- Bake for 25 minutes.
- Serve and enjoy!
Friday, September 21, 2012
Birthday Cupcakes for School
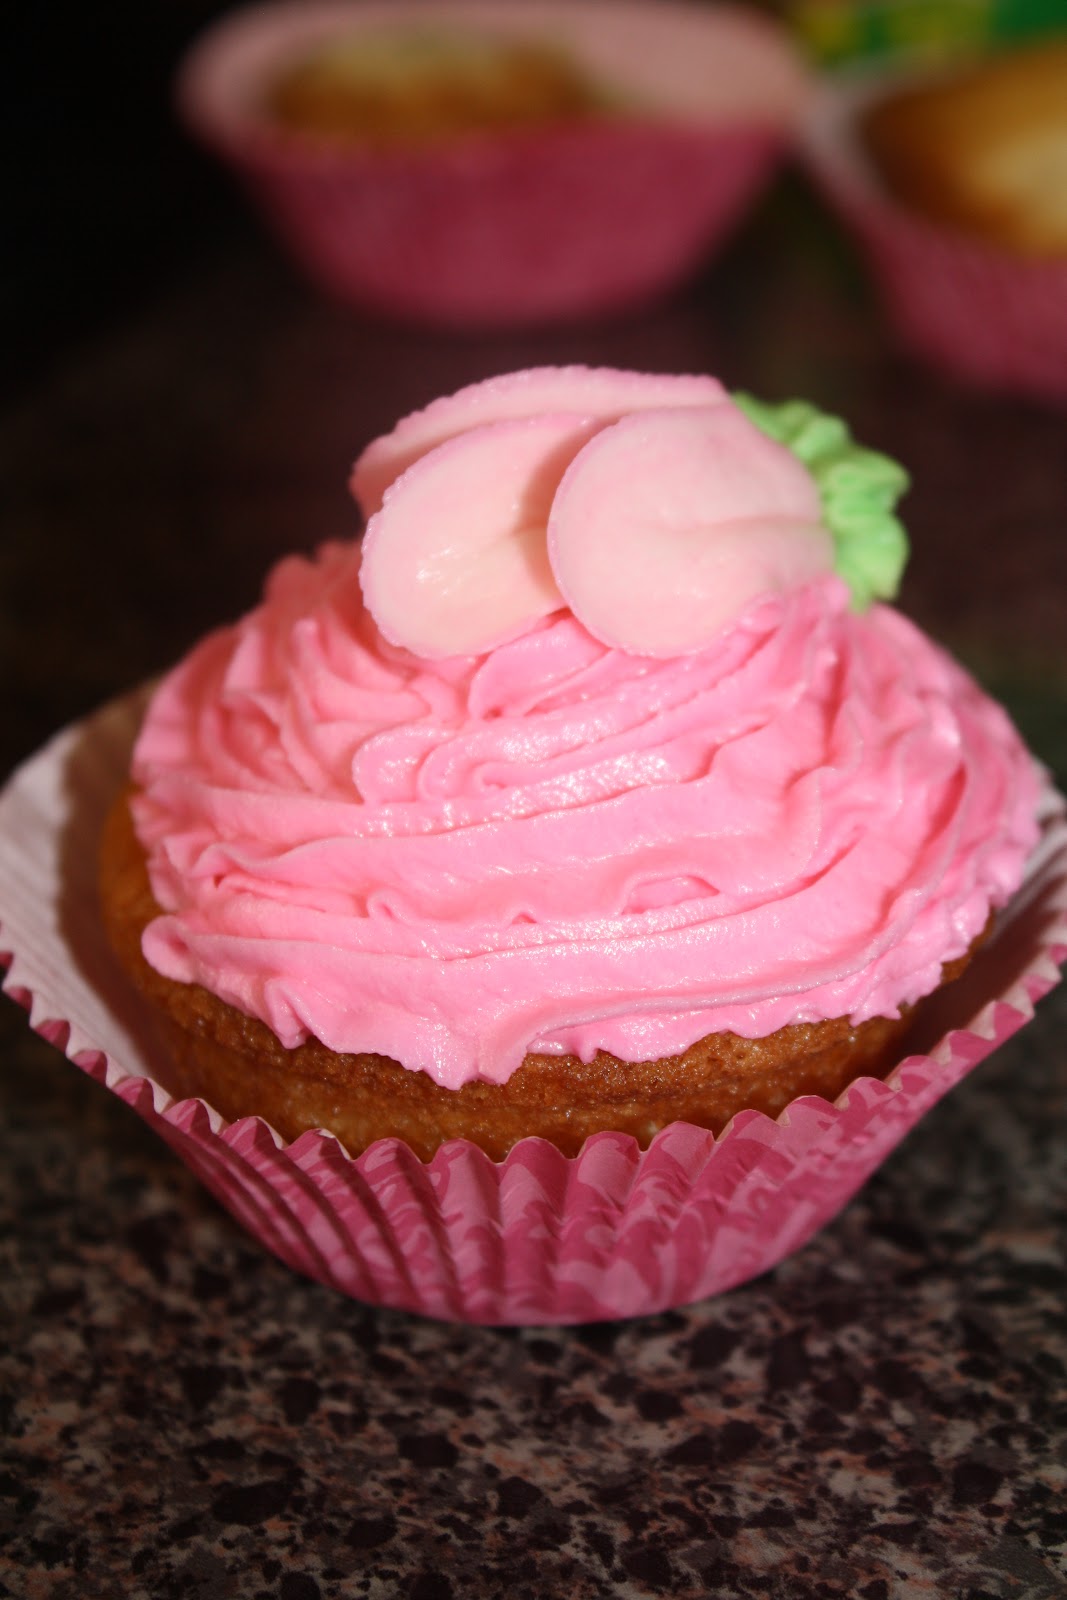
I thought it'd be fun to share some pictures of the flower cupcakes that I made for Laela's school party. I made tulips for her classmates, and a pink rose for her.
Laela and I decided to make Kyle a welcome home cake with the leftover icing. Pink tulips and butterflies are definitely fitting for a "We love Daddy" cake, don't you think?
Friday, August 31, 2012
Inside Out Burgers
Every now and then, my husband requests a "man meal", where the star of the show is a big slab of meat, preferable smothered in cheese, the only "vegetable" permitted is corn, and the french fries are made by well, alexia. The reality is, while I make a mean french fry, I packed our mandolin and food processor, and the idea of slicing perfectly even potatoes and then soaking them to release the starches just wasn't doing it for me. And the truth is, I haven't had a bad Alexia french fry, so I bought Kyle's favorite- the waffle fries.
Since we hadn't had burgers in a while, I thought a good old fashioned bacon and cheese inside out burgher was in order. The picture is deceptive, right?
On the outside, it looks like this:
But on the inside:
These burgers look like they're difficult to make, but I promise you, they're super easy.
Inside Out Burgers:
makes 4 regular sized burgers
You'll need:
- 1 lb 90/10 ground beef (I prefer grass-fed)
- 1/4 cup breadcrumbs
- 1 Egg
- 1Tb Worcestershire sauce
- Salt and pepper
- Onion Powder
- Garlic Powder
- 8 slices of cooked bacon (I really like the applewood smoked bacon from Whole Foods butcher counter)
- 4 slices of colby jack cheese, or whatever cheese you have on hand that melts well
Instructions:
- Heat a large skillet to medium heat.
- Spray the pan evenly with cooking spray. (You can use a few drizzles of olive oil if you prefer. I experimented with cooking spray, and it turned out great!)
- In a large bowl, combine the meat, egg, breadcrumbs, onion powder, garlic powder, worcestershire sauce, and a few shakes of salt and pepper. I mush it all together with my hands.
- After the mixture is well mixed/mushed together, form 4 patties.
- Flatten each patty until it is about 1 1/2 to 2 inches thick.
- Tear the bacon strips in half. Place them in the middle of the flattened patty.
- Fold each cheese slice in half or into 4 squares so that it fits in the middle of the flattened patty with the bacon.
- Make sure the bacon and cheese leave a ring of meat around them.
- Gently fold the burger around the bacon and cheese. This should form a ball.
- When it looks like a ball, and no cheese and bacon are showing, gently manipulate the meat into a patty shape. (It doesn't have to be perfect. Just try to make sure the cheese and bacon are covered.)
- Place in the hot pan.
- Depending on how well you want your burger done, cook it between 2 and 6 minutes per side. I like my burger Pittsburgh rare, so I tend to raise the heat like a maniac, cook it for one minute per side, and then chow down on that tasty burger like it's my last day on Earth. The more firm it feels, the more done it is.
- For the love of all things tasty, do NOT push down on this burger with your spatula. Don't you like a juicy burger? Leave it alone. It's cooking. Walk away. Good grief does it drive me crazy when people push the juice out of burgers or slice into them the second they're done cooking. Ugh.
- Serve with whatever toppings and buns you enjoy!
Whole sweet corn is one of the most delicious things on the planet. There are bunches of ways of cooking it, but this is by far the easiest and fool-proof:
Peel all of the husk off. Rinse off all the stringy stuff that freaks people out. Toss it in a big soup pot of boiling water (I prefer my water salted) for 10 minutes.
Serve!
Thursday, August 30, 2012
Lemon Garlic Shrimp and Tilapia
One of Laela's favorite foods to eat is shrimp. With butter, plain, in Chinese food, in scampi, cooked in a crab boil, you name the way it comes (she'll even down them with some spicy cajun seasoning!), and she'll inhale them by the pound.
Since Kyle isn't the biggest shrimp fan in the world, and Laela asked to have shrimp for dinner, I compromised and made some lemon-garlic shrimp and tilapia with broccoli and brown rice. It was a delicious meal that didn't take a ton of time, and was the perfect combo of being both filling but not heavy so that when we went to the park afterwards, we didn't feel like we were laden down from a huge meal.
Lemon-Garlic Shrimp and Tilapia with Brown Rice and Broccoli
You'll need:
- 1/2 lb peeled and deveined shrimp (I usually buy frozen by the pound since it's generally cheaper)
- 4 Tilapia filets, deboned and filleted
- 4 Cloves garlic, diced
- 2 Lemons
- 2 Broccoli Heads, or broccoli florets
- Brown rice of your choosing (enough to serve 4)
- Onion Powder
- Olive Oil
- Salt and Pepper (to taste)
- Heat a large skillet to medium heat.
- Drizzle the skillet with olive oil (a teaspoon or two, enough to make sure the pan is covered so that the fish does not stick to the pan)
- Slice one lemon into thin slices.
- Lightly sprinkle the tilapia with onion powder, salt and pepper.
- Do the same to the shrimp.
- Place the tilapia and two garlic cloves in the hot pan. Surround them with the lemon slices. (Don't overcrowd the pan though. A few slices will do.)
- Squeeze lemon juice on top of the fish. If the fillets are thin, they should take about 2 minutes per side. With fish, when it is ready, it becomes more white rather than clear white, up the sides. It also releases itself from the pan when it is ready to be flipped, or is done cooking.
- Remove the tilapia from heat. (Fish is flaky when it is done. If you need a knife at all for tilapia, it's not done cooking.)
- Place the shrimp and 1 garlic clove in the hot pan, making sure there is enough oil in the pan.
- Squeeze some lemon on the shrimp and toss in a few lemon slices.
- Shrimp cook quickly, so when they begin to curl, change color, and look more firm, take them out.
- Serve with a side of lemon.
- Heat a medium skillet to medium heat. Drizzle a small amount of olive oil into the pan.
- After the pan has heated, add 1 diced garlic clove into the pan.
- When you can smell the garlic cooking (after about a minute or so), add the broccoli to the pan.
- Cook for 3-5 minutes. Broccoli will be tender when ready.
- Salt and pepper to taste.
- **If you haven't got any olive oil left, or are trying to be extra healthy, use a few tablespoons of water to steam cook the garlic and broccoli. Just put the heat to medium high heat with the water in the pan, add the broccoli and garlic. Pop on the lid. Lower the heat to medium heat. Broccoli in 5 minutes!
- **I squeezed fresh lemon over the entire meal to make it more cohesive, but if you want some components sans lemon, that's totally up to you.
Labels:
broccoli,
brown rice,
caraacakes,
caracakes,
easy dinner,
garlic,
healthy dinner,
lemons,
scampi,
shrimp,
tilapia,
toddler friendly meals
Tuesday, August 28, 2012
Summer Pasta with Breaded Chicken
If breaded chicken and pasta are not the most toddler friendly- no forget that, everyone friendly foods on the face of the earth, I simply don't know what is. We don't eat breaded chicken and pasta everyday, but I don't think Laela and Kyle would complain if we did.
Breaded chicken is easy to make- and easy to ruin. If you cook it on too high of a temperature, you wind up with burnt chicken on the outside, and oftentimes the chicken will be raw in the center. If you put chicken in a cold pan that has cold oil in it, the breading will soak up all the oil and won't get the right amount of crunch to it, so you can wind up with a greasy, not-so-delicious mess. The trick is heating it to medium and not a degree higher, letting the oil get hot in the pan, and putting the breaded chicken in the hot pan, ready to cook itself to perfection.
This particular dish sprung to mind one day when Laela was begging for pasta, Kyle wanted breaded chicken, and all I wanted were some veggies. It's a happy compromise with a nice, light sauce for a hot summer day.
Summer Pasta with Breaded Chicken
Ingredients:
- 1lb boneless, skinless chicken breast (If your butcher has cutlets, make your life easier and pick those up)
- 1 cup breadcrumbs
- 1 large egg
- 1/2 cup milk
- 1 tsp garlic powder
- 1 tsp onion powder
- 1 tsp salt
- 1/2 tsp pepper
- Pasta of your choosing (we use Barilla Whole Grain Spaghetti- which by the way, they really do use this kind in Italy! We were just there and it was the only brand in their grocery stores that I'd ever heard of!)
- 1/2 red pepper, chopped
- 1 cup frozen peas
- 2 heads of broccoli or broccoli florets
- 1/2 cup white cooking wine (or dry white wine)
- 2 sprigs thyme, leaves only
- 2 garlic cloves, chopped
- 1 stalk of rosemary, leaves chopped
- 1Tb butter
- 1/2 cup chicken broth
- Parmesan cheese
- Put a pot of water on to boil with a few tablespoons of salt.
- Cook according to instructions.
- In a medium sized bowl, whisk the egg and milk together. I sometimes add a dash of salt and pepper to the egg wash for extra flavor. The salt also helps mix the egg and milk together more efficiently.
- In another medium bowl, stir together the bread crumbs, garlic powder, salt, and pepper.
- Make sure that all fat is cut from your chicken. You can make this easier on yourself by using some really sharp scissors rather than using a knife.
- Heat a large sized skillet to medium heat.
- Drizzle about 2 tablespoons of olive oil into the pan. Your objective is to cover the bottom of the pan with oil.
- After about a minute, begin the process of "dredging" the chicken. First, dip it in the egg wash, then dip it in the breading. The trick is to keep one hand wet- for dipping in the egg wash, and one hand dry- for dipping in the breading.
- Once the chicken has been breaded, place it in the frying pan. If the chicken is sliced into thin cutlets, cook for 3 minutes per side. If it is not pounded or sliced thin, it should cook for about 5 minutes per side. (You will see the chicken begin to looked more "cooked" up the sides of the chicken. When you see this, it is time to flip the chicken. Once you have flipped it, a trick of knowing it is done is pressing on it with a spatula or your finger. If it is firm, it is done. Try not to slice into it right away. You don't want to lose all the yummy juices that make it so delicious!) Continue this process with the chicken until all of the chicken is cooked. You can place the chicken on a plate that is lined with paper towel if you would like to soak up some of the oil from the pan.
- **Make sure to keep an eye on the oil level in the pan. You want to make sure that there is always a bit of oil to cook the chicken in so that the breading does not burn, so that the breading gets an adequate crisp, and so that the chicken doesn't stick to the pan.
- Heat a medium sized skillet to medium heat.
- Add the chopped pepper, garlic, chicken broth, herbs, peas, butter, and broccoli to the pan.
- Cook for five minutes, stirring occasionally.
- Raise the heat to medium high.
- Add the wine.
- Keep an eye on the veggies. Stir regularly to prevent burning. The wine and broth will bubble violently.
- After about two minutes, or when the wine and broth have reduced and thickened, remove from heat.
- Salt and pepper to taste.
- Add the pasta to the sauce. Cook on low heat to mix it all together for one to two minutes.
- Top with the chicken and a fresh grating of parmesan cheese.
- Enjoy!
Tuesday, August 21, 2012
A Very Cinnamony Breakfast Bake
I love a good breakfast bake. Truthfully, I love anything that I can throw together in five minutes. This breakfast bake beats all breakfast bakes in that it got me through one of those mornings when I woke up tired and hungry with a hungry, growling family chomping at my heels to make breakfast. All it took was some yummy cinnamon bread from Great Harvest, a quick whisk of egg, milk, vanilla and cinnamon, and 20 minutes in the oven. What's easier than that? And how can you ever go wrong with anything cinnamon?
This may not be the sexiest looking breakfast bake, but I promise you, it's delicious.
Cinnamon Bread Breakfast Bake
You'll need:
- 1/2 loaf of cinnamon bread (I used Great Harvest Multigrain Cinnamon Crunch)
- 2 tsp vanilla
- 2 cups milk (I used fat-free)
- 2 tsp cinnamon
- 1 large egg
Instructions:
- Preheat the oven to 375 degrees Fahrenheit.
- Place the sliced cinnamon bread in a 2 1/2 quart corningware dish or baking pan. (Thick sliced bread is generally preferable, but I only had thin sliced on hand. I think that worked out better since I didn't have time to let it settle in the mixture for very long.)
- Whisk the vanilla, egg, milk, and cinnamon in a bowl.
- Pour the mixture over the bread. (Try to pour it evenly over all of the bread.)
- If you have the time, let this sit for 5-10 minutes so that the liquid seeps into the bread. (If you don't have time, don't worry, it'll still be delicious!)
- Bake for 20-30 minutes, or until the top is golden brown.
- **For an extra indulgence, sprinkle 3Tb raw sugar, and 2 tsp cinnamon on top of the breakfast bake for 5 minutes. It will add a bit of extra sweetness and crunch to the bake.
- Enjoy!
Thursday, July 12, 2012
CaraCakes Take on a French Hamburger
I was flipping through my Julia Child cookbook, and found myself reading about how the French make hamburgers. They seemed pretty different than our burgers on this side of the pond, but no less delicious. Since I didn't have any ground beef, I opted to try a Biftek Haché à la Lyonnaise (Ground Beef with Onions and Herbs) with ground white turkey rather than beef. And wow, was it delicious.
Here is the recipe straight from Julia Child's "Mastering the Art of French Cooking":
Biftek Haché à la Lyonnaise (Ground Beef with Onions and Herbs)
You'll need:
¾ cup finely minced yellow onions
2 tablespoons butter
1 ½ pounds lean ground beef
2 tablespoons butter, softened
1 ½ teaspoons salt
1/8 teaspoon pepper
1/8 teaspoon thyme
1 egg
½ cup flour, spread on a plate
1 tablespoon butter and 1 tablespoon oil
½ cup beef stock, canned beef bouillon, dry white wine, dry white vermouth or red wine (I used white wine)
2-3 tablespoons butter, softened
Instructions:
- Cook the onions slowly in the butter for about 10 minutes until very tender but not browned. Place in a mixing bowl. Add the beef, butter, seasonings and egg to the onions in the mixing bowl and mix thoroughly to combine ingredients. Form into patties ¾-inch thick. Cover with waxed paper and refrigerate until ready to use.
- Just before sautéing, roll the patties lightly in the flour. Shake off excess flour. Place butter and oil in a skillet and set over moderately high heat. When you see the butter foam begin to subside, sauté the patties for 2 to 3 minutes or more each side, to desired doneness. Remove patties from skillet to warm plate.
- Pour the fat out of the skillet. Add the liquid and boil it down rapidly, scraping up the coagulated pan juices, until it had reduced almost to a syrup. Off heat, swirl butter by half-tablespoons into the sauce until it is absorbed. Pour the sauce over the hamburgers and serve.
- Makes 6 burgers.
Also, feel free to eat this on a bun. Kyle loved it that way. For me, since the weather has been a bit warmer, and this is already a tad on the rich side, I didn't want to weigh myself down with the bread.
**Please note: your sauce should be the color of caramel if you use white wine. My sauce began to separate at the time of this picture because I fed my family and waited to take the photo (for those of you that have hungry people demanding immediate nourishment at dinnertime, I'm sure you understand.)
Tuesday, July 10, 2012
Pancakes!
My little one LOVES pancakes. She also loves helping me make this delicious, fool-proof pancake mix (Nigella inspired of course) that we always have on hand. It's a great stand-by for when you're too tired to think of something exciting to make, or when you're trying to get your peanut to eat when they've been on a hunger strike. Plus, it really does make some of the best darn pancakes you'll ever, ever have.
Pancake Mix
You'll need:
- 4 cups flour
- 3 tablespoons baking powder
- 2 teaspoons baking soda
- 1 teaspoon salt
- 2 tablespoons plus 2 teaspoons sugar
Mix all of the above ingredients, and store in a jar or air tight container.
To make the pancakes:
You'll need:
- 1 cup pancake mix
- 1 tsp vanilla extract
- 1 cup milk (it doesn't matter if it's skim, whole, or low-fat)
- 1 large egg
- In a large bowl, combine and whisk ingredients.
- Heat a skillet to medium heat.
- Spray with cooking spray.
- Using a small ladel, ladel a few sponfuls onto the skillet. Try to keep the ladeled pancake batter from touching. (It will taste fine, it just won't be as pretty)
- When you see bubbles forming on the pancake, it's time to flip!
- The pancake will rise a bit from the skillet when it's done. Keep in mind that it's already mostly cooked when you're flipping it, so you shouldn't need to leave it much longer than a minute.
**This recipe is also great if you substitute the vanilla extract with lemon or orange extract, and if you like them, add a few poppy seeds!
Friday, June 8, 2012
Yogurt Cake by Ms. Independent
I recently read the book, "Bringing Up Bebe", by Pamela Druckerman. She's an American married to an Englishman, living in Paris with her three children. It's really interesting to see how she takes the American"isms" that she grew up with and molds them with the French way of parenting. Some of the main tenants of French parenting are teaching children balance, independence, and boundaries at an early age so that they are more confident and capable as they get older. This is not always the American way of doing things, but it was very interesting to read about these independent, well behaved little people that aren't overweight and pigging out at their whim. Instead, they are taught through gentle firmness and repetition that some things, such as when the family eats is when the family eats, is the way things are. Children are brought into the world to be a part of it, instead of grown-ups revolving around their children.
I'm not going to get into my personal views on child-rearing and the American versus the French ideal, but I will definitely get behind teaching children new skills, such as how to make a yogurt cake all by themself. I will also fully advocate keeping children (and adults for that matter) on a normal meals schedule- breakfast, lunch, snack, dinner. It teaches self control at an early age, and let's face it, learning to wait at an early age- even for your food, is probably one of the more important lessons in life. In a world of instant gratification, our kids (and let's face it, a lot of adults), are suffering from obesity. I'm not telling you to take the cake away, I'm telling you to give a moderate slice at snacktime.
For the last few months, Laela has wanted to help more and more in the kitchen. I started small at first- adding the veggies to salad, sprinkling cheese on tacos and spaghetti, and holding the mixer while making a cake or cookies. Then she wanted to beat the eggs for breakfast, so I started giving her little jobs, like pulling the thyme leaves from the stalk and then beating them in with eggs and veggies for a yummy frittata.
Laela has learned that she can do something really cool- cook! I let her use the big girl spatula to flip the eggs, and now, she has learned to make her own cake! The proud look of satisfaction when she made her cake was one I'll never forget.
The first time we made it was on a rainy day with Laela's best friend Bailey. The recipe calls for full-fat yogurt, but I couldn't find any, so we used low-fat.
Yogurt Cake
You'll need:
- 2 six-ounce containers plain whole-milk yogurt (use the empty containers to measure the other ingredients)
- 2 eggs
- 2 containers sugart (or just one, depending on how sweet you like it)
- 1 teaspoon vanilla
- Just under one container vegetable oil
- 4 containers flour
- 1 1/2 teaspoons baking powder
- 2 containers of frozen berries or chocolate chips
- Creme fraiche (optional)
- Preheat oven to 375- degrees farenheit.
- Use vegetable oil to grease a 9" round cake pan or a loaf pan.
- Gently combine the yogurt, eggs, sugar, vanilla, and oil.
- In a separate bowl, mix the flour and baking powder.
- Add the dry ingredients to the wet ingredients. Mix gently until well combined. (Don't overmix.)
- You can add 2 containers of frozen berries, a container of chocolate chips, or any flavoring you like.
- Bake for 35 minutes, then five minutes more if the cake doesn't pass the knife test. Bake for five more minutes if the cake doesn't pass the knife test. It should be almost crispy on the outside, but springy on the inside.
- Let it cool.
- The cake is delicious served with (or in Laela and Bailey's case spread), with creme fraiche.
- The first time that you make this, lay towels on the table to easily soak up any mess.
- Do your best not to help. This is a pretty fool-proof recipe. Yes, you should be standing there if they need you, but by 3 years old (Laela will be 3 in September), they probably understand 4 scoops of the ingredient your putting in front of them. For me, this was one of those proud mama moments, because I got to see Laela do it on her own and really get it. The girls both did an amazing job!
- When we made this the first time, I foolishly didn't take our higher altitude into account. The cake seemed done, but when we took it out, the center was stone raw. (I cut the cooked part off, dumped the remainder in the still hot pan, and baked it for ten more minutes.) After baking it some more, and molding it together, it was perfect, but it wasn't as pretty as it should have been:
Bailey was a definite fan though:
- That said, if you are in a high climate, preheat the oven to 375.
- When you put the cake in the oven, bring the heat down to 350.
- Bake for 40-45 minutes. If the cake is still gooey inside, bake for five more minutes.
- Enjoy!
- **And take lots of pictures! This is a lot of fun!
Wednesday, March 28, 2012
Flatbread Pizza Salad
We have a deep affection for whole wheat flatbread in our house. Laela loves it toasted with olive oil and topped with hummus, and as weird as it may sound to some, steamed broccoli. Kyle loves it made as a basic pizza with sauce, mozzarella cheese, and whatever kind of meat we have on hand.
My favorite thing to do with flatbread is make what Kyle calls "Flatbread Pizza Salad". It's super easy to make, and when I have that insatiable craving for pizza, with less of the guilt that tends to come with your typically deliciously greasy slice of tastiness, this is the pizza I turn to.
Flatbread Pizza Salad
You'll need:
My favorite thing to do with flatbread is make what Kyle calls "Flatbread Pizza Salad". It's super easy to make, and when I have that insatiable craving for pizza, with less of the guilt that tends to come with your typically deliciously greasy slice of tastiness, this is the pizza I turn to.
Flatbread Pizza Salad
You'll need:
- 1 slice of whole wheat flatbread
- 1tsp olive oil
- 3Tb Mozzarella cheese, shredded
- 2Tb Parmesan Cheese (I prefer freshly shredded)
- 1 Sprig Thyme (leaves only)
- 1 Sprig Rosemary (chopped)
- 3 Slices of roasted peppers, jarred is easier, fresh fine too. (You can also use sundried tomatoes or jarred artichokes)
- Salt and Pepper
- 1/2 Lemon
- 4 large handfuls of spring mix, or 50/50 arugula/spinach mix
- Preheat your oven to 400-degrees.
- Use a pastry brush to "paint" the olive oil on both sides of the flatbread. (You may use more or less oil than specified, depending on the size of your flatbread.)
- Place the oiled flatbread on a cookie sheet. Put the cookie sheet in the oven for 10 minutes.
- Chop the roasted peppers.
- Take the flatbread out of the oven. Top with the thyme, rosemary, cheeses, roasted peppers, salt, and pepper.
- Bake for 5 minutes, or until cheese is melted.
- When cheese is melted, take the flatbread out of the oven. Slice into servings (our flatbreads usually serve 2 people, unless Kyle is super hungry.) Top with the salad mix (you can stop here if you're not a salad fan!).
- Squeeze a bit of lemon onto the salad. Sprinkle a bit of salt and pepper.
Labels:
caraacakes,
caracakes,
easy diner,
flatbread pizza,
healthy pizza,
mozzarella,
parmesan,
salad
Monday, March 5, 2012
Nacho Cheese!
I have this deep, unabiding love for nachos. I love nachos topped with just about anything you can think of, but especially when they're topped with ooey, gooey, delicious cheese. The unfortunate thing is, nachos are not one of those things that I'd check into the "healthy category" of my life.
I refuse to deny my nacho craving, so I came up with a healthier recipe for nacho cheese. Truthfully, the process is really not much different than making the cheese for macaroni and cheese, so if you've made homemade mac and cheese before, this should be a total cinch!
Nacho Cheese Sauce
You'll need:
- 1 cup Non-fat milk
- 1/4 tsp yellow mustard
- Hot sauce
- 1/2 tsp Onion powder
- 1/4 tsp Garlic powder
- Salt and Pepper
- 1Tb Butter
- 1Tb All-purpose flour
- 1/2 cup low-fat Mexican blend grated cheese (you can use extra cheese if you'd like)
Instructions:
- Heat a large saucepan to medium-high heat.
- Whisk together the butter and flour to create a roux (a thickener for the sauce). The butter and flour should be well mixed, looking like a paste.
- Whisk in the milk, hot sauce (a little if you're not a spicy food lover, a lot if you are- remember, you can add more later), a few shakes of salt and pepper, mustard, onion and garlic powder.
- Whisk until a thick sauce is created (a bit thicker than mayonnaise).
- Once the mixture is thickened, whisk in the cheese.
- Taste to correct seasoning.
- Serve!
Friday, February 24, 2012
I Lub You Breakfast
Laela loves to help me make breakfast. One of our favorite things to do is break out the cookie cutters, and make fun shapes out of eggs, pancakes, and french toast. Last Tuesday was Kyle's first morning back in America from his business trip, and since it was Valentine's Day and he wanted American food, I decided to make eggs in a basket with heart cookie cutters. I used the heart cut-outs to make vanilla french toast.
This is much easier than it looks. The trick is toasting the bread before you use the cookie cutter!
I Lub You Eggs in a Basket
Serves 4, or 1 very hungry Daddy, and two moderately hungry gals.
You'll need:
- 4 large eggs
- 4 pieces of toasted whole wheat or multigrain bread (we are a white bread free home.)
- Butter or margarine
- Salt and pepper
- 1 cookie cutter of the shape of your choice.
Instructions:
- Toast the bread.
- Heat a large skillet to medium heat.
- Spray it well with cooking spray.
- Use the cookie cutter to cut out a shape out of the center of the bread.
- Set the cutout aside.
- Spread butter on both sides of the bread that has the cut-out in it.
- Place it in the heated skillet.
- Crack your egg as closely to the pan as possible.
- Drop the egg (stay close to the pan so that you stay within the cut-out shape!) into the cut-out.
- Cook for about 1 1/2 minutes to 2 minutes per side.
- Serve!
Vanilla French Toast Cut-Outs
You'll need:
- The leftover cut-outs from the eggs in a basket
- 1 egg
- 1 tsp vanilla
- 1/2 tsp sugar
- 1 tsp cinnamon
- 1/2 cup milk
Instructions:
- Whisk the egg, vanilla, sugar, cinnamon, and milk together in a medium bowl.
- Heat a medium sized skillet to medium heat.
- Spray well with cooking spray.
- Dip the cutouts in the mixture (Unless your bread is stale, don't soak the bread in it, or the cut-outs will fall apart.)
- Place the cut-outs in the skillet. Cook for 2-3 minutes per side, depending on how crispy you want your toasts to be (I like mine really crispy, so I leave mine on longer, whereas Kyle likes his a bit soppy, so I only cook his for about 2 minutes per side. Sometimes less if the pan got extra hot.)
- Serve with powdered sugar or maple syrup.
Enjoy!!
**This recipe can also be made with regular toast. Just use 1 cup of milk and 4 slices of toast instead of 4 cutouts.
Monday, February 20, 2012
Broccoli Two Ways
I've never been one to fight about eating vegetables. I prefer them over most foods (I'm pretty sure Kyle is convinced I could live on broccoli and peas- plain). I'm one of those annoying people that put peas, broccoli, garlic and onions in to pretty much everything. I even love plain old steamed brussel sprouts with salt and pepper.
Needless to say, when I hear people say that they don't like vegetables, I just don't get it. So, I've made it my mission to prove that vegetables are totally delicious. Maybe you won't want them plain, but with a little garlic, and a lot of love, even the most boring vegetable can be fantastic!
Now let's talk broccoli. I have seen those super creepy frozen packs of broccoli with the weird plastic-y cheese on it. Put down the fake cheese! Frozen broccoli is amazingly quick and simple to cook- you really don't need any mystery sauce or seasonings on it. You can make it yourself in five minutes flat!
My family loves broccoli...but that wasn't always the case. Kyle isn't a natural vegetable lover. How did I convert him, might you ask?
Broccoli with Garlic
You'll need:
Put a large saucepan on medium heat. Fill the pan with about a half inch of water. Wait one minute for the water to get hot. Add the broccoli, onion powder, and garlic to the pan. Carefully stir them together in the hot water. Add a bit of salt and pepper. If you'd like, once the water starts to cook down a bit, you can add a tiny bit of olive oil to the broccoli (less than a half teaspoon). I really like the flavor that the olive oil brings to the broccoli, but I don't always use it. The broccoli should be done after about five minutes of cooking. Taste before serving to correct the seasoning.
Broccoli with Cheese
For the cheese obsessed, this is pretty awesome.
You'll need:
Fill a large saucepan with about a half inch of water. Cook the water at medium heat. After a minute or so after the water has heated up, add all of the ingredients to the pan. Cook for five minutes. Taste before serving to correct the seasoning. And of course, you can always add more cheese!
Tomorrow I'll be sharing the tastiest, absolute easiest way to make asparagus- ever.
Needless to say, when I hear people say that they don't like vegetables, I just don't get it. So, I've made it my mission to prove that vegetables are totally delicious. Maybe you won't want them plain, but with a little garlic, and a lot of love, even the most boring vegetable can be fantastic!
Now let's talk broccoli. I have seen those super creepy frozen packs of broccoli with the weird plastic-y cheese on it. Put down the fake cheese! Frozen broccoli is amazingly quick and simple to cook- you really don't need any mystery sauce or seasonings on it. You can make it yourself in five minutes flat!
My family loves broccoli...but that wasn't always the case. Kyle isn't a natural vegetable lover. How did I convert him, might you ask?
Broccoli with Garlic
You'll need:
- 2 cups frozen broccoli (about a half bag or so)
- 2 Tb chopped garlic (I prefer fresh, but chopped garlic jarred is totally fine too)
- 1/2 tsp onion powder
- Salt and pepper
- Olive oil (optional)
Put a large saucepan on medium heat. Fill the pan with about a half inch of water. Wait one minute for the water to get hot. Add the broccoli, onion powder, and garlic to the pan. Carefully stir them together in the hot water. Add a bit of salt and pepper. If you'd like, once the water starts to cook down a bit, you can add a tiny bit of olive oil to the broccoli (less than a half teaspoon). I really like the flavor that the olive oil brings to the broccoli, but I don't always use it. The broccoli should be done after about five minutes of cooking. Taste before serving to correct the seasoning.
Broccoli with Cheese
For the cheese obsessed, this is pretty awesome.
You'll need:
- 2 cups broccoli
- 1/4 cup Italian blend cheese (parmesan, mozzarella)
- salt and pepper
Fill a large saucepan with about a half inch of water. Cook the water at medium heat. After a minute or so after the water has heated up, add all of the ingredients to the pan. Cook for five minutes. Taste before serving to correct the seasoning. And of course, you can always add more cheese!
Tomorrow I'll be sharing the tastiest, absolute easiest way to make asparagus- ever.
Labels:
asparagus,
broccoli,
caraacakes,
caracakes,
cheese,
garlic,
healthy eating,
mozzarella,
parmesan,
tasty sides,
toddler food,
vegetables
Monday, February 13, 2012
Chocolate Chip Cookies After a Long Break
I can't believe it's been almost two months since I've posted! The truth is, sometimes life gets in the way of posting. I think of things I want to share (like my favorite tomato soup recipe), and then Laela wants to finger paint, or Kyle actually has a few hours to spend with us, so the recipe and posting gets pushed to the back of my mind, and my family takes precedence.
So where to begin...well, Kyle worked 16 hours shifts, 7 days a week for about a month. My mother-in-law and her husband came to visit for a week. Then Kyle went to Shanghai and Laela and I hitailed it to Siesta Key for some sun and fun on the beach for a week. Now we're awaiting Kyle's return from Shanghai after an entire day of delayed flights.
Delayed flights are not the easiest thing to explain to a two year old. Thankfully, Laela's is easily made happy by finger painting, making play dough, dressing up, playing hairdresser, and playing with her princesses and princess castle.
While we were on vacation, we met a really nice couple named Patty and Christopher from Kentucky. They told me how they always played with their kids, and did their best to be present in every moment, because they knew that one day, their little ones would be grown ups, and they'd miss that time. I think sometimes, it's very easy to get caught up in the day to day, and forget to really put some time in with the people that we love. Life goes by too quickly. I find that Gretchen Ruben says it best: "the days are long, but the years are short."
While parenthood is a lifelong job, children aren't "yours" forever, so I intend to continue to do my best to really enjoy every moment that I have with my little girl.
Today, while we wait (and hope) to find out when Kyle will be home, we're going to make some chocolate chip cookies, pepper soup, and some of Kyle and Laela's very favorite anniversary chicken with macaroni and cheese and broccoli. A very dear friend of mine once told me that the memory of licking the spoon while baking with his mom is one of his favorite memories. I hope that Laela remembers baking and cooking with me as fondly as that.
So you might be wondering...what chocolate chip cookie recipe do I use? Tollhouse! This really is the best chocolate chip cookie recipe in the whole wide world. I usually use twice the amount of chocolate chips. Remember two things: 1. Cookies are still baking for a few minutes when you take them out of the oven. 2. If you can smell the cookies, they are probably done baking.
Nestle Tollhouse Chocolate Chip Cookies
Ingredients:
PREHEAT oven to 375° F.
COMBINE flour, baking soda and salt in small bowl. Beat butter, granulated sugar, brown sugar and vanilla extract in large mixer bowl until creamy. Add eggs, one at a time, beating well after each addition. Gradually beat in flour mixture. Stir in morsels and nuts. Drop by rounded tablespoon onto ungreased baking sheets.
BAKE for 9 to 11 minutes or until golden brown. Cool on baking sheets for 2 minutes; remove to wire racks to cool completely.
PAN COOKIE VARIATION: Grease 15 x 10-inch jelly-roll pan. Prepare dough as above. Spread into prepared pan. Bake for 20 to 25 minutes or until golden brown. Cool in pan on wire rack. Makes 4 dozen bars.
SLICE AND BAKE COOKIE VARIATION:
PREPARE dough as above. Divide in half; wrap in waxed paper. Refrigerate for 1 hour or until firm. Shape each half into 15-inch log; wrap in wax paper. Refrigerate for 30 minutes.* Preheat oven to 375° F. Cut into 1/2-inch-thick slices; place on ungreased baking sheets. Bake for 8 to 10 minutes or until golden brown. Cool on baking sheets for 2 minutes; remove to wire racks to cool completely. Makes about 5 dozen cookies.
* May be stored in refrigerator for up to 1 week or in freezer for up to 8 weeks.
FOR HIGH ALTITUDE BAKING (5,200 feet): Increase flour to 2 1/2 cups. Add 2 teaspoons water with flour and reduce both granulated sugar and brown sugar to 2/3 cup each. Bake drop cookies for 8 to 10 minutes and pan cookie for 17 to 19 minutes.
**If you want the cookies to stay chewy, put them in an air tight container while still slightly warm.
Enjoy!!
So where to begin...well, Kyle worked 16 hours shifts, 7 days a week for about a month. My mother-in-law and her husband came to visit for a week. Then Kyle went to Shanghai and Laela and I hitailed it to Siesta Key for some sun and fun on the beach for a week. Now we're awaiting Kyle's return from Shanghai after an entire day of delayed flights.
Delayed flights are not the easiest thing to explain to a two year old. Thankfully, Laela's is easily made happy by finger painting, making play dough, dressing up, playing hairdresser, and playing with her princesses and princess castle.
While we were on vacation, we met a really nice couple named Patty and Christopher from Kentucky. They told me how they always played with their kids, and did their best to be present in every moment, because they knew that one day, their little ones would be grown ups, and they'd miss that time. I think sometimes, it's very easy to get caught up in the day to day, and forget to really put some time in with the people that we love. Life goes by too quickly. I find that Gretchen Ruben says it best: "the days are long, but the years are short."
While parenthood is a lifelong job, children aren't "yours" forever, so I intend to continue to do my best to really enjoy every moment that I have with my little girl.
Today, while we wait (and hope) to find out when Kyle will be home, we're going to make some chocolate chip cookies, pepper soup, and some of Kyle and Laela's very favorite anniversary chicken with macaroni and cheese and broccoli. A very dear friend of mine once told me that the memory of licking the spoon while baking with his mom is one of his favorite memories. I hope that Laela remembers baking and cooking with me as fondly as that.
So you might be wondering...what chocolate chip cookie recipe do I use? Tollhouse! This really is the best chocolate chip cookie recipe in the whole wide world. I usually use twice the amount of chocolate chips. Remember two things: 1. Cookies are still baking for a few minutes when you take them out of the oven. 2. If you can smell the cookies, they are probably done baking.
Nestle Tollhouse Chocolate Chip Cookies
Ingredients:
- 2 1/4 cups all-purpose flour
- 1 teaspoon baking soda
- 1 teaspoon salt
- 1 cup (2 sticks) butter, softened
- 3/4 cup granulated sugar
- 3/4 cup packed brown sugar
- 1 teaspoon vanilla extract
- 2 large eggs
- 2 cups (12-oz. pkg.) NESTLÉ® TOLL HOUSE® Semi-Sweet Chocolate Morsels (I use two packages)
- 1 cup chopped nuts (optional)
PREHEAT oven to 375° F.
COMBINE flour, baking soda and salt in small bowl. Beat butter, granulated sugar, brown sugar and vanilla extract in large mixer bowl until creamy. Add eggs, one at a time, beating well after each addition. Gradually beat in flour mixture. Stir in morsels and nuts. Drop by rounded tablespoon onto ungreased baking sheets.
BAKE for 9 to 11 minutes or until golden brown. Cool on baking sheets for 2 minutes; remove to wire racks to cool completely.
PAN COOKIE VARIATION: Grease 15 x 10-inch jelly-roll pan. Prepare dough as above. Spread into prepared pan. Bake for 20 to 25 minutes or until golden brown. Cool in pan on wire rack. Makes 4 dozen bars.
SLICE AND BAKE COOKIE VARIATION:
PREPARE dough as above. Divide in half; wrap in waxed paper. Refrigerate for 1 hour or until firm. Shape each half into 15-inch log; wrap in wax paper. Refrigerate for 30 minutes.* Preheat oven to 375° F. Cut into 1/2-inch-thick slices; place on ungreased baking sheets. Bake for 8 to 10 minutes or until golden brown. Cool on baking sheets for 2 minutes; remove to wire racks to cool completely. Makes about 5 dozen cookies.
* May be stored in refrigerator for up to 1 week or in freezer for up to 8 weeks.
FOR HIGH ALTITUDE BAKING (5,200 feet): Increase flour to 2 1/2 cups. Add 2 teaspoons water with flour and reduce both granulated sugar and brown sugar to 2/3 cup each. Bake drop cookies for 8 to 10 minutes and pan cookie for 17 to 19 minutes.
**If you want the cookies to stay chewy, put them in an air tight container while still slightly warm.
Enjoy!!
Tuesday, August 9, 2011
Meatloaf Burgers, Lentils, and Chunky Tomatoes and Bean Pasta Sauce
Life is a bit difficult right now. I've had to completely adjust our program in so many ways that I feel as if my head is spinning. Kyle is working double shifts to get acclimated to his new role. Laela is fine while we're out, but is very, very clingy when we're home. She cries every night for her Daddy. She hugs her dinosaur book and says "Daddy dinosaurs!!"
As for me, I'm just trying to keep things together. Kyle has always traveled a lot, but we always made up for it with lots of phone time, writing letters, and making sure to spend a lot of time together when he gets home. We've always tried to cram every moment of family time that we can, much in the same way that you want to sop up the gravy of a really good roast. You want to savor it, and make it last as long as possible.
Because we need this time, I've had to strive for a balance with things that I'd never really had to worry about before. I'm trying to make new friends for Laela and I, but I also have to make sure to keep the two hours a morning that Kyle's available this week, and possibly next week, free. I wasn't prepared for Laela to beg for Dada to get out of bed, but then for her to ignore him. I wasn't prepared for the tears when he left this morning. It's a lot.
Sad toddler aside- which is generally only at bedtime and morning time when Kyle leaves, things are going okay. I was really nervous about having to switch from dinner being the main sit down family meal. Now it's all about breakfast/brunch before Kyle goes to work.
I've also had to readjust our meals in that I have to make dinner for the next day the night before. So all of the meals that I'm making from now on, with the exception of most breakfasts, are easy to freeze, and taste just as good microwaved. Just because Kyle's not eating dinner with Laela and I anymore, doesn't mean he shouldn't have a tasty, healthy, energizing meal. My focus right now is making sure that we all stay healthy.
Over the next few weeks, I will be sharing recipes that are easy to freeze, and will taste great reheated.
Here is a recipe for three things that can be frozen and reheated, and will please everyone in your house.
As for me, I'm just trying to keep things together. Kyle has always traveled a lot, but we always made up for it with lots of phone time, writing letters, and making sure to spend a lot of time together when he gets home. We've always tried to cram every moment of family time that we can, much in the same way that you want to sop up the gravy of a really good roast. You want to savor it, and make it last as long as possible.
Because we need this time, I've had to strive for a balance with things that I'd never really had to worry about before. I'm trying to make new friends for Laela and I, but I also have to make sure to keep the two hours a morning that Kyle's available this week, and possibly next week, free. I wasn't prepared for Laela to beg for Dada to get out of bed, but then for her to ignore him. I wasn't prepared for the tears when he left this morning. It's a lot.
Sad toddler aside- which is generally only at bedtime and morning time when Kyle leaves, things are going okay. I was really nervous about having to switch from dinner being the main sit down family meal. Now it's all about breakfast/brunch before Kyle goes to work.
I've also had to readjust our meals in that I have to make dinner for the next day the night before. So all of the meals that I'm making from now on, with the exception of most breakfasts, are easy to freeze, and taste just as good microwaved. Just because Kyle's not eating dinner with Laela and I anymore, doesn't mean he shouldn't have a tasty, healthy, energizing meal. My focus right now is making sure that we all stay healthy.
Over the next few weeks, I will be sharing recipes that are easy to freeze, and will taste great reheated.
Here is a recipe for three things that can be frozen and reheated, and will please everyone in your house.
Meatball burgers
You'll need:
- 1 lb ground chuck (I prefer grass fed when possible)
- 1 egg
- 1 cup breadcrumbs
- 2 diced sprigs parsley (stems too)
- Salt and Pepper
- Good squirt of ketchup
- 1/2 tsp onion powder
- 1/2 tsp garlic powder
- olive oil
- Mix all of the ingredients together in a bowl. If your mixture feels too wet, add a bit more breadcrumbs.
- Form patties out of the mixture.
- Heat a skillet to medium heat. If you are using grass-fed beef, keep an eye on your skillet. If it gets too hot, it will cook faster than regular beef.
- Drizzle some olive oil in the pan.
- Cook each burger for 3-6 minutes per side, depending on how well done you like them. If you plan to freeze them, it doesn't hurt to cook them a little under what you normally prefer so that when you reheat them, they don't dry out.
- To keep them from drying out when reheating, drizzle some water or broth on the burger when you reheat it.
Lentils
You'll need:
- 1/2lb lentils
- 1 cup pasta sauce
- 1 chopped carrot
- 1 chopped celery
- 1/2 chopped onion
- 2 chopped garlic cloves
- Water
- 1 bay leaf
- Salt and Pepper
- Olive oil
Instructions:
- Heat a large sauce pan to medium heat.
- Drizzle a bit of olive oil in the pan.
- Add the garlic, carrot, onion and celery.
- Cook for five minutes.
- Add the lentils, bay leaf, and pasta sauce.
- Cover the lentils with about a 1/2 inch of water.
- Bring to a boil.
- Lower to medium low heat.
- Cook for about 20 minutes.
- Add salt and pepper as needed.
Chunky Tomato and Beans Pasta Sauce
You'll need:
- 1 cup pasta sauce (I use homemade, but you can use jarred if you want.)
- (1) 8oz can of diced tomatoes
- (3) cloves garlic, chopped
- (1) 8oz can cannellini beans
- (1) oz can red kidney beans
- Salt and Pepper
Instructions:
- Heat a large saucepan to medium-low heat.
- Mix all of the ingredients in the pan.
- Cook for ten minutes.
This is one of those meals that each compontent is delicious alone, but is also great mixed together. Yesterday, I defrosted some of the lentils and pasta sauce and cooked it with some whole grain pasta.
Put down the premade frozen meals, and give some of the meals I make over the next few weeks, and give them a try. I promise, you won't be disappointed!
Wednesday, August 3, 2011
Happy Buhday Dada!
Birthdays are sacred in our house. They're a week long celebration of well, your life. It's not just about presents, but appreciating the person for their general wonderfulness.
Since Kyle started his first day of his new position at work on his birthday, we didn't really get to celebrate like we normally would. Instead, we had to run all over town trying to find him proper footware for working in a plant. When we finally got home, Laela was so tired, when she handed her Daddy his birthday pictures that she'd drawn and covered in Mickey Mouse stickers, her mumbling "Happy Buhday Dada" was quickly followed by her passing out.
So what does a wife do in such a situation? Improvise baby.
The next day, we made Dada brownies and double baked chicken with homemade mac-n-cheese. Veggies? Just corn- which personally, I like to call a grain- very much NOT a veggie. Oh, and yes, I definitely topped it off with a gigantic bottle of scotch. Dada was a very happy guy.
For day three of the Dada celebration, I made some homemade guacamole, some homemade salsa, and some tasty tacos.
For the tacos:
I used 4 TB Penzey's Spices bold taco blend and 4TB water with a pound of ground turkey meat.
For the guacamole:
Use a fork to blend 1 avocado with the juice of 1/2 a lime. Salt and pepper to taste.
For the salsa:
You'll need:
This was a delicious, simple, relatively healthy meal. We enjoyed our salsa with some Whole Foods Sunflower and Flax Seed Torilla Chips.
Do birthdays always turn out the way that we want them to? No. But sometimes, life is a lot like food. You've got to work with what you've got, put as much love and effort into it as you can, and hope for the best.
Since Kyle started his first day of his new position at work on his birthday, we didn't really get to celebrate like we normally would. Instead, we had to run all over town trying to find him proper footware for working in a plant. When we finally got home, Laela was so tired, when she handed her Daddy his birthday pictures that she'd drawn and covered in Mickey Mouse stickers, her mumbling "Happy Buhday Dada" was quickly followed by her passing out.
So what does a wife do in such a situation? Improvise baby.
The next day, we made Dada brownies and double baked chicken with homemade mac-n-cheese. Veggies? Just corn- which personally, I like to call a grain- very much NOT a veggie. Oh, and yes, I definitely topped it off with a gigantic bottle of scotch. Dada was a very happy guy.
For day three of the Dada celebration, I made some homemade guacamole, some homemade salsa, and some tasty tacos.
For the tacos:
I used 4 TB Penzey's Spices bold taco blend and 4TB water with a pound of ground turkey meat.
For the guacamole:
Use a fork to blend 1 avocado with the juice of 1/2 a lime. Salt and pepper to taste.
For the salsa:
You'll need:
- 5 tomatoes
- 4 green onions
- 1/4 vidalia onion
- 1 jalapeno pepper
- The juice of 1/2 a lemon
- 1/2 bunch of cilantro
- Salt and pepper to taste
- Chop the tomatoes, onion, green onions, jalapeno, and cilantro (including stems).
- Toss together in a bowl.
- Add the juice of the lemon.
- Mix in the salt and pepper. Taste. Add more as needed.
This was a delicious, simple, relatively healthy meal. We enjoyed our salsa with some Whole Foods Sunflower and Flax Seed Torilla Chips.
Do birthdays always turn out the way that we want them to? No. But sometimes, life is a lot like food. You've got to work with what you've got, put as much love and effort into it as you can, and hope for the best.
Labels:
avocado,
caraacakes,
caracakes,
cilantro,
corn,
ground turkey,
guacamole,
jalapeno,
onions,
penzey's spices,
tacos,
tomatoes
Subscribe to:
Posts (Atom)