Showing posts with label garlic. Show all posts

Monday, April 8, 2013

Pregnancy and Bolognese

I have been a terrible, rotten blogger lately.  The truth is, that for 15 of the last 16 weeks, I've had no desire for food.  Every time I've tried to eat it, my body rejects it.  I've been taken down with a case of pregalimia.  Brutal.

If you haven't heard of pregalimia, then you have either a. never known a pregnant person with "all the time sickness" (morning sickness is seriously the most annoying phrase EVER.  It has nothing to do with the morning.  It has to do with things being smelly, the very cute little alien that has taken over your body and turned you into a vomatious demon, and a very disturbing relationship with your head in the toilet- or the sink- or the trash can...), or a. you are one of those people that have only seen the bright side of pregnancy (i.e. your wife/significant other/friend never got sick, or she kicked it old school, and hid from you until she woke up and saw the sunlight with a rumble in her stomach that said: FEED ME NOW!)

Now that I've hit week 16, I finally have a (mostly)steady, ravenous desire for food.  This is one of those lovely times when living in Italy is first world problems.  What?  You're pregnant!  'No cured meats little lady, but here ya go, have some bolognese!'  It's wonderful.  Good grief.  Writing this blog is making me hungry. (Yay!)

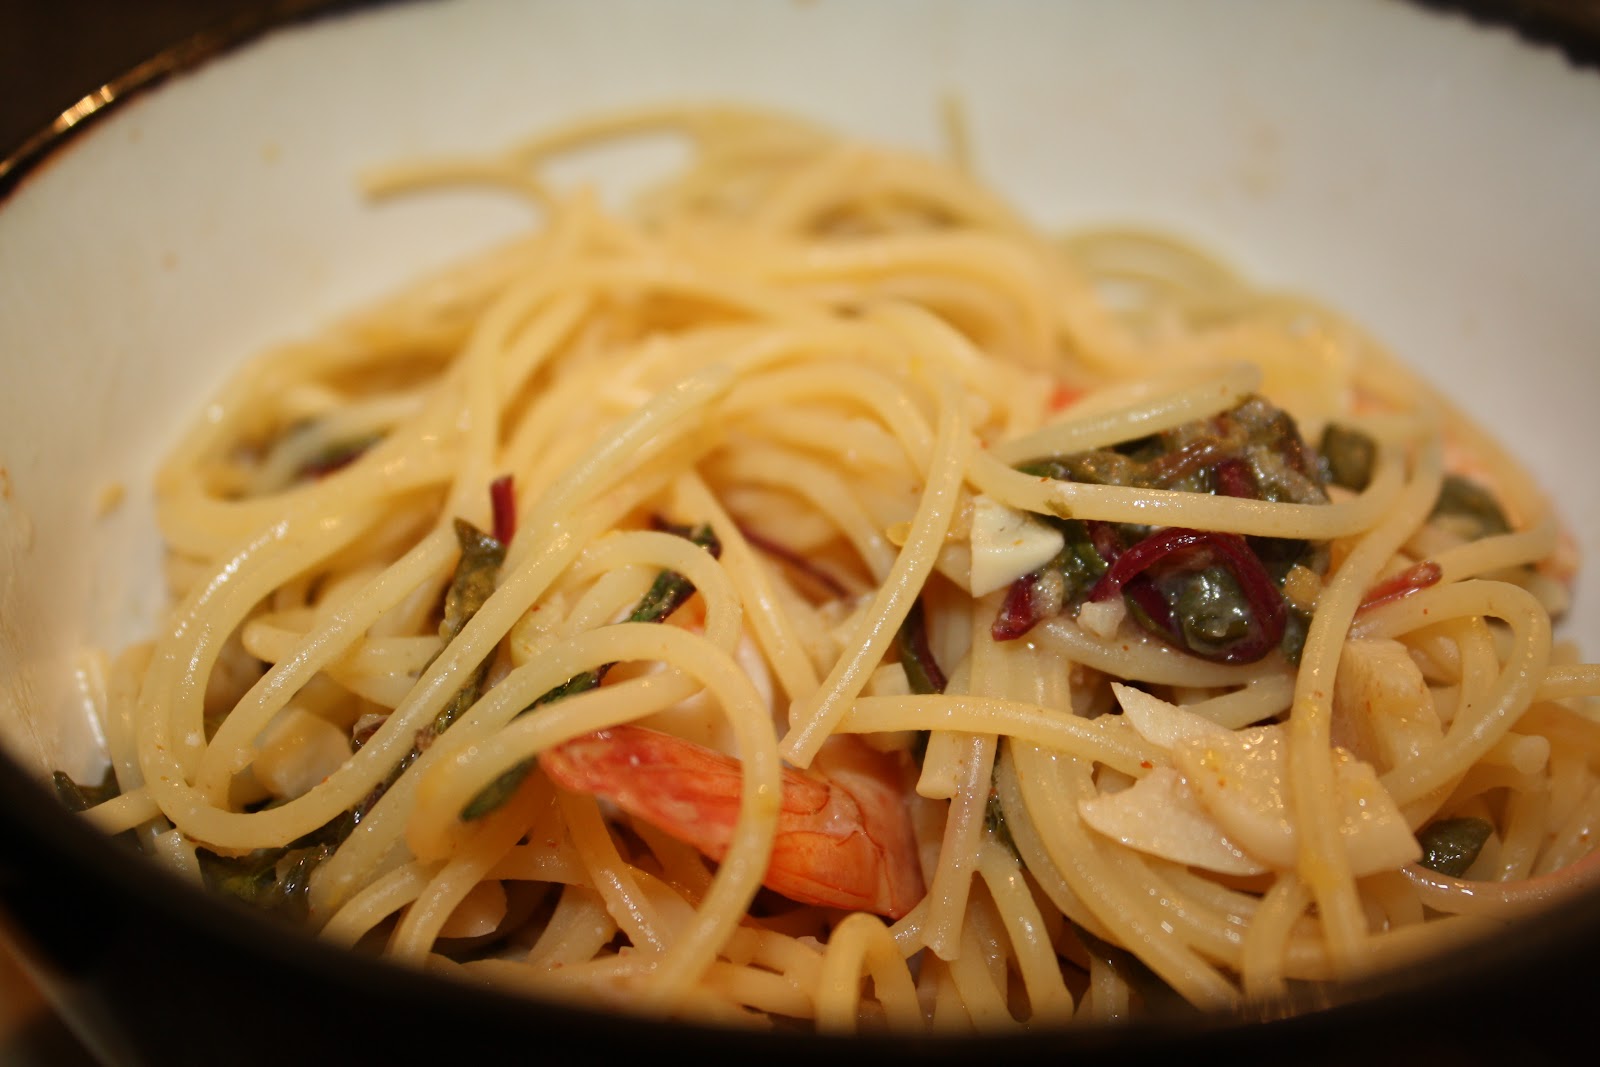
Speaking of bolognese, or ragu, as it is known to some, this is one of the recipes that I have come to love since moving to Firenze.  A good girlfriend gave me the recipe, and it's one of the few things that I've ever made that if it was in our house everyday, my husband wouldn't be able to resist it.  Ever.


You'll need:
  • 2 tbsp olive oil (I prefer extra virgin)
  • 6 rashers of streaky 'pancetta' bacon, chopped
  • 2 large onions, chopped
  • 3 garlic cloves, crushed
  • 2 carrots, chopped
  • Stick of celery, chopped 
  • 1kg/2¼lb lean minced beef (I usually use what is sold as "ragu meat" in Firenze.  Pork is just as tasty as meat if you prefer it.)
  • 2 large glasses of red wine (I prefer Chianti)
  • 2x400g cans chopped tomatoes (or 1 jar of passata- a type of tomato puree for those that don't like a chunky sauce)
  • 2 fresh or dried bay leaves
  • salt and freshly ground black pepper
  • 800g-1kg/1¾-2¼lb dried tagliatelle or a good artigianale pasta that will hold up to the ragu.
  • freshly grated parmesan cheese (optional for serving)
Instructions:

1. Heat the oil in a large, heavy-based saucepan and fry the bacon until golden over a medium heat.

2.  Add the onions, garlic, carrots, and celery, cook until softened, and the onions are clear.

3.  Increase the heat and add the minced beef. Fry it until it has browned. Make sure to "chop" at it with your spatula so that the meat gets nice and small (and the veggies too as they break down and cook).

4.  Pour in the wine and boil until it has reduced in volume by about a third. Reduce the temperature.  Stir in the tomatoes and bay leaves.

5. Cover with a lid and simmer over a gentle heat for 1-1½ hours until it's rich and thickened, stirring occasionally.

6.  Add salt and pepper to taste.

7.  Serve over tagliatelle, or stir in with a hearty pasta that sticks to the ribs on a cold day!

8.  Top with freshly grated parmesan cheese.

This is also one of those delicious sauces that tastes better with each passing day, so don't be afraid to make it ahead of time and use it later.  (Although, once you taste it, I guarantee that it won't last long!  I've caught Kyle eating it by the spoonful!)

Thursday, August 30, 2012

Lemon Garlic Shrimp and Tilapia


One of Laela's favorite foods to eat is shrimp.  With butter, plain, in Chinese food, in scampi, cooked in a crab boil, you name the way it comes (she'll even down them with some spicy cajun seasoning!), and she'll inhale them by the pound.

Since Kyle isn't the biggest shrimp fan in the world, and Laela asked to have shrimp for dinner, I compromised and made some lemon-garlic shrimp and tilapia with broccoli and brown rice.  It was a delicious meal that didn't take a ton of time, and was the perfect combo of being both filling but not heavy so that when we went to the park afterwards, we didn't feel like we were laden down from a huge meal.

Lemon-Garlic Shrimp and Tilapia with Brown Rice and Broccoli

You'll need:
  • 1/2 lb peeled and deveined shrimp (I usually buy frozen by the pound since it's generally cheaper)
  • 4 Tilapia filets, deboned and filleted
  • 4 Cloves garlic, diced
  • 2 Lemons
  • 2 Broccoli Heads, or broccoli florets
  • Brown rice of your choosing (enough to serve 4)
  • Onion Powder
  • Olive Oil
  • Salt and Pepper (to taste)
Instructions:
  • Heat a large skillet to medium heat.
  • Drizzle the skillet with olive oil (a teaspoon or two, enough to make sure the pan is covered so that the fish does not stick to the pan)
  • Slice one lemon into thin slices.
  • Lightly sprinkle the tilapia with onion powder, salt and pepper.
  • Do the same to the shrimp.
  • Place the tilapia and two garlic cloves in the hot pan.  Surround them with the lemon slices.  (Don't overcrowd the pan though.  A few slices will do.)

  • Squeeze lemon juice on top of the fish.  If the fillets are thin, they should take about 2 minutes per side.  With fish, when it is ready, it becomes more white rather than clear white, up the sides.  It also releases itself from the pan when it is ready to be flipped, or is done cooking.
  • Remove the tilapia from heat.  (Fish is flaky when it is done.  If you need a knife at all for tilapia, it's not done cooking.)
  • Place the shrimp and 1 garlic clove in the hot pan, making sure there is enough oil in the pan.
  • Squeeze some lemon on the shrimp and toss in a few lemon slices.
  • Shrimp cook quickly, so when they begin to curl, change color, and look more firm, take them out.
  • Serve with a side of lemon.
For the Broccoli:
  • Heat a medium skillet to medium heat.  Drizzle a small amount of olive oil into the pan.
  • After the pan has heated, add 1 diced garlic clove into the pan.
  • When you can smell the garlic cooking (after about a minute or so), add the broccoli to the pan.
  • Cook for 3-5 minutes.  Broccoli will be tender when ready.
  • Salt and pepper to taste.
  • **If you haven't got any olive oil left, or are trying to be extra healthy, use a few tablespoons of water to steam cook the garlic and broccoli.  Just put the heat to medium high heat with the water in the pan, add the broccoli and garlic.  Pop on the lid.  Lower the heat to medium heat.  Broccoli in 5 minutes!
  • **I squeezed fresh lemon over the entire meal to make it more cohesive, but if you want some components sans lemon, that's totally up to you.
Enjoy!


Tuesday, February 21, 2012

Asparagus!


I really feel like asparagus gets a bad wrap.  For whatever reason, some people just won't eat it- or even try it!  How can you know if you like something or not, if you don't even try it?  I'm sure that there were folks out there that thought pasta looked funny, but I think you'd be hard pressed to find someone who doesn't like pasta.

But I digress.  Asparagus is one of those things that can be cooked very simply, and taste anything but simple.  It can liven up any plate.  Besides it's being delicious, I love that Laela and I can make it together. I personally feel that any recipe that can be made mostly by a toddler, can easily be made by a grown-up.

Asparagus

You'll need:
  • 1 bunch of asparagus
  • Onion Powder
  • Garlic Powder
  • Olive oil
  • Salt and Pepper
Instructions:
  • Preheat your oven to 350-degrees F.
  • Place a piece of foil on a cookie sheet.
  • Drizzle a little bit of olive oil on the foiled cookie sheet.
  • Rinse and dry the asparagus.
  • Take the asparagus with both hands.  Snap the asparagus.  It will break where it is meant to naturally. because the stalk is the natural breaking point for the asparagus.  You'll be surprised to find that the asparagus will be mostly even. 
  • Place the asparagus on the cookie sheet, one quarter inch apart.
  • Drizzle with a little more olive oil.
  • Shake some onion powder, garlic powder, salt and pepper on the asparagus.  (This pretty fool-proof.  Laela loves to shake the spices on.  I watch to make sure she doesn't get too crazy with the salt and pepper, but our shakers aren't overly liberal, so it's not really too much of an issue.  This is the kind of recipe that no matter how much or how little of the onion and garlic you put on, it'll be amazing.)
  • Place the pan in the preheated oven for 10 minutes.  15 minutes if you like it with a little crisp to it.
Enjoy!

*Variations:
  • You can use fresh garlic instead if you'd like, just finely chop 2 cloves of garlic, and sprinkle it over the asparagus.
  • You can also use fresh onion.  Chop 1/2 onion, drizzle it in a little bit of olive oil, and sprinkle it over the asparagus.
  • Chopped red pepper added to the recipe is also delicious, and tastes great served over pasta, or with roasted chicken.

Monday, February 20, 2012

Broccoli Two Ways

I've never been one to fight about eating vegetables.  I prefer them over most foods  (I'm pretty sure Kyle is convinced I could live on broccoli and peas- plain).  I'm one of those annoying people that put peas, broccoli, garlic and onions in to pretty much everything.  I even love plain old steamed brussel sprouts with salt and pepper.
 
Needless to say, when I hear people say that they don't like vegetables, I just don't get it.  So, I've made it my mission to prove that vegetables are totally delicious.  Maybe you won't want them plain, but with a little garlic, and a lot of love, even the most boring vegetable can be fantastic!

Now let's talk broccoli.  I have seen those super creepy frozen packs of broccoli with the weird plastic-y cheese on it.  Put down the fake cheese!  Frozen broccoli is amazingly quick and simple to cook- you really don't need any mystery sauce or seasonings on it.  You can make it yourself in five minutes flat!

My family loves broccoli...but that wasn't always the case.  Kyle isn't a natural vegetable lover.  How did I convert him, might you ask? 

Broccoli with Garlic

You'll need:
  • 2 cups frozen broccoli (about a half bag or so)
  • 2 Tb chopped garlic (I prefer fresh, but chopped garlic jarred is totally fine too)
  • 1/2 tsp onion powder
  • Salt and pepper
  • Olive oil (optional)
Instructions:
Put a large saucepan on medium heat.  Fill the pan with about a half inch of water.  Wait one minute for the water to get hot.  Add the broccoli, onion powder, and garlic to the pan.  Carefully stir them together in the hot water.  Add a bit of salt and pepper.  If you'd like, once the water starts to cook down a bit, you can add a tiny bit of olive oil to the broccoli (less than a half teaspoon).  I really like the flavor that the olive oil brings to the broccoli, but I don't always use it.  The broccoli should be done after about five minutes of cooking.  Taste before serving to correct the seasoning.

Broccoli with Cheese

For the cheese obsessed, this is pretty awesome.

You'll need:
  • 2 cups broccoli
  • 1/4 cup Italian blend cheese (parmesan, mozzarella)
  • salt and pepper
Instructions:
Fill a large saucepan with about a half inch of water.  Cook the water at medium heat.  After a minute or so after the water has heated up, add all of the ingredients to the pan.  Cook for five minutes.  Taste before serving to correct the seasoning.  And of course, you can always add more cheese!


Tomorrow I'll be sharing the tastiest, absolute easiest way to make asparagus- ever. 

Friday, October 21, 2011

Butternut Squash Soup

Over the last few months, I've dared to get dangerous in the food store.  I let Laela use one of those little kid carts in the produce section at Whole Foods.  She gets to fill it with whatever she wants, and then we go home and try to figure out what to do with it.

Last week, Laela grabbed a butternut squash, something, I'm almost embarrassed to admit, I've never made.  I think it's delicious, but I usually ate it out or at friend's houses.  I tried looking up a few recipes, but I seemed to be missing an ingredient, or three, so I decided to just wing it.  The result?  A soup so deliciously simple and flavor packed, that it almost defies reason.

Butternut Squash Soup
You'll need:
  • 1 medium butternut squash
  • 2 cups chicken broth (I used homemade that had been cooked with lemon, sage, garlic, and rosemary)
  • 1 clove garlic
  • 1 good shake of onion powder
  • Salt and pepper
  • 1Tb butter
  • An immersion or regular blender.  (If you don't have an immersion blender, and have $20 to spare, go out and get one.  It will really make your cooking life easier- and less messy!!)
Instructions:
  • Put a large saucepan on medium heat.  Add the chicken broth, garlic, butter, onion powder, salt and pepper to the pot.
  • Peel off all of the skin of the squash.  The skin is a little difficult to peel, and the squash is an awkward size, so I used a knife to peel and cut off the ends.  Just be sure not to cut too deeply, or you'll take away the "meat" of the squash.
  • Cut the squash into cubes.
  • Steam your squash cubes using either a steamer, or a pot with a steamer insert.
  • When the squash falls apart on your fork, it's ready to be added to the pot of hot broth.
  • Cook for 5-10 minutes. 
  • Blend together.  Taste to adjust seasoning. 
  • Serve and enjoy!!
Laela LOVED this soup.  We toasted some whole wheat baguettes and dipped them in our yummy soup.

*This will store in the fridge for a week, the freezer for 3-6 months.
*Roasted red peppers are a fantastic garnish for this!

I know that it might sound crazy to let my child loose in the produce department, but I really think it's teaching her to be curious and open to healthy foods.  I have a little girl who cheers "Banana!  Banana!" in the checkout line, and that's something I'll take any day of the week over those kids flipping out over wanting candy.  Give it a go.  Let your kid have a food-venture with you!  You never know what you will come up with!

Monday, September 26, 2011

Crock Pot Turkey Meatballs

Ugh.  Our laptop exploded.  Therefore, until we get a new laptop, there will be no pictures on CaraCakes.

Anyway, I promised some seriously awesome recipes this week, so let's get to it.

Who doesn't love meatballs?  Okay, vegetarians.  Vegetarian friends, try this with veggie crumble or ground tofu.  And double your seasonings. 

Crock Pot Meatballs

You'll need:
  • 1lb ground turkey (I get the butcher to give me a mix of 85/95- otherwise it'll be too dry if you use all white turkey.)
  • 2 cups pasta sauce
  • 1/2 cup chicken/beef/veg stock
  • 2 bulbs garlic, crushed
  • 1 cup parmesan cheese
  • 1/2 cup romano
  • 1 cup breadcrumbs
  • 1 egg
  • Dash of salt and pepper
  • 1tsp onion powder
  • 1 tsp garlic powder
Instructions:
  • In a large bowl, combine your meat, egg, onion powder, garlic powder, salt and pepper, romano, parmesan, and breadcrumbs.  Squish all of the ingredients together with your hands.
  • Form the meat mixture into balls (try to make them the same size).  If it feels to dry, add a bit of water to make it easier to mold.
  • Turn the crock pot on low heat.
  • Pour the pasta sauce and broth into the crock pot.
  • Add the crushed garlic.  (you can add extra if you're a huge garlic lover.)
  • Add the meatballs.
  • This is a great meal to start in the morning, as it will be ready by dinner!
  • Serve with pasta, on a roll, or on their own!
*This is another easy to freeze dinner.  You can freeze them with or without sauce.
*Tip- If you like crispy meatballs (we really do!) bake them for about ten minutes on a greased baking sheet at 400-degrees before you put them in the crock pot.

Enjoy!!

Friday, September 2, 2011

Fast Food My Way!

I have blood sugar issues.  I think it may be from years of working too many jobs at weird hours.  There have been times where I forgot to eat and didn't realize it until I was at a red light and was absolutely convinced that my car was going in reverse.  Yeah, my car was definitely not moving.  It was my blood sugar going into a code red.

When Kyle and I started dating, okay literally, the day we went on our first date, I gave him fair warning that I eat every three hours.  If I don't, there are different degrees of of my grumpiness.  Since then, he's actively tried to avoid the hungry, red eyed version of Cara that I become when I go too long without so much as a peanut.

I think the worst part is that my cravings are so acute that I won't just settle for whatever is being offered to me to eat, unless I'm on the verge of passing out.  Then, I'll happily scarf down your stale bag of smoked almonds that you found in the bottom of your gym bag.  Yum.  Sweaty tasting salty almonds.  Delish.

So why is this chic informing us of her blood sugar issues, you might ask?  Well, I encountered them big-time the day while I was stocking up on "supplies" to get us through the weekend.

Colleen, who has not known me a super long time (I think we're going on a month or so now?), gave me the look at the grocery store that indicated that I was slurring and not making any sense.  I said "what?" to which she replied, maybe we should get you a candy bar?

I grumpily trudged through the rest of our shopping, got us home safely, and started searching the pantry for something to eat.  We were about to order food when I went from amber (about to lose my mind with hunger) to straight up code red.

I decided that the delivery man would take too damn long, so I whipped up mussels cooked in my super easy pasta sauce with a cup of white wine, a tablespoon or two of butter, and a clove of garlic, finely sliced.

Hungry?  Want fast food?  Doesn't get much faster than this baby.

Super Speedy Mussels for the Ridiculously Hungry:

You'll need:
  • 1 lb mussels
  • 1 garlic clove
  • Pasta sauce
  • 2 Tb butter
  • Pasta
  • 1 cup white wine (any that's on hand will do)
Instructions:
  • Put a pot of water, well salted, to boil.
  • Add pasta.
  • Cook to a little less than done.
  • Cover the bottom of a large pan with water.  Bring to a boil.
  • Add mussels to the pan.
  • Lower your heat to medium heat.
  • Add the garlic and white wine to the pan.
  • Put on the lid.
  • Check in 1-2 minutes.
  • The mussels should open after less than five minutes.
  • When the mussels are all open (if there are a few that don't open, just toss them), take the mussels out of the pan. 
  • Set aside.
  • Use all of the liquids used to cook the mussels to cook and add the butter and pasta sauce.
  • Stir all of the ingredients together.
  • Allow the sauce to reduce (get thicker) for a few minutes while stirring.
  • Add the pasta and mussels to the pan.  Let the pasta soak up all of that delicious sauce.
Enjoy!

This took less than ten minutes.  Seriously.  Think about how long a delivery guy takes to get to your house, or how long it would take you to run out and get something that would make you feel like you'd been hit by a truck.

Let's redefine fast food.  Eat well.  Feel well.  Try it!

Monday, August 29, 2011

Simply Superb Shrimp Scampi


Sometimes I find really amazing recipes at the strangest of places.  The other day, my friend Colleen and I went food shopping at Whole Foods (yes, she was brave and went shopping with Laela and I), and wound up talking to the samples woman.  She made shrimp scampi- which I generally can't stand, and made it light and lemony- not heavy, buttery and cloying like I often find shrimp scampi to be.  It was so good, I bought a pound of shrimp and all of the ingredients that she recommended.  We had it for dinner that night, and, in the words of Laela: "MMMMMM!  Yummy!  Delicious Mama!!"  Make this.  It's super simple and absolutely fantastic.


Shrimp Scampi
serves 4-6

You'll need:
  • 1 lb peeled and deveined shrimp (I used frozen peeled and deveined shrimp, they only take a minute or two extra to cook.)
  • Juice and zest of 2 lemons (preferably Meyer lemons)
  • 6 cloves garlic
  • 1/2 stick butter
  • 1/2 bag baby red and green chard, cleaned and rinsed (you can add more if you like.)
  • 1/2 cup white wine
  • Pinch cayenne pepper (I added a little more than a pinch because we like a little kick.)
  • Salt to taste
  • Chopped Italian parsley
Instructions:
  • Finely chop the garlic.
  • Melt the butter over medium low heat.  Saute the garlic gently until very fragrant.
  • Add the wine and lemon juice and raise the heat to medium high.
  • Reduce the wine mixture by half, and add a pinch of cayenne pepper.
  • Add the baby chard and cook briefly.
  • Add the shrimp and cook just until done, 3-4 minutes. (They'll turn from clear to pinkish-white)
  • Add the chopped parsley and lemon zest.
  • You can serve this as is, or add cooked pasta to the mix so that it can seep up all of the delicious sauce.
Enjoy!!

Friday, August 12, 2011

Bangers and Mash!


I absolutely love a really good dish of bangers and mash.  Usually, I'll have it for dinner, but when I found myself without eggs, I had to think of what would hold Kyle over until dinnertime.  This is a pretty heavy meal, so when you make this, be ready to eat!

Bangers and Mash
You'll need:
  • (3) Small Yukon Gold potatoes
  • (2) Bangers (I got them from the meat counter at Whole Foods)
  • 1 tsp butter
  • 1 cup beef stock
  • 1 tsp corn starch
  • Salt and pepper
  • Rosemary and thyme (about 1 sprig each)
  • 1/2 tsp garlic powder
  • 1/2 tsp onion powder
Instructions:

Mashed Potatoes:
  • Boil water in a medium saucepan.
  • Dice potatoes. 
  • Once water is boiling, add the potatoes.  Boil until fork tender.
  • When the potatoes are fork tender, add the butter.  Salt and pepper to taste.
  • Mash the potatoes (using a blender, mixer, or immersion blender.)
Bangers:
  • Set your skillet to medium heat.
  • Cook on each side for about four minutes per side.  (You want each side a nice, golden brown.)
  • When fully cooked, set aside. 
  • Save all drippings.
Gravy:
  • Using the skillet that you used for the sausage, raise the heat to medium-high heat.  Pour in the beef stock.
  • Chop and add the herbs.
  • Add the garlic and onion powder.
  • Add salt and pepper to taste.
  • Mix cornstarch and water (about a tsp.) in a cup, and whisk into the boiling herb broth.
  • Turn off the heat.
  • Whisk until the proper consistency. (If it gets too thick, add a bit of water to thin it out a bit.)
To Serve:
  • Scoop one serving of potatoes onto each plate.
  • Slice the sausage and place on top of each plate of potatoes.
  • Add gravy.
  • Serve!


This was also really delicious when I reheated my other half of it for lunch with some corn.  Yum!

Monday, I'll be sharing another deliciously easy way to make roasted chicken- and what to do with some of the leftovers!  Have a great weekend!

Tuesday, August 9, 2011

Meatloaf Burgers, Lentils, and Chunky Tomatoes and Bean Pasta Sauce

Life is a bit difficult right now. I've had to completely adjust our program in so many ways that I feel as if my head is spinning. Kyle is working double shifts to get acclimated to his new role. Laela is fine while we're out, but is very, very clingy when we're home. She cries every night for her Daddy. She hugs her dinosaur book and says "Daddy dinosaurs!!"


As for me, I'm just trying to keep things together. Kyle has always traveled a lot, but we always made up for it with lots of phone time, writing letters, and making sure to spend a lot of time together when he gets home. We've always tried to cram every moment of family time that we can, much in the same way that you want to sop up the gravy of a really good roast. You want to savor it, and make it last as long as possible.

Because we need this time, I've had to strive for a balance with things that I'd never really had to worry about before. I'm trying to make new friends for Laela and I, but I also have to make sure to keep the two hours a morning that Kyle's available this week, and possibly next week, free. I wasn't prepared for Laela to beg for Dada to get out of bed, but then for her to ignore him. I wasn't prepared for the tears when he left this morning. It's a lot.

Sad toddler aside- which is generally only at bedtime and morning time when Kyle leaves, things are going okay. I was really nervous about having to switch from dinner being the main sit down family meal.  Now it's all about breakfast/brunch before Kyle goes to work.

I've also had to readjust our meals in that I have to make dinner for the next day the night before. So all of the meals that I'm making from now on, with the exception of most breakfasts, are easy to freeze, and taste just as good microwaved. Just because Kyle's not eating dinner with Laela and I anymore, doesn't mean he shouldn't have a tasty, healthy, energizing meal. My focus right now is making sure that we all stay healthy.

Over the next few weeks, I will be sharing recipes that are easy to freeze, and will taste great reheated.
Here is a recipe for three things that can be frozen and reheated, and will please everyone in your house.


Meatball burgers
You'll need:
  • 1 lb ground chuck (I prefer grass fed when possible)
  • 1 egg
  • 1 cup breadcrumbs
  • 2 diced sprigs parsley (stems too)
  • Salt and Pepper
  • Good squirt of ketchup
  • 1/2 tsp onion powder
  • 1/2 tsp garlic powder
  • olive oil
Instructions:
  • Mix all of the ingredients together in a bowl.  If your mixture feels too wet, add a bit more breadcrumbs.
  • Form patties out of the mixture.
  • Heat a skillet to medium heat.  If you are using grass-fed beef, keep an eye on your skillet.  If it gets too hot, it will cook faster than regular beef. 
  • Drizzle some olive oil in the pan. 
  • Cook each burger for 3-6 minutes per side, depending on how well done you like them.  If you plan to freeze them, it doesn't hurt to cook them a little under what you normally prefer so that when you reheat them, they don't dry out.
  • To keep them from drying out when reheating, drizzle some water or broth on the burger when you reheat it.


Lentils
You'll need:
  • 1/2lb lentils
  • 1 chopped carrot
  • 1 chopped celery
  • 1/2 chopped onion
  • 2 chopped garlic cloves
  • Water
  • 1 bay leaf
  • Salt and Pepper
  • Olive oil
Instructions:
  • Heat a large sauce pan to medium heat.
  • Drizzle a bit of olive oil in the pan.
  • Add the garlic, carrot, onion  and celery.
  • Cook for five minutes.
  • Add the lentils, bay leaf, and pasta sauce.
  • Cover the lentils with about a 1/2 inch of water.
  • Bring to a boil.
  • Lower to medium low heat.
  • Cook for about 20 minutes.
  • Add salt and pepper as needed.
Chunky Tomato and Beans Pasta Sauce
You'll need:
  • 1 cup pasta sauce (I use homemade, but you can use jarred if you want.)
  • (1) 8oz can of diced tomatoes
  • (3) cloves garlic, chopped
  • (1) 8oz can cannellini beans
  • (1) oz can red kidney beans
  • Salt and Pepper
Instructions:
  • Heat a large saucepan to medium-low heat.
  • Mix all of the ingredients in the pan.
  • Cook for ten minutes.
This is one of those meals that each compontent is delicious alone, but is also great mixed together.  Yesterday, I defrosted some of the lentils and pasta sauce and cooked it with some whole grain pasta.

Put down the premade frozen meals, and give some of the meals I make over the next few weeks, and give them a try.  I promise, you won't be disappointed!

Wednesday, May 25, 2011

Wonton Ravioli with Garbanzo Spaghetti Sauce


If I had to write a love letter to a specific type of food, it would probably be pasta.  It's the one thing that I could eat almost everyday, and never get sick of it.  So when I looked at the label on my wonton wrappers, and saw that I could make them into ravioli, I decided to give it a go.

Wonton Ravioli:
 Ingredients:
  • 1 1/2 cups part skim/part whole milk ricotta cheese
  • 1/2 cup parmesan cheese
  • 8-9 large basil leaves- chopped
  • salt and pepper
  • 1 egg
  • 40-50 wonton wrappers
  • 1 cup water
Instructions:
  • In a large bowl, combine the ricotta cheese, parmesan cheese, basil leaves, salt, pepper, and egg. 
  • Mix well.
  • On a clean surface, line up all of your wonton wrappers.
  • Using a spoon, or melon baller, scoop the mixture onto half of the wontons.
  • Dip your finger in the water.  Run your wet finger along the edges of the wonton wrapper. 
  • Top the scooped wonton wrapper with a plain wonton that has also been lined in water.
  • Pinch the wontons together so that they won't open when you boil them.
  • Boil them in salted water.
  • When they float to the top, they're done.
  • This is what they'll look like:

Garbanzo Spaghetti Sauce:
Ingredients:
  • 1 can garbanzo beans, drained and rinsed.
  • 5-6 large basil leaves, chopped
  • 1tsp crushed garlic
  • 1tsp olive oil
  • 4 oz frozen spinach, defrosted and drained
Instructions:
  • In a medium pan, on medium heat, combine the spinach, garbanzo beans, garlic, and oil.
  • Cook for five minutes, stirring occasionally.
  • Add the pasta sauce and basil.
  • Cook until it becomes one cohesive, well mixed sauce.
Top your pasta and enjoy!

Wednesday, May 18, 2011

Some Deadly Red Snapper

Whenever I go out to eat, the first thing I do is ask the waiter or waitress what their favorite thing to eat is. It's pretty much foolproof that every time I do this, I discover something incredibly delicious- and sometimes not on the menu.

One of those delicious discoveries is the whole red snapper at Tamarindos.  It's freaking incredible.  You don't need an appetizer, you don't need any side dishes.  It is a decadent, flavorful, perfectly seasoned, ridiculously filling meal that will leave you in a blissful food coma afterwards.

The problem with this meal is that I crave it more often than Kyle wants to go there.  So I did what I always do, I made it for dinner.

Red Snapper:
You'll need:
  • 1 whole, gutted fish (bones in, fins, guts and scales removed)
  • 2 limes
  • 3 Tb chopped garlic
  • 4 sprigs cilantro
  • 1 sprig rosmary (chopped)
  • 3 sprigs Italian parsley
  • 1 sprig thyme
  • 1 small onion, finely diced
  • salt and pepper
  • olive oil
Instrucions:
  • Preheat your oven to 350 degrees.
  • In a medium sized bowl, squeeze the juice from one lime into the bowl. 
  • Zest the lime.  Add the zest to the juice.
  • Sprinkle 2 tsp of olive oil into the bowl.
  • Dice the onion very finely (it will look like chopped garlic) and add it to the mixture in the bowl.
  • Add the chopped garlic to the bowl.
  • Add a dash of salt and pepper to the mixture.
  • Add all of the herbs to the mixture.
  • Stir all of the ingredients together.
  • Lightly oil a baking sheet. 
  • Slice the other lime.  Insert half of the lime slices in the fish.
  • Rub the mixture on both sides of the fish.
  • Cook for 30-35 minutes.
  • Serve with a slice of lime and your choice of spanish rice.
  • Enjoy!
I ate the front half (in my opinion the head is the tastiest part):


Kyle ate the other half:


The truth about this recipe is that while it was completely delicious, and tasted almost exactly the same as Tamarindos, I don't think I'll make it again.  For whatever reason, I don't get a ton of bones when I pull the fish off of the bone at Tamarindos, but at home, it became frustrating.  So yes, the flavors were there, I made it correctly, but obviously they know something that I don't.  Plus, the price of buying the fish was the same as getting it with some free margaritas at Tamarindos.  I think if I did choose to do this again, I'd make boneless filets instead.  I know that the bones add to the flavor, but having to give Laela a separate dinner because I was concerned she'd choke or something just wasn't worth it.

The moral of the story?  Just because you can make something that you love at a restaurant, does not always mean you should- and sometimes you don't know that until you give it a go yourself.

However, if you don't live near Tamarindos, or somewhere that makes whole red snapper rubbed in garlic and herbs, give this a try!  It really is delicious...just watch out for those nastly little bones...or better yet, make some boneless filets.

Thursday, March 3, 2011

Pop in for Some Peppers Soup!


A while back, I had mentioned that I was going to start trying to work with what is already in my fridge, rather than run to the store every time I wanted to make dinner.  Part of the reason for this is to see what I can do at the end of the grocery week, and part of it is because I feel like sometimes trying new things with what's in the fridge can break me out of a food rut.

I've been in the mood for some hearty, soothing soups lately, so I decided to bust out some frozen mixed peppers that I had in the freezer and make a delicious pepper soup garnished with roasted potatoes.


Roasted Red, Green and Yellow Pepper Soup

Ingredients:
- Approx. 1 cup frozen mixed peppers (or one heaping handful)
- 2Tb Garlic (chopped)
- 1 small sweet onion, chopped.
- 3Tb butter
- 3Tb flour
- 2 cups chicken, vegetable, or beef stock (or 2 cups water with appropriate amount of boullion)
- 2 carrots, chopped.
- 2 celery stalks, chopped.
- 1 cup tomato sauce (you can use my super easy pasta sauce recipe if you want home made)
- Salt and Pepper to taste
- Dash of Nutmeg
- Dash of Cinnamon
- Olive Oil

Instructions:
  • In a medium saucepan, boil stock.
  • While the stock is boiling, put a large saucepan on high heat.  Whisk butter and flour until it forms a paste.
  • Whisk in the stock, the pasta sauce, and add 1Tb garlic, the salt and pepper, nutmeg, and cinnamon.
  • Lower the heat to medium heat.
  • Heat a large skillet to medium high heat.
  • Pour a few glugs of olive oil into the hot skillet.
  • For 5- 8 minutes, fry up the carrots and celery until fork tender.
  • When fully cooked, put the carrots and celery into the food processor or blender.  (KEEP THE SKILLET HOT!)
  • Add the peppers, onions, and garlic to the hot skillet. 
  • Once the peppers, onions and garlic start to smell really aromatic and great, and look like they're losing liquid (sweating), pour the mixture into a blender or food processor and puree with the carrots and celery.
  • Whisk the puree into the cooking soup. 
  • Lower the heat to medium low heat.
  • Cook for at least twenty minutes.  This is one of those recipes that will taste great straightaway, but will also taste amazing the longer it cooks, or the next day as leftovers.
For the Garnish:
Ingredients:
- 3 or 4 medium Yukon Gold potatoes
- 2 Sprigs Rosemary
- 2 Sprigs Thyme
- Salt and Pepper to taste
- Onion Powder
- Garlic Powder
- Olive Oil

Instructions:
  • Preheat your oven to 350- degrees.
  • Wash and chop your potatoes.
  • Put your potatoes in a 3 inch deep baking dish.
  • Add all of the seasonings, and a drizzle of oil.
  • Mix together with your hands or tongs.
  • Bake for 20 minutes
  • Top your soup with it and enjoy!

*This soup freezes well for 6 months in a regular freezer and 1 year for a deep freeze.  I put it in individual sized containers so that it defrosts quickly and is easy for Kyle to bring for lunch.

My family realy enjoyed this soup!  And to top it off, when Kyle and I talked about it, it cost less than $5 to make!  (and there was enough for him to bring to work for lunch and for me to feed the baby for 4 days!)  Maybe it's crazy to try to make everything in the fridge before I grocery shop next (besides for milk and eggs), but it is kind of fun to see that it is possible to make really good food with what we have, and to know that we're not wasting anything.  Isn't there enough waste in the world?  And enough people that don't have enough, that we should try to use what we've got before accumulating more?  Just a thought.

For the weekend, I'll be sharing a deliciously bad for you fried dinner that I made Kyle when he was a bit hungover.  Next stop...fried green beans and homemade chicken nuggets.

Monday, February 7, 2011

Lentil Soup with a Dash of Love

Whenever I hear someone mention lentil soup, I think of two things- the worst soup I've ever had, and the best soup I've ever had.  One of the first times I had it, I swear it was cooked in water with salt and pepper.  It had NO love in it whatsoever.  The first time I remember really remember LOVING it was this older Greek woman's soup that was garnished with red peppers and had a faint taste of red vinegar.  I've tried my damnedest to make her recipe, and I've just never been able to figure out what she did to make it so amazing.

This go around, I asked my good friend, Dawn, to give me some tips on how she makes her soup so yummy.  Her family makes "lucky lentil soup" that is made for the first day of the New Year, and if I'm guessing correctly, whomever receives the bay leaf is to have good luck that year.  (I grew up with that same tradition, except the bay leaves were in spaghetti sauce..but that's a post for another day.)

Anyway, Dawn recommended some pureed celery and carrots (Can you say yum?  And sneaking in veggies!  I'm in!)  She also recommended sun-dried tomatoes, which sounds super awesome, but I didn't have any on hand, so I just had to improvise with a fresh tomato.


Here's my twist on lentil soup..

Ingredients:
  • (1/2 lb) Dried lentils
  •  (3) Carrots
  • (1) Celery stalk
  • (1) Medium Tomato
  • (2) Boullion cubes (I used vegetable, but I'm sure chicken or beef would be good too)
  • (4) Cups water
  • (2) Tb Crushed garlic
  • (1) Tb Onion powder
  • (1) Bay leaf
  • Salt and Pepper to taste

Directions:
  • Measure four cups of water and pour it into a medium soup pot.
  • Chop the celery and carrots.  (I used the celery leaves as well.) 
  • Add the celery and carrots to the boiling water.
  • Boil for ten minutes.
  • While the veggies are boiling, slice up the tomato.
  • Sprinkle some olive oil in a medium-high skillet.  Salt and pepper both sides of the tomato and place each slice in the skillet.  Lower the heat to medium heat.  Cook for two or three minutes per side.
  • DO NOT DISCARD THE VEGETABLE WATER.
  • Use a slotted spoon to take out the vegetables.
  • Put the carrots, tomato and celery in a food processor or blender and puree.
  • Rinse the lentils.
  • Pour the rinsed lentils into the vegetable water.
  • Add the pureed vegetables.
  • Add the crushed garlic and onion powder (if you want to use fresh onions, just sautee them and puree them.  I used onion powder because I didn't have onions on hand.)
  • Add the boullion cubes.
  • Bring to a boil.  Once you have brought the soup to a boil, lower it to a simmer and place a lid on the pot.
  • Cook for 20 minutes.  (This is one of those dishes that tastes better the longer you cook it.  I let mine simmer on low heat after the twenty minutes were up for an extra hour, for a total time of 80 minutes.  The rule of thumb with sauces and soups (and food in general, really) is that if you put a little love in it, it'll taste like it.  So if you have the time, definitely take it.  If not, it'll still be a pretty darn delicious soup!
Oh, and as you can see from this picture, Laela really loved this soup!!


I know that it seems like there are a lot of steps in this dish, and it may not be the simplest recipe I've posted...but it really isn't too difficult, and it's definately worth the effort!

*This soup will freeze for 6 months in a normal home freezer, and 1 year in a deep freeze.